

Word/Excel online preview in .NET programming

前言
近日项目中做到一个功能,需要上传附件后能够在线预览。之前也没做过这类似的,于是乎就查找了相关资料,.net实现Office文件预览大概有这几种方式:
使用Microsoft的Office组件将文件直接转换为html文件(优点:代码实现最简单,工作强度最小。缺点:效果极差)
使用Microsoft的Office组件将文件转换为PDF格式文件,然后再使用pdf2swf转换为swf文件,也就是flash文件在使用FlexPaper展示出来(优点:预览效果能接受,缺点:代码量大)
使用Office online(优点:表现完美,缺点:不适合中小企业应用)
由于开发时间短而且还有其他功能点需要完成,所以暂时先已第一种方式实现了,这里也主要讲第一种方式,效果如下图:

具体实现
这里简单提一下效果图中的遮罩效果和上传实现,有喜欢的朋友也可以参考参考。
遮罩效果就是HTML+CSS+JS来实现的,全部代码如下:
<!DOCTYPE html PUBLIC "-//W3C//DTD XHTML 1.0 Transitional//EN"
"http://www.w3.org/TR/xhtml1/DTD/xhtml1-transitional.dtd">
<html xmlns="http://www.w3.org/1999/xhtml">
<head>
<title>弹出层</title>
<script src="jquery-1.6.2.min.js" type="text/javascript"></script>
<style>
.black_overlay{
display: none;
position: absolute;
top: 0%;
left: 0%;
width: 100%;
height: 100%;
background-color: black;
z-index:1001;
-moz-opacity: 0.8;
opacity:.80;
filter: alpha(opacity=80);
}
.white_content {
display: none;
position: absolute;
top: 10%;
left: 10%;
width: 80%;
height: 80%;
border: 16px solid lightblue;
background-color: white;
z-index:1002;
overflow: auto;
}
.white_content_small {
display: none;
position: absolute;
top: 20%;
left: 30%;
width: 40%;
height: 50%;
border: 16px solid lightblue;
background-color: white;
z-index:1002;
overflow: auto;
}
</style>
<script type="text/javascript">
//弹出隐藏层
function ShowDiv(show_div,bg_div){
document.getElementById(show_div).style.display='block';
document.getElementById(bg_div).style.display='block' ;
var bgdiv = document.getElementById(bg_div);
bgdiv.style.width = document.body.scrollWidth;
// bgdiv.style.height = $(document).height();
$("#"+bg_div).height($(document).height());
};
//关闭弹出层
function CloseDiv(show_div,bg_div)
{
document.getElementById(show_div).style.display='none';
document.getElementById(bg_div).style.display='none';
};
</script>
</head>
<body>
<input id="Button1" type="button" value="点击弹出层" onclick="ShowDiv('MyDiv','fade')" />
<!--弹出层时背景层DIV-->
<div id="fade" class="black_overlay">
</div>
<div id="MyDiv" class="white_content">
<div style="text-align: right; cursor: default; height: 40px;">
<span style="font-size: 16px;" onclick="CloseDiv('MyDiv','fade')">关闭</span>
</div>
目前来说,我还是喜欢这个自己改造的弹出层。自己在项目中也用的是这个。
</div>
</body>
</html>上传的话,因为文件比较小,所以采用的是保存在服务器,在数据库中存放路径的方式
前台代码
<div class="white_content" id="MyDiv" style="text-align: center; display: none;">
<div style="text-align: right; cursor: default; height: 40px;">
<span style="font-size: 16px;" onclick="CloseDiv('MyDiv','fade')">关闭</span>
</div>
<tr style="width: 50%" id="upload_Image">
<h1>
请上传常见问题附件</h1>
<td align="right" class="Title">
上传附件
</td>
<td>
<asp:FileUpload ID="FileUpload1" runat="server" />
<asp:Label ID="label1" runat="server" ForeColor="Red"></asp:Label>
<asp:Button ID="UploadButton" runat="server" Text="上传附件" OnClick="UploadButton_Click" />
</td>
</tr>
<tr>
<td colspan="2" align="center" id="show_image" style="visibility: hidden">
<asp:Image ID="Image1" runat="server" Height="118px" Width="131px" />
</td>
</tr>
</div>后台方法
try
 {
                string FullName = FileUpload1.PostedFile.FileName;//获取附件物理地址
                FileInfo fi = new FileInfo(FullName);
                string name = fi.Name;//获取附件名称
                string type = fi.Extension;//获取附件类型
                if (type == ".xls" || type == ".xlsx" || type == ".doc" || type == ".docx" || type == ".pdf")
                {
                    string SavePath = Server.MapPath("~\\uploadFile");//附件保存到文件夹下
                    if (!Directory.Exists(SavePath))
                    {
                        Directory.CreateDirectory(SavePath);
                    }
                    this.FileUpload1.PostedFile.SaveAs(SavePath + "\\" + name);//保存路径
                    #region 将附件内容保存到数据库中
                    int showsuccess = CMSModelManager.Submitted_questionsDAO.Save_File(name,type,SavePath);
                    if (showsuccess == 1)
                    {
                        this.label1.Text = "上传成功";
                    }
                    else
                    {
                        this.label1.Text = "服务器繁忙,请稍后重试";
                    }
                    #endregion
                }
                else
                {
                    this.label1.Text = "请选择正确的格式附件";
                }
            }
            catch (Exception ex)
            {
                Response.Write(ex.Message);
}图中所示的将Word转换成HTML的实现方式:
首先新建一个帮助类
using System;
using System.Collections.Generic;
using System.Web;
//using Microsoft.Office.Core;
using Word = Microsoft.Office.Interop.Word;
namespace Com.VanruPortal.Admin
{
    public class Office2HtmlHelper
    {
        /// <summary>
        /// Word转成Html
        /// </summary>
        /// <param name="path">要转换的文档的路径</param>
        /// <param name="savePath">转换成html的保存路径</param>
        /// <param name="wordFileName">转换成html的文件名字</param>
        public static void Word2Html(string path, string savePath, string wordFileName)
        {
            Word.ApplicationClass word = new Word.ApplicationClass();
            Type wordType = word.GetType();
            Word.Documents docs = word.Documents;
            Type docsType = docs.GetType();
            Word.Document doc = (Word.Document)docsType.InvokeMember("Open",
            System.Reflection.BindingFlags.InvokeMethod, null, docs, new Object[] { (object)path, true, true });
            Type docType = doc.GetType();
            string strSaveFileName = savePath + wordFileName + ".html";
            object saveFileName = (object)strSaveFileName;
            docType.InvokeMember("SaveAs", System.Reflection.BindingFlags.InvokeMethod, null, doc, new object[] { saveFileName,
            Word.WdSaveFormat.wdFormatFilteredHTML });
            docType.InvokeMember("Close", System.Reflection.BindingFlags.InvokeMethod, null, doc, null);
            wordType.InvokeMember("Quit", System.Reflection.BindingFlags.InvokeMethod, null, word, null);
        }
        /// <summary>
        /// Excel转成Html
        /// </summary>
        /// <param name="path">要转换的文档的路径</param>
        /// <param name="savePath">转换成html的保存路径</param>
        /// <param name="wordFileName">转换成html的文件名字</param>
        public static void Excel2Html(string path, string savePath, string wordFileName)
        {
            string str = string.Empty;
            Microsoft.Office.Interop.Excel.Application repExcel = new Microsoft.Office.Interop.Excel.Application();
            Microsoft.Office.Interop.Excel.Workbook workbook = null;
            Microsoft.Office.Interop.Excel.Worksheet worksheet = null;
            workbook = repExcel.Application.Workbooks.Open(path, Type.Missing, Type.Missing, Type.Missing, Type.Missing, Type.Missing,
            Type.Missing, Type.Missing, Type.Missing, Type.Missing, Type.Missing, Type.Missing, Type.Missing, Type.Missing, Type.Missing);
            worksheet = (Microsoft.Office.Interop.Excel.Worksheet)workbook.Worksheets[1];
            object htmlFile = savePath + wordFileName + ".html";
            object ofmt = Microsoft.Office.Interop.Excel.XlFileFormat.xlHtml;
            workbook.SaveAs(htmlFile, ofmt, Type.Missing, Type.Missing, Type.Missing, Type.Missing,
            Microsoft.Office.Interop.Excel.XlSaveAsAccessMode.xlNoChange, Type.Missing, Type.Missing,
            Type.Missing, Type.Missing, Type.Missing);
            object osave = false;
            workbook.Close(osave, Type.Missing, Type.Missing);
            repExcel.Quit();
        }
    }
}后台调用方法
上传成功后将文件转换
string physicalPath = Server.MapPath(Server.UrlDecode("/uploadFile"+"\\"+ name));//读取相对路径
string extension = Path.GetExtension(physicalPath);//获取后缀名
string[] show_name = name.Split(new string[] { "." }, StringSplitOptions.RemoveEmptyEntries);
//此处的name是上面上传附件中的名称分割
string show_name_View = show_name[0];//拿到实际name
switch (extension)
{
case ".doc":
case ".docx":
Office2HtmlHelper.Word2Html(MapPath("/uploadFile" + "\\" + name + ""),
MapPath("/Html/"), "" + show_name_View + "");
//调用帮助类中生成WordHtml的方法,并保存起来
Response.Write("<script>window.open('/Html/" + show_name_View + ".html','_blank')</script>");
//跳转并打开保存的相对路径中hmtl文件
break;
case ".xls":
case ".xlsx":
Office2HtmlHelper.Excel2Html(MapPath("/uploadFile" + "\\" + name + ""),
MapPath("/Html/"), "" + show_name_View + "");
Response.Write("<script>window.open('/Html/" + show_name_View + ".html','_blank')</script>");
break;
default:
break;
}至此,一个简易的上传附件在线浏览已经全部实现
以上就是.NET编程中Word/Excel 在线预览的内容,更多相关内容请关注PHP中文网(www.php.cn)!

Hot AI Tools

Undresser.AI Undress
AI-powered app for creating realistic nude photos

AI Clothes Remover
Online AI tool for removing clothes from photos.

Undress AI Tool
Undress images for free

Clothoff.io
AI clothes remover

Video Face Swap
Swap faces in any video effortlessly with our completely free AI face swap tool!

Hot Article
Hot Tools

Notepad++7.3.1
Easy-to-use and free code editor

SublimeText3 Chinese version
Chinese version, very easy to use

Zend Studio 13.0.1
Powerful PHP integrated development environment

Dreamweaver CS6
Visual web development tools

SublimeText3 Mac version
God-level code editing software (SublimeText3)
Hot Topics
 1657
1657
 14
1415
52
1309
25
1257
29
1231
24
14
1415
52
1309
25
1257
29
1231
24

 What should I do if the frame line disappears when printing in Excel?
Mar 21, 2024 am 09:50 AM
What should I do if the frame line disappears when printing in Excel?
Mar 21, 2024 am 09:50 AM
If when opening a file that needs to be printed, we will find that the table frame line has disappeared for some reason in the print preview. When encountering such a situation, we must deal with it in time. If this also appears in your print file If you have questions like this, then join the editor to learn the following course: What should I do if the frame line disappears when printing a table in Excel? 1. Open a file that needs to be printed, as shown in the figure below. 2. Select all required content areas, as shown in the figure below. 3. Right-click the mouse and select the "Format Cells" option, as shown in the figure below. 4. Click the “Border” option at the top of the window, as shown in the figure below. 5. Select the thin solid line pattern in the line style on the left, as shown in the figure below. 6. Select "Outer Border"
 How to filter more than 3 keywords at the same time in excel
Mar 21, 2024 pm 03:16 PM
How to filter more than 3 keywords at the same time in excel
Mar 21, 2024 pm 03:16 PM
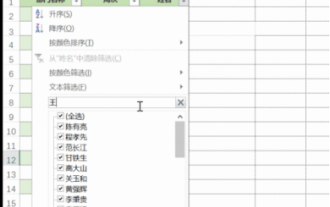
Excel is often used to process data in daily office work, and it is often necessary to use the "filter" function. When we choose to perform "filtering" in Excel, we can only filter up to two conditions for the same column. So, do you know how to filter more than 3 keywords at the same time in Excel? Next, let me demonstrate it to you. The first method is to gradually add the conditions to the filter. If you want to filter out three qualifying details at the same time, you first need to filter out one of them step by step. At the beginning, you can first filter out employees with the surname "Wang" based on the conditions. Then click [OK], and then check [Add current selection to filter] in the filter results. The steps are as follows. Similarly, perform filtering separately again
 How to change excel table compatibility mode to normal mode
Mar 20, 2024 pm 08:01 PM
How to change excel table compatibility mode to normal mode
Mar 20, 2024 pm 08:01 PM
In our daily work and study, we copy Excel files from others, open them to add content or re-edit them, and then save them. Sometimes a compatibility check dialog box will appear, which is very troublesome. I don’t know Excel software. , can it be changed to normal mode? So below, the editor will bring you detailed steps to solve this problem, let us learn together. Finally, be sure to remember to save it. 1. Open a worksheet and display an additional compatibility mode in the name of the worksheet, as shown in the figure. 2. In this worksheet, after modifying the content and saving it, the dialog box of the compatibility checker always pops up. It is very troublesome to see this page, as shown in the figure. 3. Click the Office button, click Save As, and then
 How to set superscript in excel
Mar 20, 2024 pm 04:30 PM
How to set superscript in excel
Mar 20, 2024 pm 04:30 PM
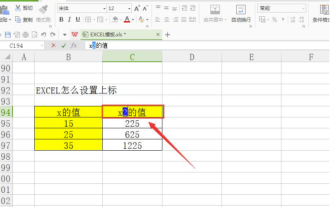
When processing data, sometimes we encounter data that contains various symbols such as multiples, temperatures, etc. Do you know how to set superscripts in Excel? When we use Excel to process data, if we do not set superscripts, it will make it more troublesome to enter a lot of our data. Today, the editor will bring you the specific setting method of excel superscript. 1. First, let us open the Microsoft Office Excel document on the desktop and select the text that needs to be modified into superscript, as shown in the figure. 2. Then, right-click and select the "Format Cells" option in the menu that appears after clicking, as shown in the figure. 3. Next, in the “Format Cells” dialog box that pops up automatically
 How to use the iif function in excel
Mar 20, 2024 pm 06:10 PM
How to use the iif function in excel
Mar 20, 2024 pm 06:10 PM
Most users use Excel to process table data. In fact, Excel also has a VBA program. Apart from experts, not many users have used this function. The iif function is often used when writing in VBA. It is actually the same as if The functions of the functions are similar. Let me introduce to you the usage of the iif function. There are iif functions in SQL statements and VBA code in Excel. The iif function is similar to the IF function in the excel worksheet. It performs true and false value judgment and returns different results based on the logically calculated true and false values. IF function usage is (condition, yes, no). IF statement and IIF function in VBA. The former IF statement is a control statement that can execute different statements according to conditions. The latter
 Where to set excel reading mode
Mar 21, 2024 am 08:40 AM
Where to set excel reading mode
Mar 21, 2024 am 08:40 AM
In the study of software, we are accustomed to using excel, not only because it is convenient, but also because it can meet a variety of formats needed in actual work, and excel is very flexible to use, and there is a mode that is convenient for reading. Today I brought For everyone: where to set the excel reading mode. 1. Turn on the computer, then open the Excel application and find the target data. 2. There are two ways to set the reading mode in Excel. The first one: In Excel, there are a large number of convenient processing methods distributed in the Excel layout. In the lower right corner of Excel, there is a shortcut to set the reading mode. Find the pattern of the cross mark and click it to enter the reading mode. There is a small three-dimensional mark on the right side of the cross mark.
 How to insert excel icons into PPT slides
Mar 26, 2024 pm 05:40 PM
How to insert excel icons into PPT slides
Mar 26, 2024 pm 05:40 PM
1. Open the PPT and turn the page to the page where you need to insert the excel icon. Click the Insert tab. 2. Click [Object]. 3. The following dialog box will pop up. 4. Click [Create from file] and click [Browse]. 5. Select the excel table to be inserted. 6. Click OK and the following page will pop up. 7. Check [Show as icon]. 8. Click OK.
 Do you know how to open the root number in Excel?
Mar 20, 2024 pm 07:11 PM
Do you know how to open the root number in Excel?
Mar 20, 2024 pm 07:11 PM
Hello, everyone, today I am here to share a tutorial with you again. Do you know how to open the root number in an Excel spreadsheet? Sometimes, we often use the root sign when using Excel tables. For veterans, opening a root account is a piece of cake, but for a novice student, opening a root account in Excel is difficult. Today, we will talk in detail about how to open the root number in Excel. This class is very valuable, students, please listen carefully. The steps are as follows: 1. First, we open the Excel table on the computer; then, we create a new workbook. 2. Next, enter the following content in our blank worksheet. (As shown in the picture) 3. Next, we click [Insert Function] on the [Toolbar]
