Preface
I believe everyone knows that smart prompts for code in IDEs are almost standard. Although some text editors also have some simple prompts, these are provided through code snippets. Functionally it is far from comparable to IDE. However, Visual Studio Code, a recently emerging text editor, can implement smart prompts for JavaScript through Typings, which is rare for a text editor. Therefore, Visual Studio Code is particularly suitable for writing JavaScript (Node.js) programs; at the same time, if we need to write some experimental small code snippets, such as: Lodash.js small demo of a certain function, because we don’t want to study a function To use the IDE to create a new project, Visual Studio Code is a very good choice at this time, and it can also run and debug JavaScript code (depends on Node.js), and also includes a very convenient code prompt function.
From this point of view, I think Visual Studio Code can be regarded as a powerful small IDE.
Install Typings through NPM
We can easily install Typings through NPM, enter in the command line:
npm install -g typings
After the installation is completed, in Enter in the command line:
typings --version
When you see the version information, it means that the typings tool installation is complete:

NPM is the same as Node. js is installed together. If you want to use NPM, then you should install Node.js first.
Install related prompt information files
After the installation is completed, we need to install the corresponding type information files that require prompt function libraries or frameworks. Here we create a new folder NodeSnippet and enter it using the command line Go to this directory and enter the following two commands to install the type interface information files of Node and Lodash:
typings install dt~node --global --save
typings install lodash --save
When do you need to use --global parameter:
If the installed package is referenced using script tags (such as jQuery) (that is, used in the browser)
This package is part of the environment (such as node)
This package is not used --global When the installation fails
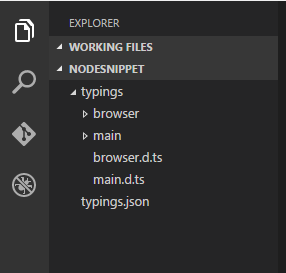
At this time we can see that there are some more files in our NodeSnippet directory:

These files are for We provide type type files (defined using TypeScript) for prompt information. To check whether Typings supports smart prompts for a certain library or framework, we can use the following command:
typings search exampleName
Enable smart prompts
Start prompts in two ways Function:
The first is to add the directory where the prompt information file is located in the top line of the file that needs to be prompted. The format is as follows:
/// <reference path="./typings/index.d.ts" />
The second is to add the directory where the prompt information file is located in the top line of the file that needs to be prompted. Add an empty file named jsconfig.json to the directory where the project is located (in this case, the NodeSnippet folder).
For more content of the jsconfig.json file, please refer to: https://code.visualstudio.com/docs/languages/javascript
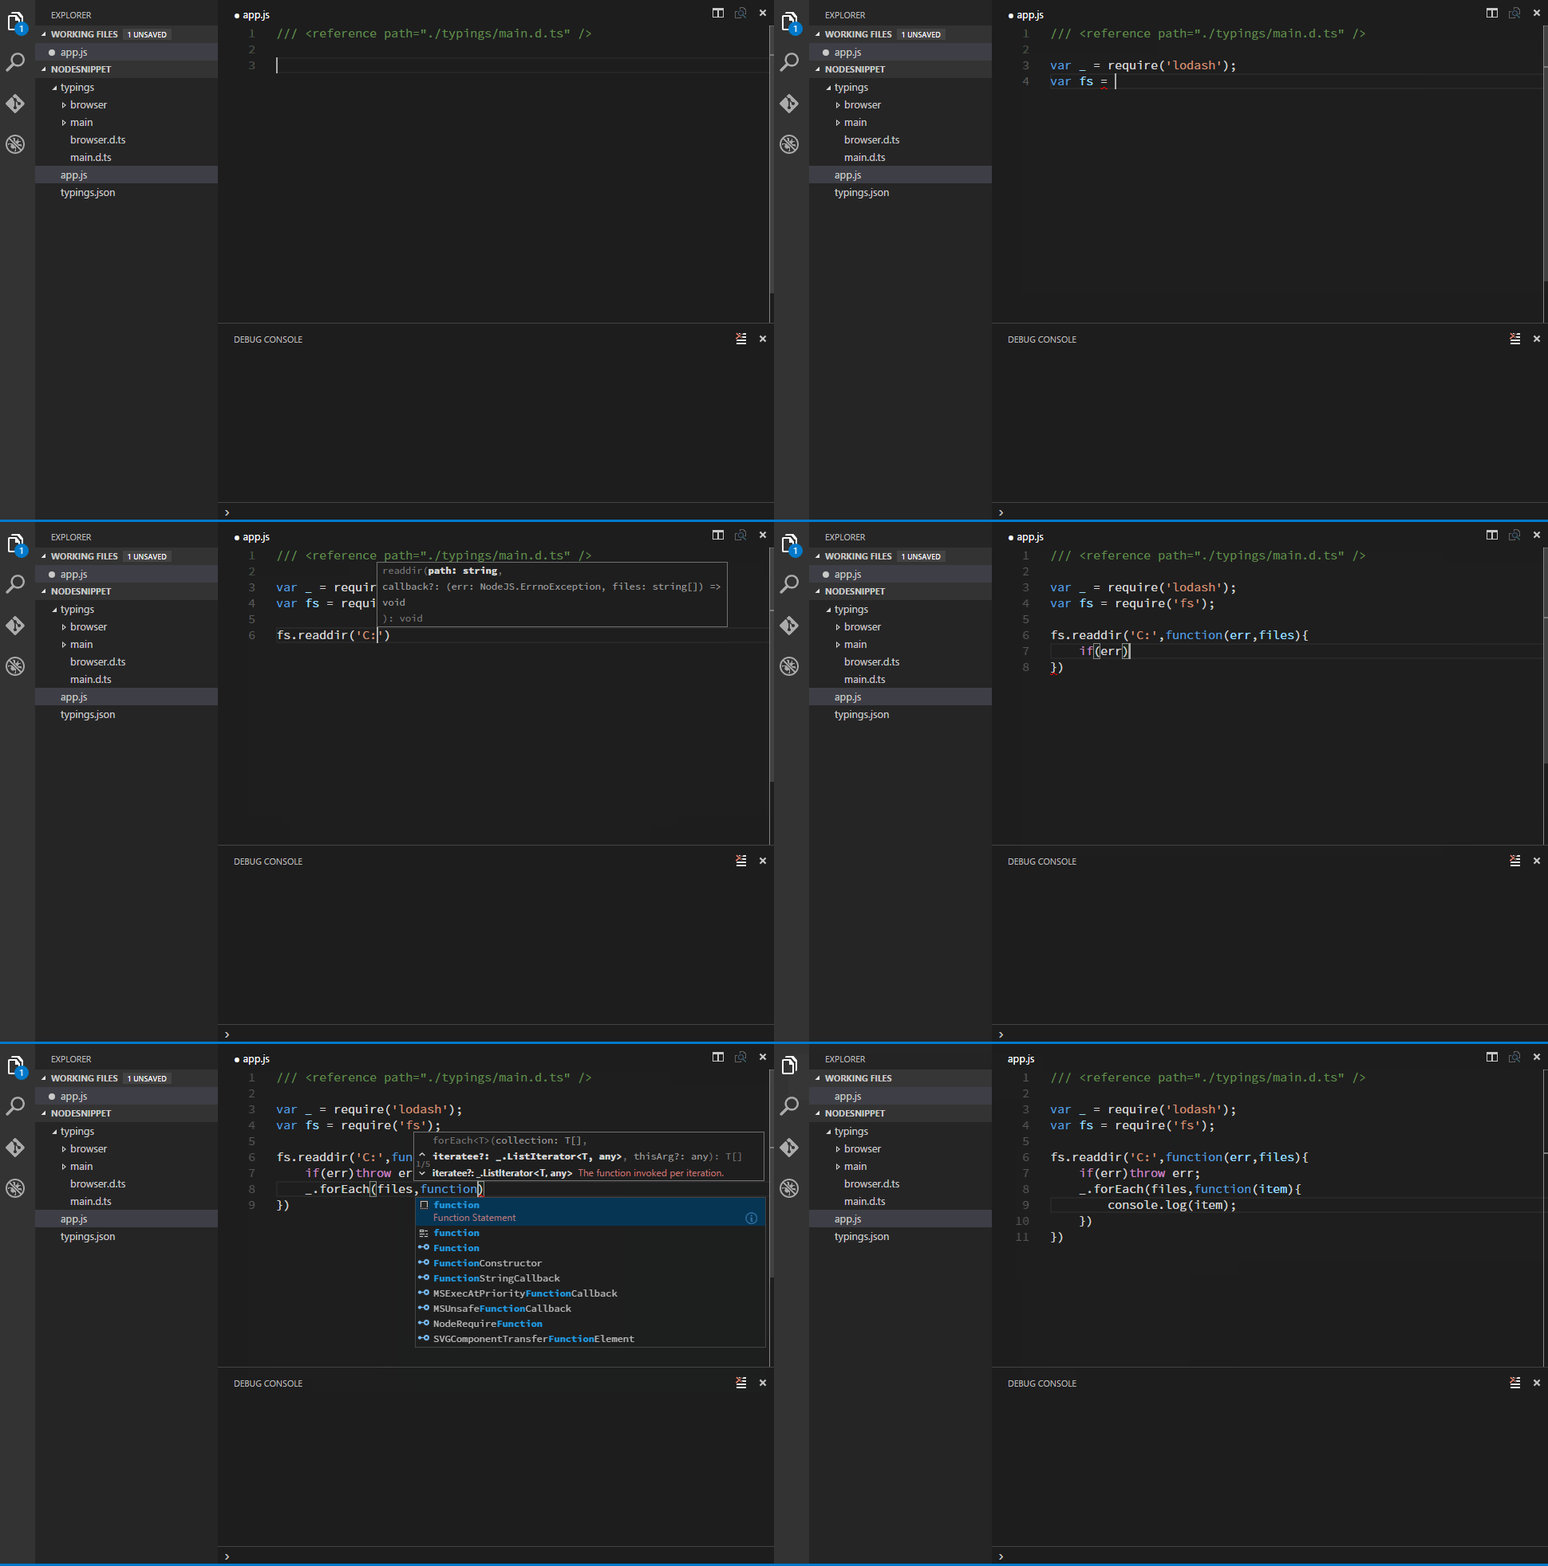
We can be very happy after enabling the prompt function Let’s use the smart prompt function provided by Visual Studio Code. As shown below:

Note
Typings VS TSD
Typings comes as a replacement for TSD, if you already If TSD is installed, you need to know that TSD is no longer recommended. If TSD has been installed, please execute the following command to remove it:
npm rm -g tsd
Use CNPM
Due to the wall in China, sometimes NPM is used to install modules faster The upload will be very slow. At this time, we can actually choose the domestic Taobao NPM image and use the following command to install it:
npm install -g cnpm --registry=https://registry.npm.taobao.org
After the installation is completed, use cnpm instead of the npm command. For example, the following is an example of installing a lodash module:
cnpm install lodash
You can see that there is no difference except that cnpm replaces npm.
Summary
The above is the entire content of this article. I hope the content of this article can bring some help to everyone's study or work. If you have any questions, you can leave a message to communicate.
For more related articles using Typings to implement intelligent prompt functions for Visual Studio Code, please pay attention to the PHP Chinese website!
 How to install ps filter
 How much is one Bitcoin in RMB?
 What is blockchain web3.0
 What is the difference between JD International self-operated and JD self-operated
 Words disappear after typing
 Why can't my mobile phone make calls but not surf the Internet?
 Does inflation rate have an impact on digital currencies?
 How to open hosts file


