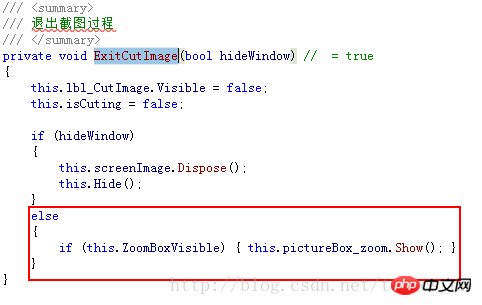
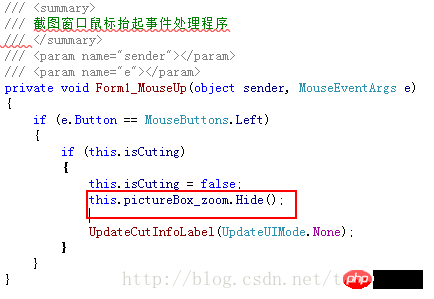
Since you may need to accurately capture a certain part when taking a screenshot, you need the function of a magnifying glass, so that it is easier to locate the location of the screenshot when taking a screenshot.
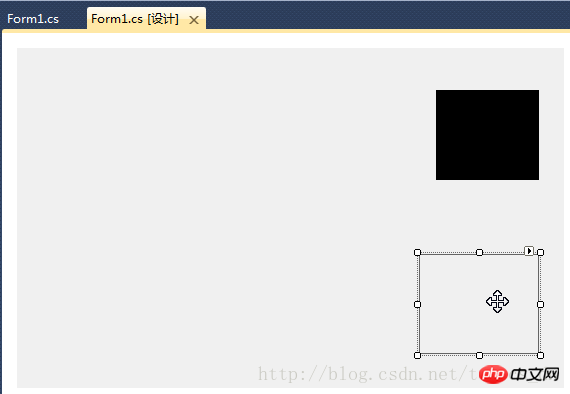
//设置放大镜的大小 this.pictureBox_zoom.Width = this.ZoomBoxWidth; this.pictureBox_zoom.Height = this.ZoomBoxHeight;
if (this.ZoomBoxVisible) { UpdateCutInfoLabel(UpdateUIMode.ShowZoomBox); this.pictureBox_zoom.Show(); }
if (this.pictureBox_zoom.Visible || (updateUIMode & UpdateUIMode.ShowZoomBox) != UpdateUIMode.None) { Point zoomLocation = new Point(MousePosition.X + 15, MousePosition.Y + 22); if (zoomLocation.Y + this.pictureBox_zoom.Height > this.Height) { if (zoomLocation.X + this.pictureBox_zoom.Width > this.Width) { zoomLocation = new Point(MousePosition.X - this.pictureBox_zoom.Width - 10, MousePosition.Y - this.pictureBox_zoom.Height - 10); } else { zoomLocation = new Point(MousePosition.X + 15, MousePosition.Y - this.pictureBox_zoom.Height - 15); } } else { if (zoomLocation.X + this.pictureBox_zoom.Width > this.Width) { zoomLocation = new Point(MousePosition.X - this.pictureBox_zoom.Width - 15, MousePosition.Y); } } this.pictureBox_zoom.Location = zoomLocation; if (!this.pictureBox_zoom.Visible) { this.pictureBox_zoom.Show(); } }
/// <summary> /// 放大镜组件重绘事件处理程序 /// 实时显示鼠标指针位置放大后的图像 /// </summary> /// <param name="sender"></param> /// <param name="e"></param> private void pictureBox_zoom_Paint(object sender, PaintEventArgs e) { Bitmap bmp_lbl = new Bitmap(e.ClipRectangle.Width, e.ClipRectangle.Height); int srcWidth = (int)(this.ZoomBoxWidth / 10); int srcHeight = (int)(this.ZoomBoxHeight / 10); Bitmap bmp = new Bitmap(srcWidth, srcHeight); Rectangle srcRect = new Rectangle(MousePosition.X - 5, MousePosition.Y - 4, srcWidth, srcHeight); if (!isCuting) { srcRect = new Rectangle(MousePosition.X - 6, MousePosition.Y - 5, srcWidth, srcHeight); } Graphics g = Graphics.FromImage(bmp); g.DrawImage(screenImage, 0, 0, srcRect, GraphicsUnit.Pixel); g.Dispose(); //Zoom int x, y; for (int row = 0; row < bmp.Height; row++) { for (int col = 0; col < bmp.Width; col++) { Color pc = bmp.GetPixel(col, row); for (int h = 0; h < 10; h++) { for (int w = 0; w < 10; w++) { x = col * 10 + w; y = row * 10 + h; if (x < bmp_lbl.Width && y < bmp_lbl.Height) { bmp_lbl.SetPixel(x, y, pc); } } } } } e.Graphics.DrawImage(bmp_lbl, 0, 0); int blockX = e.ClipRectangle.Width / 2; int blockY = e.ClipRectangle.Height / 2; SolidBrush brush = new SolidBrush(Color.FromArgb(10, 124, 202)); Pen pen = new Pen(brush, 2.0F); e.Graphics.DrawLine(pen, new Point(0, blockY), new Point(e.ClipRectangle.Width, blockY)); e.Graphics.DrawLine(pen, new Point(blockX, 0), new Point(blockX, e.ClipRectangle.Height)); g.Dispose(); bmp_lbl.Dispose(); }
Compile, run, take a screenshot to see the effect!
The above is the detailed content of C# Development Example-Customized Screenshot Tool (7) Code Example for Adding Magnifying Glass Function. For more information, please follow other related articles on the PHP Chinese website!