Customize JPanel panel background
1. Foreword
1. The full name of GUI is Graphical User Interface, which is the graphical user interface. JAVA's GUI applications are widespread and common in our lives. Many applications use this GUI programming design, such as clicking the QQ icon to pop up the corresponding login form.

# Generally, the interaction between a program and the user is based on the running interface of the corresponding program.
2. The JPanel panel is a panel container class under SWING. The panel supports nesting, the layout mode can be set, and different layout managers can be set to add other controls such as JButton buttons, JTextField text boxes, etc. To design and improve a program interface form.
As a drawing panel, it is not enough to support setBackground() to set the background color. Here you can customize the picture background for JPanel.
2. Platform tools
1.MyEclipse
The demonstration here uses myeclipse2014
Other platforms that support java awt+swing are also available
3. Picture and text display
1. The effect of different processing JPanel under the same form
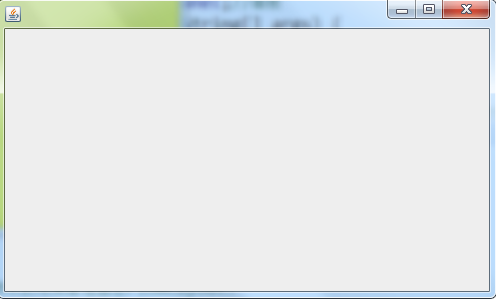
(1) First create an unmodified form, the general default jpanel interface effect As follows:

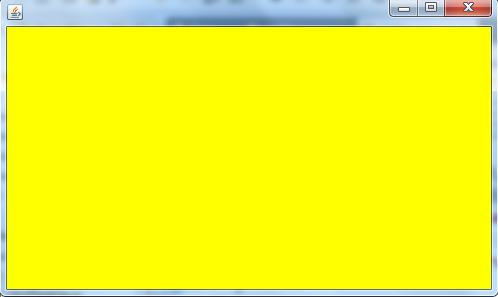
(2) Simply set the background color effect:

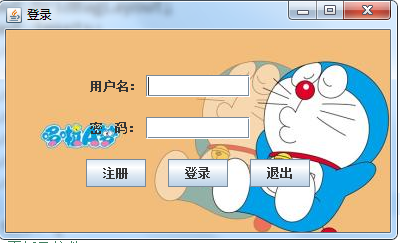
(3) After custom processing Form effect under JPanel:

2. Code implementation
Customized JPanel background processing, the image is bg.PNG, and tested The classes are in the same path. When using images, be sure to use relative paths.
import java.awt.Graphics;
import javax.swing.ImageIcon;
import javax.swing.JFrame;
import javax.swing.JPanel;

public class GUITest {
   private static JFrame jframe; //声明一个窗体
   private JPanel jpanel;     //声明一个画板

   public GUITest(){       //构造方法
     jframe = new JFrame();
     init();
   }

   private void init(){
     jframe.setTitle("测试");
     jpanel = new JPanel(){//关键代码,就是重写了paint的一个方法
        @Override
        protected void paintComponent(Graphics g) {
          super.paintComponent(g);
          ImageIcon img = new ImageIcon(GUITest.class.getResource("bg.png"));
         /**
          * bg.PNG这个地方换成自己的图片
          * 此处使用的相对路径,bg.png跟该测试类在同一路径下
          * 不过建议使用相对路径避免使用绝对路径
          */
          img.paintIcon(this, g, 0, 0);
        }
     };
     jpanel.setOpaque(true);
     jframe.setBounds(200, 200, 500, 400); //设置显示位置距离左边200像素距离上边200像素及屏幕大小500*400

     jframe.add(jpanel); //添加画板到窗体

     jframe.setVisible(true); //设置显示界面
   }

   public static void main(String[] args) {
      new GUITest();      // 实例化对象
   }
} 4. Expand the layout manager
Let’s simply write a login form:
Based on the customized JPanel background, set the GridBagLayout layout, add button text boxes and other basic controls to implement a simple login form.
(1) The code is as follows:
import java.awt.Graphics;
import java.awt.GridBagConstraints;
import java.awt.GridBagLayout;
import java.awt.Insets;
import javax.swing.ImageIcon;
import javax.swing.JButton;
import javax.swing.JFrame;
import javax.swing.JLabel;
import javax.swing.JPanel;
import javax.swing.JPasswordField;
import javax.swing.JTextField;

public class GUIT {
  //声明窗体,面板及控件
  private static JFrame jframe;
  private JLabel jlabel,jlabel1;
  private GridBagLayout gridbag;
  private GridBagConstraints constraints;
  private JTextField jtfield1;
  private JPasswordField jpfield1;
  private JButton jbutton1,jbutton2,jbutton3;
  private JPanel jpanel;

  public GUIT(){
    jframe = new JFrame();
    jlabel = new JLabel();
    jlabel1 = new JLabel();
    jtfield1 = new JTextField();
    jpfield1 = new JPasswordField();
    gridbag = new GridBagLayout();
    jbutton1 = new JButton();
    jbutton2 = new JButton();
    jbutton3 = new JButton();
    init();
  }

   /**
   * init()初始化并显示界面
   */
  private void init(){
    jframe.setTitle("登录");
    /**
     * 设置JPanel背景
     */
    jpanel = new JPanel(){
      @Override
      protected void paintComponent(Graphics g) {
        super.paintComponent(g);
        ImageIcon img = new ImageIcon(GUITest.class.getResource("ddmbg.jpg"));
        img.paintIcon(this, g, 0, 0);
      }
    };
    //为JLabel,JButton初始化文本
    jlabel.setText("用户名:");
    jlabel1.setText("密  码:");
    jbutton1.setText("登录");
    jbutton2.setText("退出");
    jbutton3.setText("注册");

    //设置显示位置及屏幕大小500*400
    jframe.setBounds(450, 240, 400, 240);
    //jpanel采用GridBagLayout布局管理器
    jpanel.setOpaque(false);
    jpanel.setLayout(gridbag);

    //初始化用户名label,并添加该控件到画板
    constraints = getGridBagConstraints(0,0,1,1,0,0,GridBagConstraints.CENTER,GridBagConstraints.NONE,new Insets(10,0,10,0),0,0);
    gridbag.setConstraints(jlabel, constraints);
    jpanel.add(jlabel);

    //初始化用户名文本框,并添加该组件到画板
    constraints = getGridBagConstraints(1,0,1,1,0,0,GridBagConstraints.CENTER,GridBagConstraints.NONE,new Insets(10,0,10,0),100,0);
    gridbag.setConstraints(jtfield1, constraints);
    jpanel.add(jtfield1);

    //初始化密码label
    constraints = getGridBagConstraints(0,1,1,1,0,0,GridBagConstraints.CENTER,GridBagConstraints.NONE,new Insets(10,0,10,0),0,0);
    gridbag.setConstraints(jlabel1, constraints);
    jpanel.add(jlabel1);

    //初始化密码文本框
    constraints = getGridBagConstraints(1,1,1,1,0,0,GridBagConstraints.CENTER,GridBagConstraints.NONE,new Insets(10,0,10,0),100,0);
    gridbag.setConstraints(jpfield1, constraints);
    jpanel.add(jpfield1);

    //初始化注册按钮,并添加该控件到画板
    constraints = getGridBagConstraints(0,2,1,1,0,0,GridBagConstraints.CENTER,GridBagConstraints.NONE,new Insets(10,0,10,0),0,0);
    gridbag.setConstraints(jbutton3, constraints);
    jpanel.add(jbutton3);

    //初始化登录按钮
    constraints = getGridBagConstraints(1,2,1,1,0,0,GridBagConstraints.CENTER,GridBagConstraints.NONE,new Insets(10,0,10,0),0,0);
    gridbag.setConstraints(jbutton1, constraints);
    jpanel.add(jbutton1);

    //初始化退出按钮
    constraints = getGridBagConstraints(2,2,1,1,0,0,GridBagConstraints.CENTER,GridBagConstraints.NONE,new Insets(10,0,10,0),0,0);
    gridbag.setConstraints(jbutton2, constraints);
    jpanel.add(jbutton2);

    //添加画板到窗体
    jframe.add(jpanel);
    //窗体初始化完成
  }

   private static GridBagConstraints getGridBagConstraints(int gridx,int gridy,int gridwidth,int gridheight,double weightx,double weighty,int anchor,int fill,Insets insets,int ipadx,int ipady){
     return new GridBagConstraints(gridx, gridy, gridwidth, gridheight, weightx, weighty, anchor, fill, insets, ipadx, ipady);
   }

   public static void main(String[] args) {
     new GUIT();
     jframe.setVisible(true);
   }
}where ddmbg is the picture name
(2) The effect is as shown in the figure:

Layout is the basic and very important knowledge in GUI design.
To master the three major layouts and other layout managers proficiently, you need to practice coding by yourself.
The above is the entire content of this article. I hope it will be helpful to everyone's learning. I also hope that everyone will support the PHP Chinese website.
For more articles related to JAVA GUI custom JPanel drawing board background, please pay attention to the PHP Chinese website!


