
This article mainly introduces PHPmyadmin installation tutorial in detail.
PHPmyadmin is one of the MySQL database managers commonly used in our daily project development! So how to quickly download and install PHPmyadmin is an indispensable skill for novice friends. After mastering this skill, whether you need to rebuild the development environment or delete PHPmyadmin by mistake later, these problems can be easily solved.
Below we will introduce in detail how to download and install PHPmyadmin and how to log in and start PHPmyadmin with specific graphic and text information!
1. Download PHPmyadmin
Open the PHPmyadmin tool download link in the PHP Chinese website: http://www.php.cn/xiazai/gongju/ 97, click local download to download the PHPmyadmin compressed package.
2. Change the folder name and part of the code
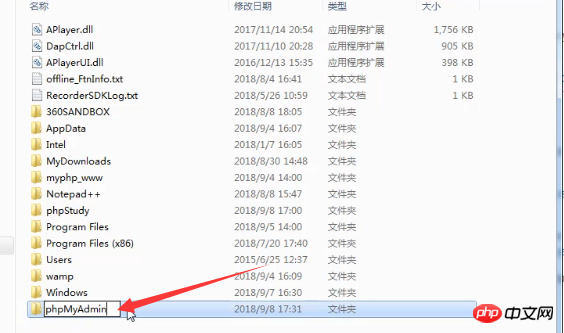
After we download the compressed package of the PHPmyadmin file, extract it to the root directory of the c drive Down. And change the original folder name to PHPmyadmin.
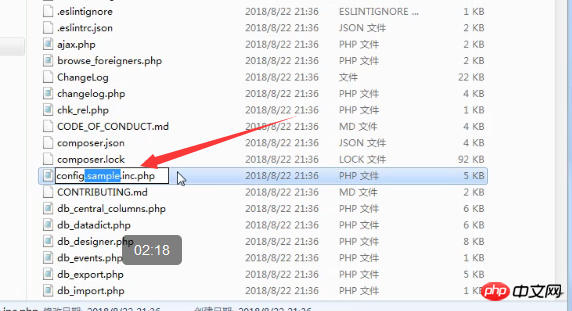
Then open this folder, find config.sample.inc.php, and rename it to config.inc.php.
Finally open the config.inc.php file and find this code:
$cfg['blowfish_secret'] = ''
Change it to the following code:
$cfg['blowfish_secret'] = 'c4ca4238a0b923820dcc509a6f75849b';//一个长字符串密码就行
Save and exit.
3. Create a new phpmyadmin.conf file
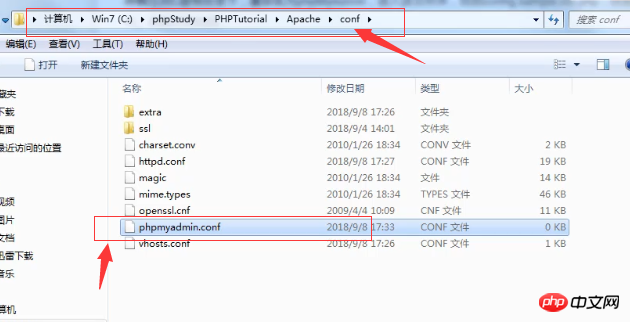
First we need to find the Apache conf folder in the PHP environment and create a new one directly in it A phpmyadmin.conf file. For example, in the PHPstudy environment, the location of the conf folder is as shown below:
Then in this newly created file, directly copy and paste this code:
Alias /phpmyadmin "c:/phpMyAdmin/"
<Directory "c:/phpMyAdmin/">
Options Indexes FollowSymLinks MultiViews
AllowOverride all
Require all granted
php_admin_value upload_max_filesize 128M
php_admin_value post_max_size 128M
php_admin_value max_execution_time 360
php_admin_value max_input_time 360
</Directory>
Finally save and exit.
4. Modify the configuration file httpd.conf
Find the httpd.conf file in Apache’s conf folder, open the file, and add this paragraph at the end of the text Code:
Include conf/phpmyadmin.conf
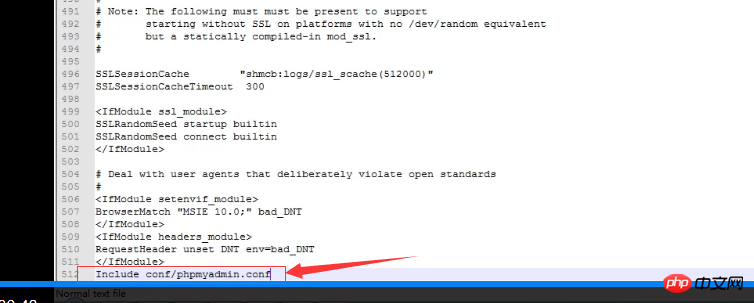
Finally restart Apache.
5. Log in and start PHPmyadmin
After the above four steps, PHPmyadmin has been successfully installed. How to log in to PHPmyadmin? You can access this link address at this time: localhost/phpmyadmin, or 127.0.0.1/phpmuadmin. Note: phpmyadmin in the link must be lowercase.

The PHPmyadmin login interface appears:
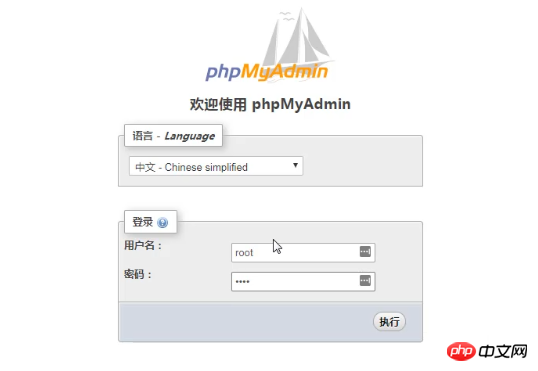
Generally the initial username and password are root, click After executing, you can successfully log in and start the management interface of PHPmyadmin, as shown below:
The above article is about the specific process of downloading and installing PHPmyadmin. I hope it will be helpful to friends in need. help!
You can also refer to the corresponding video tutorial [Download, install and configure the online database management tool PHPMyAdmin]. This video explanation is more intuitive and easy to understand!
Related recommendations:
Detailed explanation of PHPMyadmin configuration
The above is the detailed content of phpMyAdmin latest download and installation tutorial (with video). For more information, please follow other related articles on the PHP Chinese website!
 How to set both ends to be aligned in css
 How to create a blog
 What versions of linux system are there?
 Usage of console.log
 How to check dead links on your website
 vista key activation code
 How to solve error1
 special symbol point
 What is the difference between JD International self-operated and JD self-operated