Home > Web Front-end > JS Tutorial > body text

Knockoutjs Quick Start (Classic)_Basic Knowledge

WBOY
Release: 2016-05-16 17:45:48
Original
1228 people have browsed it

Knockoutjs is an MVVM framework implemented in JavaScript. It mainly has the following functions:

1. Declarative bindings

2. Observables and dependency tracking

3. Templating

It has a significant effect on separating the front-end business logic and views and simplifying the data binding process. Without further ado, let’s just look at the example. I won’t talk about how to download it. If you use VS to develop, you can use Nuget to get it done with one click.

1. Basic binding and dependency tracking
First you need to define a ViewModel:

Copy code The code is as follows:


Then there is a View used to display this ViewModel:
Copy code The code is as follows:


< input data-bind="value: lastName"/>


From this view you can see the meaning of declarative binding, you only need to use it on the label The data-bind attribute can bind the value of the data to the corresponding place. With View and ViewModel, code is needed to associate the two:
Copy code The code is as follows:

ko.applyBindings(new ViewModel());

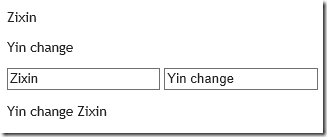
Put them together. Note that the applyBinding code must be executed after the page is fully loaded. The page displays:

image

Let’s look at observables next. This function is not innate. You must set the View Model to observable. The method is as follows:

Copy code The code is as follows:

function ViewModel() {
this.firstName = ko.observable("Zixin");
this.lastName = ko.observable(" Yin");
}

Nothing else needs to be changed. At this time, if you change the value in the input box, when the focus leaves, you can find that the value in p also changes. :

image

Let’s look at dependency tracking, that is, if a value depends on multiple values, and any one of the values ​​changes, it will automatically change. This is achieved through the computed method, the code is as follows:

Copy code The code is as follows:

function ViewModel() {
this.firstName = ko.observable("Zixin" );
this.lastName = ko.observable("Yin");
this.fullName = ko.computed(function () { return this.lastName() " " this.firstName(); },this );
}

Note that getting the value of an observable is a function call. In this way, when the first or last name changes, the fullName will automatically change accordingly.

image

You can also change the value of the observable through code, and the page will refresh automatically:

Copy the code The code is as follows:

function ViewModel() {
//………
this.capitalizeLastName = function () {
this.lastName(this.lastName().toUpperCase());
}
}

Add a button on the page:
Copy the code The code is as follows:


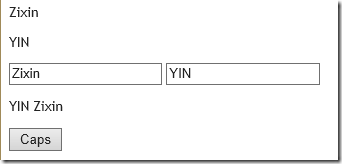
After clicking the button, the capitalizeLastName method of the viewmodel will be launched. The way to change the value of an observable is to use the new value as a parameter of the function call. After clicking:

image

2. List binding

Join us with the following order ViewModel and use observableArray to track changes in the array.

Copy code The code is as follows:

var products=[{name: "Thinkpad X1", price:9000},
{name:"Hp ProBook",price:5555},
{name:"Mouse",price:45} ];

function Order() {
var self = this;
self.items = ko.observableArray([
//This data should load from server
new Item(products[0], 1),
new Item(products [1],2)]);
self.price = ko.computed(function () {
var p=0;
for (var i = 0; i < self.items() .length; i ) {
var item = self.items()[i];
p = item.product.price * item.amount();
}
return p;
}, self);
}

The Item in Order should actually be obtained from the server. The Item is defined as follows:
Copy code The code is as follows:

function Item(product, amount) {
var self = this;
this.product = product;
this.amount = ko.observable(amount);
this.subTotal = ko.computed(function () {
return self.amount() * self.product.price;
}, self );
}

After the ViewModel is ready, you can implement the View. This time you need to use foreach binding, as follows:
Copy the code The code is as follows:

< table>


Name
Amount
Price


Order Price:


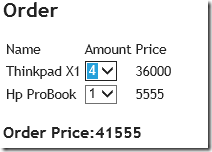
It would be nice to have a basic order page like this, where you can select the quantity and the price will automatically update:

image

Next, add the function of adding and deleting products to the order. First add the following method to the Order:

Copy the code The code is as follows :

function Order() {
//……
self.remove = function (item) {
self.items.remove(item);
}

self.addMouse = function () {
self.items.push(new Item(products[2],1));
}
}

Add a column delete button to the table:
Copy the code The code is as follows:

Again Add a button to add products at the bottom of the table:
Copy the code The code is as follows:

< ;button data-bind="click: addMouse">Add a Mouse

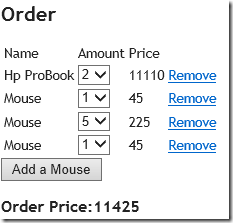
At this time, the function of observableArray is reflected. When you click the delete button or the button at the bottom, the page nodes will change accordingly, without the need to manually update the DOM nodes, which greatly simplifies the front-end JS.

image

Related labels:
source:php.cn
Statement of this Website
The content of this article is voluntarily contributed by netizens, and the copyright belongs to the original author. This site does not assume corresponding legal responsibility. If you find any content suspected of plagiarism or infringement, please contact admin@php.cn
Popular Tutorials
More>
Latest Downloads
More>
Web Effects
Website Source Code
Website Materials
Front End Template
About us Disclaimer Sitemap
php.cn:Public welfare online PHP training,Help PHP learners grow quickly!