
Preface
I have been looking at VUE in the past few months, and then tried to implement some components only with native js+vue .
PC side time selection component This is the first implementation of time selection on the PC. It is also done on the mobile side, so I want to implement the Time Selector on the mobile side. Let me share how I implemented it on mobile The idea and process of the end scroll wheel special effect time selector. The entire component is built based on vue-cli
Function
1. Time selection [
A.年月日选择
B.年月日小时分钟选择
C. Hour and minute selection D. Minute selection]
2. Scroll wheel effect [
A.构成一个圆环首尾相连
B. Does not form end-to-end connection]
3. Time selection range setting (a pop-up window will prompt if the selected time exceeds the range), minute interval setting
4. Multi-languageSettings
5. The time format setting meets the setting rules of yyyy/MM/dd HH:mm
6. The UE is close to the native ios effect
7. The extension can not only select time, but also can pass in custom linkage selection data
Here we mainly talk about the implementation of infinite scroll wheel
Data preparation 1
Get it here
天
Let's explain
A clever way to get the number of days in a month.
dayList () {
       /* get currentMonthLenght */
        let currentMonthLength = new Date(this.tmpYear, this.tmpMonth + 1, 0).getDate();
       /* get currentMonth day */
        let daylist = Array.from({length: currentMonthLength}, (value, index) => {
          return index + 1
        });
        return daylist
},Here I used the computed method of vue to implement it, and put
yearList
monthList
dayList
hourList
minuteList
to store the basic data. The data preparation here comes to an end. .
StaticEffect implementation
There are many ways to achieve the static effect of the scroll wheel
1. Visual 3D effect [add shadow]
2. Actual 3D effect[ CSS3D]
我把实现效果大致分为上面2种,具体的大家可以自己搜索相关资料,这里展开涉及太多就带过好了
My own implementation is the second one using CSS3D
Explanation
First we see the native ios selection effect when entering the selection range There is a difference between the scroll wheel inside and outside the selection range
#So in order to achieve this difference in effect, I chose to use two dom structures to implement it, one dom to implement the scroll wheel, and one dom to implement it. Black selection effect, so that when linked, there will be a difference similar to the original effect
picker-panel
Install various selection doms, here only the day one is given,
box-day
install the day data An outermost box,
check-line
realizes the selected 2 lines,
day-list
the outermost black effect data,
day-wheel
the gray roller part
<p class="picker-panel">
<!--other box-->
<p class="box-day">
  <p class="check-line"></p>
  <p class="day-checked">
    <p class="day-list">
      <p class="list-p" v-for="day in renderListDay">
       {{day.value}}
      </p>
    </p>
  </p>
  <p class="day-wheel">
    <p class="wheel-p" v-for="day in renderListDay" transform: rotate3d(1, 0, 0, 80deg) translate3d(0px, 0px, 2.5rem);>
    {{day.value}}
    </p>
  </p>
</p>
<!--other box-->
</p>.day-wheel{
position: absolute;
overflow: visible;
height: px2rem(68px);
font-size: px2rem(36px);
top:px2rem(180px);
left: 0;
right: 0;
color:$unchecked-date;
-webkit-transform-style: preserve-3d;
transform-style: preserve-3d;
.wheel-p{
height: px2rem(68px);
line-height: px2rem(68px);
position: absolute;
top:0;
width: 100%;
text-align: center;
-webkit-backface-visibility: hidden;
backface-visibility: hidden;
white-space: nowrap;
overflow: hidden;
text-overflow: ellipsis;
}
}Mainly involved cssproperties
transform-style: preserve-3d;
Display 3D effect,
-webkit-backface-visibility: hidden;
The part behind the scroll wheel is automatically hidden
postition:absolute;
Used to position the wheel
transform: rotate3d(1, 0, 0, 80deg) translate3d(0px, 0px, 2.5rem);
The angle of each data rotation and the wheel sideViewThe radius of the circle
The angle of each data rotation And the construction principle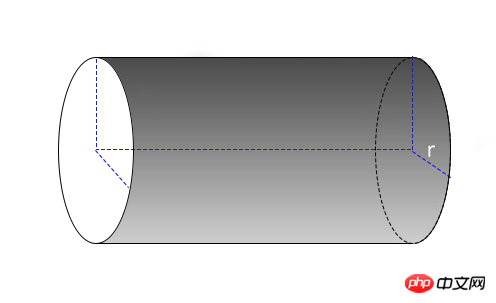
As shown above
is the three-dimensional effect of our roller, r is the 2.5rem in our translated3d(0px,0px,2.5rem),
Without this css, all the data will be gathered at the center of the circle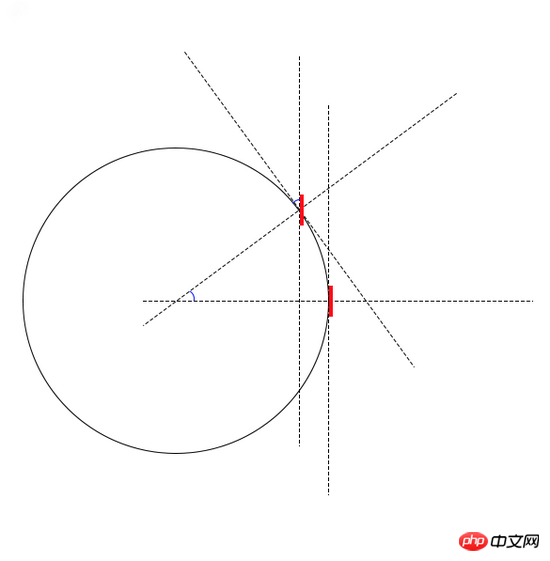
The above picture does not rotate (red represents the data effect we see)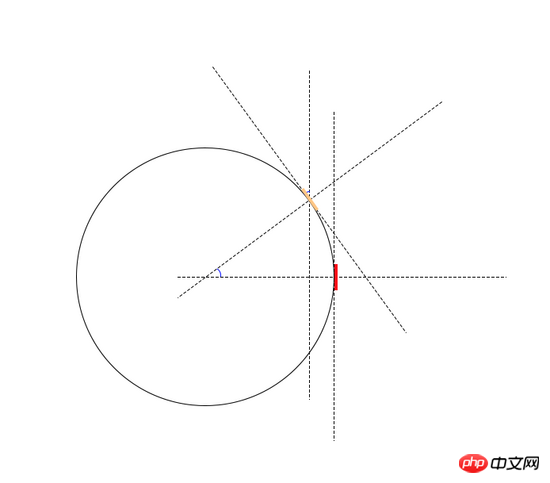
The image is rotated (red and orange represent the data effect we see)
The angle represented by the blue arc is the same (this involves the knowledge of angles), and it is also the visual rotation angle, which is what is in the rotate3d css For 80deg, what I do is that each space is 20 degrees. In this way, we only rotate the x-axis and incidentally rotate the center angle of the circle, thus spreading the entire ring. A complete circle can hold 360/20 data, and we can see the front data with the naked eye, so after a certain angle, it should not be visible to us behind it, and -webkit-backface-visibility: hidden; this sentence means It worked.
这里我们发现轮子装不完所有数据,而且我们要实现数据循环
The effect is similar to the picture below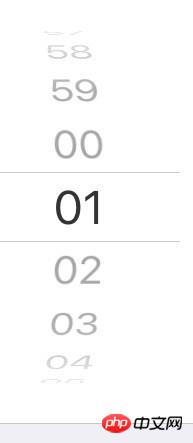
So there is a second data preparation
Data preparation 2
It is also used here Our dayList is used as the initial data [1,2,3,4,...,30,31]
Here we take 19 data each time as rendering data, and we need renderListDay initial rendering is [23 ,24,25,26,27,28,29,30,31,1,2,3,4,5,6,7,8,9,10]
Because the middle number is exactly the One (only during initialization)
renderListDay(){
let list = [];
for (let k = this.spin.day.head; k <= this.spin.day.last; k++) {
let obj = {
value: this.getData(k, 'day'),
index: k,
};
list.push(obj)
}
return list
},The method of fetching data is forward if it is less than 0 and greater than 0, IndexIf the length of the original data is greater than the original data length, use % calculation. Obtain the index corresponding to the normal range, so the above spin is our fork for fetching data (initially from -9 to 9)
getData(idx, type){
       //...
        else if (type == 'day') {
          return this.dayList[idx % this.dayList.length >= 0 ? idx % this.dayList.length : idx % this.dayList.length + this.dayList.length];
        }
        //...
},The angle of rotation of each piece of data (the upper semicircle is positive, the lower semicircle is negative)
<p class="wheel-p" v-for="day in renderListDay" v-bind:data-index="day.index" v-bind:style="{transform: 'rotate3d(1, 0, 0, '+ (-day.index)*20%360+'deg) translate3d(0px, 0px, 2.5rem)'}">{{day.value}}{{day.value}}</p>接着需要旋转到我们需要的角度,跟我们的初始化时间对上,this.orDay-this.DayList[0] 是获取偏移量来矫正角度
this.$el.getElementsByClassName('day-wheel')[0].style.transform = 'rotate3d(1, 0, 0, ' + (this.orDay - this.dayList[0]) * 20 + 'deg)';
增加touch事件
剩下的事就很好处理了,给对应的dom绑定事件根据touchmove的距离来转换成旋转的角度 和check-list的位移这里translateY是用来记录实际移动的距离的,最后输出需要算入偏移量
<p class="box-day" v-on:touchstart="myTouch($event,'day')" v-on:touchmove="myMove($event,'day')" v-on:touchend="myEnd($event,'day')">
<p class="check-line"></p>
<p class="day-checked">
<p class="day-list" data-translateY="0" style="transform: translateY(0rem)">
<p class="list-p" v-for="day in renderListDay" v-bind:data-index="day.index">
{{day.value}}
</p>
</p>
</p>
<p class="day-wheel" style=" transform: rotate3d(1, 0, 0,0deg)">
<p class="wheel-p" v-for="day in renderListDay" v-bind:data-index="day.index" v-bind:style="{transform: 'rotate3d(1, 0, 0, '+ (-day.index)*20%360+'deg) translate3d(0px, 0px, 2.5rem)'}">
{{day.value}}
</p>
</p>
</p>惯性滚动
这个实现我是用了一个 cubic-bezier(0.19, 1, 0.22, 1)
判断手势是不是flicker 如果是flicker通过一个瞬时速度来算出位移,和时间,然后一次性设置,然后用transition做惯性滚动,
普通拖动 设置1秒
这个实际效果还是有点不好,以后来改进。
其他功能的实现
这里不做详细说明了
总结
自适应方面用了手淘的解决方案
这次实现这个组件最困难的就是实现无限滚动,和无限滚动的渲染数据的构造,接着就是惯性滚动的实现。
已知问题
1.惯性滚动不完美
2.无限滚动实现了。非无限滚动没实现,就是渲染数据就是[1,2,3,4,5,6,7,8,9,10]
3.现在选择必须 年月日 或者年月日小时分钟 不能单独选小时或者分钟
The above is the detailed content of vue.js implementation of imitating native ios time selection component development experience. For more information, please follow other related articles on the PHP Chinese website!
 Why does vue.js report an error?
 What are the uses of vue.js slots?
 How to jump with parameters in vue.js
 How to solve waiting for device
 What is javascript mainly used for?
 linux view system information
 Build your own git server
 What does win11 activation status activity mean?
 How does a switch work?


