

Detailed explanation of when to cancel subscription in Angular

You may know that when you subscribe to an Observable object or set up an event listener, at some point in time, you need to perform an unsubscription operation to release the operating system's memory. Otherwise, your application may suffer from memory leaks.
Next, let’s take a look at some common scenarios that require manual unsubscription operations in the ngOnDestroy life cycle hook. This article mainly introduces a brief discussion on when to cancel a subscription in Angular. The editor thinks it is quite good. Now I will share it with you and give you a reference. Let’s follow the editor to take a look, I hope it can help everyone.
Manual release resource scenario
Form
export class TestComponent {

 ngOnInit() {
  this.form = new FormGroup({...});
  // 监听表单值的变化
  this.valueChanges = this.form.valueChanges.subscribe(console.log);
  // 监听表单状态的变化
  this.statusChanges = this.form.statusChanges.subscribe(console.log);
 }

 ngOnDestroy() {
  this.valueChanges.unsubscribe();
  this.statusChanges.unsubscribe();
 }
}The above solution is also applicable to other form controls.
Routing
export class TestComponent {
 constructor(private route: ActivatedRoute, private router: Router) { }

 ngOnInit() {
  this.route.params.subscribe(console.log);
  this.route.queryParams.subscribe(console.log);
  this.route.fragment.subscribe(console.log);
  this.route.data.subscribe(console.log);
  this.route.url.subscribe(console.log);

  this.router.events.subscribe(console.log);
 }

 ngOnDestroy() {
  // 手动执行取消订阅的操作
 }
}Renderer Service
export class TestComponent {
 constructor(
  private renderer: Renderer2,
  private element : ElementRef) { }

 ngOnInit() {
  this.click = this.renderer
    .listen(this.element.nativeElement, "click", handler);
 }

 ngOnDestroy() {
  this.click.unsubscribe();
 }
}Infinite Observables
When you use the interval() or fromEvent() operator, you create an infinite Observable object. In this case, when we no longer need to use them, we need to unsubscribe and release the resources manually.
export class TestComponent {
 constructor(private element : ElementRef) { }

 interval: Subscription;
 click: Subscription;

 ngOnInit() {
  this.interval = Observable.interval(1000).subscribe(console.log);
  this.click = Observable.fromEvent(this.element.nativeElement, 'click')
              .subscribe(console.log);
 }

 ngOnDestroy() {
  this.interval.unsubscribe();
  this.click.unsubscribe();
 }
}Redux Store
export class TestComponent {

 constructor(private store: Store) { }

 todos: Subscription;

 ngOnInit() {
   /**
   * select(key : string) {
   *  return this.map(state => state[key]).distinctUntilChanged();
   * }
   */
   this.todos = this.store.select('todos').subscribe(console.log);
 }

 ngOnDestroy() {
  this.todos.unsubscribe();
 }
}No need to manually release resource scenarios
AsyncPipe
@Component({
selector: 'test',
template: `<todos [todos]="todos$ | async"></todos>`
})
export class TestComponent {
constructor(private store: Store) { }
ngOnInit() {
this.todos$ = this.store.select('todos');
}
}When the component is destroyed, the async pipeline will automatically perform the unsubscription operation to avoid the risk of memory leaks.
Angular AsyncPipe source code snippet
@Pipe({name: 'async', pure: false})
export class AsyncPipe implements OnDestroy, PipeTransform {
 // ...
 constructor(private _ref: ChangeDetectorRef) {}

 ngOnDestroy(): void {
  if (this._subscription) {
   this._dispose();
  }
 }
}export class TestDirective {
@HostListener('click')
onClick() {
....
}
}// subscribe
this.handler = this.renderer.listen('document', "click", event =>{...});
// unsubscribe
this.handler();Finite Observable
export class TestComponent {
 constructor(private http: Http) { }

 ngOnInit() {
  // 表示1s后发出值,然后就结束了
  Observable.timer(1000).subscribe(console.log);
  this.http.get('http://api.com').subscribe(console.log);
 }
}
Copy code The code is as follows:
public static timer(initialDelay: number | Date, period: number, scheduler: Scheduler): Observable
##
// 每隔1秒发出自增的数字,3秒后开始发送
var numbers = Rx.Observable.timer(3000, 1000);
numbers.subscribe(x => console.log(x));

// 5秒后发出一个数字
var numbers = Rx.Observable.timer(5000);
numbers.subscribe(x => console.log(x));
Final advice
You should Call the unsubscribe() method as little as possible. You can learn more about Subject in the article RxJS: Don't Unsubscribe.
Specific examples are as follows:
export class TestComponent {
 constructor(private store: Store) { }

 private componetDestroyed: Subject = new Subject();
 todos: Subscription;
 posts: Subscription;

 ngOnInit() {
   this.todos = this.store.select('todos')
           .takeUntil(this.componetDestroyed).subscribe(console.log);

   this.posts = this.store.select('posts')
           .takeUntil(this.componetDestroyed).subscribe(console.log);
 }

 ngOnDestroy() {
  this.componetDestroyed.next();
  this.componetDestroyed.unsubscribe();
 }
}##takeUntil operator
public takeUntil(notifier: Observable): Observable<T>
Operator function
Emits the value emitted by the source Observable until the notifier Observable emits a value.
##
var interval = Rx.Observable.interval(1000);
var clicks = Rx.Observable.fromEvent(document, 'click');
var result = interval.takeUntil(clicks);

result.subscribe(x => console.log(x));
##Related recommendations:
Detailed explanation of the use of custom instructions in AngularJS_AngularJS
Detailed explanation of custom filters in AngularJS_ AngularJS
The above is the detailed content of Detailed explanation of when to cancel subscription in Angular. For more information, please follow other related articles on the PHP Chinese website!

Hot AI Tools

Undresser.AI Undress
AI-powered app for creating realistic nude photos

AI Clothes Remover
Online AI tool for removing clothes from photos.

Undress AI Tool
Undress images for free

Clothoff.io
AI clothes remover

Video Face Swap
Swap faces in any video effortlessly with our completely free AI face swap tool!

Hot Article
Hot Tools

Notepad++7.3.1
Easy-to-use and free code editor

SublimeText3 Chinese version
Chinese version, very easy to use

Zend Studio 13.0.1
Powerful PHP integrated development environment

Dreamweaver CS6
Visual web development tools

SublimeText3 Mac version
God-level code editing software (SublimeText3)
Hot Topics


 How to cancel window overlay and cascading effects in Win11
Jan 10, 2024 pm 02:50 PM
How to cancel window overlay and cascading effects in Win11
Jan 10, 2024 pm 02:50 PM
The default window overlapping in win11 is very annoying, so many friends want to cancel the overlapping windows, but don’t know how to cancel it. In fact, we only need to use relevant software. How to cancel overlapping windows in win11 Method 1: Cancel through the taskbar 1. Win11 does not have its own cancellation function, so we need to download a "startallback" 2. After the download is completed, "unzip" the compressed package. After the decompression is completed, open folder, run the illustrated installation program to complete the installation. . 3. After the installation is completed, you need to open the "Control Panel" and then change the "View by" in the upper right corner to "Large Icons". 4. In this way, you can find "startallback", click to open it, and enter the "Tasks" on the left
 How to cancel an order with Meituan
Mar 07, 2024 pm 05:58 PM
How to cancel an order with Meituan
Mar 07, 2024 pm 05:58 PM
When placing orders using Meituan, users can choose to cancel the orders they do not want. Many users do not know how to cancel Meituan orders. Users can click on the My page to enter the order to be received, select the order that needs to be canceled and click Cancel. How to cancel an order with Meituan 1. First, click on Meituan My Page to enter the order to be received. 2. Then click to enter the order that needs to be canceled. 3. Click Cancel Order. 4. Click OK to cancel the order. 5. Finally, select the reason for cancellation according to your personal situation and click Submit.
 Tutorial to cancel win11 screen lock
Dec 31, 2023 pm 12:29 PM
Tutorial to cancel win11 screen lock
Dec 31, 2023 pm 12:29 PM
In order to protect the screen content or save power, we often turn on the screen saver, but find it very troublesome to re-enter the password lock every time after exiting the screen saver. So how to cancel the win11 screen lock? In fact, it can be turned off in the screen saver settings. How to cancel the win11 screen lock: 1. First, we right-click a blank space on the desktop and open "Personalization" 2. Then find and open the "Lock Screen Interface" on the right 3. Then open the "Screen Saver" in the relevant settings at the bottom 4. Finally, check "Show login screen on restore" and confirm to save to cancel the screen lock.
 Detailed steps to cancel the ear symbol on WeChat
Mar 25, 2024 pm 05:01 PM
Detailed steps to cancel the ear symbol on WeChat
Mar 25, 2024 pm 05:01 PM
1. The ear symbol is the voice receiver mode. First, we open WeChat. 2. Click me in the lower right corner. 3. Click Settings. 4. Find the chat and click to enter. 5. Uncheck Use earpiece to play voice.
 Where to cancel Mango TV automatic renewal?
Feb 28, 2024 pm 10:16 PM
Where to cancel Mango TV automatic renewal?
Feb 28, 2024 pm 10:16 PM
When many users experience Mango TV, a video software, they choose to become members in order to enjoy more film and television resources and more comprehensive services. In the process of using Mango TV membership services, some users will choose to turn on the automatic renewal function to enjoy the discounts to ensure that they will not miss any exciting content. However, when users no longer need membership services or want to change the payment method, canceling the automatic renewal function is a very important thing to protect the safety of property. How to cancel the automatic renewal service of Mango TV? Users who want to know Come and follow this article to learn more! How to cancel the automatic renewal of membership on Mango TV? 1. First enter [My] in the Mango TV mobile APP, and then select [VIP Membership]. 2. Then find [Tube
 How to cancel automatic renewal on iQiyi How to cancel automatic renewal on iQiyi
Feb 22, 2024 pm 04:46 PM
How to cancel automatic renewal on iQiyi How to cancel automatic renewal on iQiyi
Feb 22, 2024 pm 04:46 PM
You can open the management automatic renewal function on the My Gold VIP Member interface to cancel. Tutorial Applicable Model: Huawei P50 System: HarmonyOS2.0 Version: iQiyi 12.1.0 Analysis 1 Open the iQiyi app on your phone, and then enter the My page. 2 Then click Gold VIP Membership at the top of my page, and then click Manage Automatic Renewal Options. 3. Click Cancel automatic renewal in the pop-up window. If you are not interested, continue to cancel. 4Finally confirm to turn off automatic renewal and click I understand, just reject it cruelly. Supplement: How to cancel the automatic renewal function of iQiyi on Apple mobile phone 1. Open the settings on the phone, and then click [AppleID] at the top of the settings interface. 2Click [Subscribe] on the AppleID interface to select
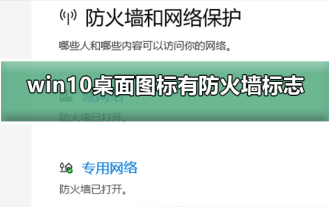 How to remove the firewall logo on the Win10 desktop icon?
Jan 01, 2024 pm 12:21 PM
How to remove the firewall logo on the Win10 desktop icon?
Jan 01, 2024 pm 12:21 PM
Many friends who use win10 system find that there is a firewall logo on the icon on the computer desktop. What is going on? This makes many friends with obsessive-compulsive disorder particularly uncomfortable. In fact, we only need to open the control panel and click " It can be solved by changing "Change User Account Control Settings". Let's take a look at the specific tutorial. How to cancel the firewall logo on the desktop icon in Windows 10 1. First, right-click the Start menu button next to the computer startup screen, and then select the Control Panel function from the pop-up menu. 2. Then select the "User Account" option and select the "Change User Account Control Settings" item from the new interface that appears. 3. After adjusting the slider in the window to the bottom, click Confirm to exit.
 How to install Angular on Ubuntu 24.04
Mar 23, 2024 pm 12:20 PM
How to install Angular on Ubuntu 24.04
Mar 23, 2024 pm 12:20 PM
Angular.js is a freely accessible JavaScript platform for creating dynamic applications. It allows you to express various aspects of your application quickly and clearly by extending the syntax of HTML as a template language. Angular.js provides a range of tools to help you write, update and test your code. Additionally, it provides many features such as routing and form management. This guide will discuss how to install Angular on Ubuntu24. First, you need to install Node.js. Node.js is a JavaScript running environment based on the ChromeV8 engine that allows you to run JavaScript code on the server side. To be in Ub
