

Detailed explanation of how to create multiple ueditors in vue

Some time ago, the company's Vue.js project needed to use the UEditor rich text editor. I searched around on Baidu and found no detailed instructions, so I decided to try it myself. After a busy day, I finally got it. This article mainly introduces you to the relevant information on how to create multiple ueditors in Vue. The article introduces it in great detail through sample code. It has certain reference learning value for everyone's study or work. Friends who need it will follow the editor below. Let’s learn together.
I recently requested an upgrade at work and needed to create multiple ueditor instances in vue. I used neditor, which actually beautified the ueditor style. The rest is almost the same as ueditor. I won’t go into more details below. Let’s go together. Let’s take a look at the detailed introduction.
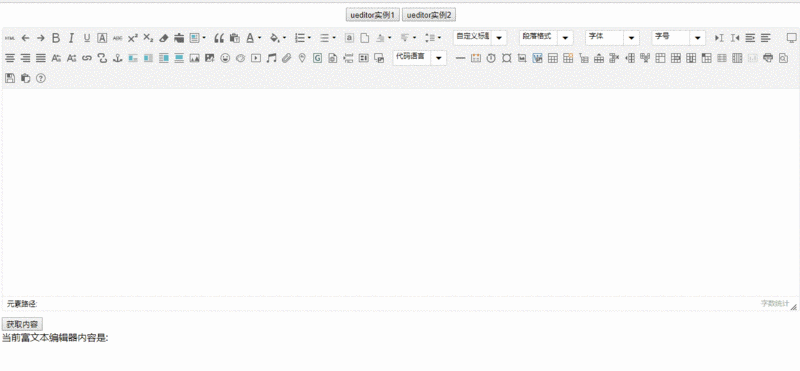
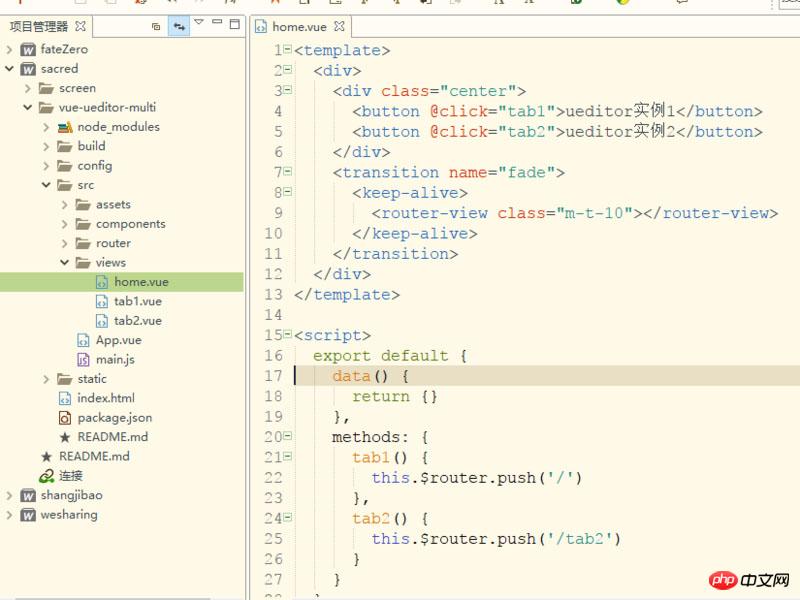
Screenshot
##Description
 ##Be sure to add the keep-alive component and transition component outside the router-view, otherwise the ueditor instance cannot be saved
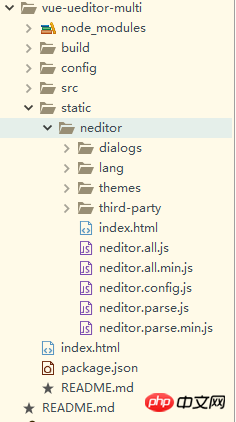
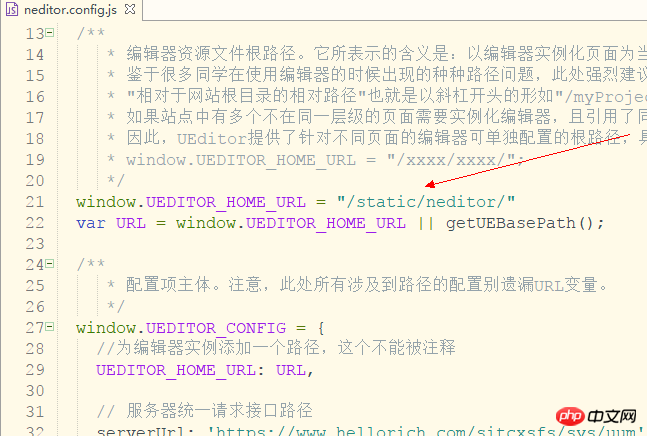
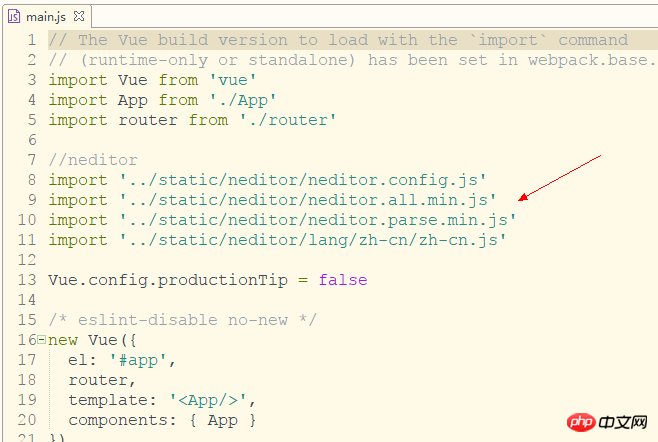
Create a new editor under the components folder as a public component of the editor
Call the editor in tab1, and pass in an id and accept it on the editor page. Note that if multiple instances are needed, the ids must not be the same.
<template>
<p>
<editor ref="editor" id="tab1Editor"></editor>
<button @click="getContent" class="m-t-10">获取内容</button>
<p>
<span>当前富文本编辑器内容是: {{content}}</span>
</p>
</p>
</template>
<script>
import Editor from '@/components/editor'
export default {
name: 'tab1',
components: { Editor },
data() {
return {
content:''
}
},
methods: {
//获取内容
getContent(){
this.content = this.$refs.editor.content
}
}
}
</script>
<style scoped>
.m-t-10{
margin-top: 10px;
}
</style>Editor page code, because we apply keep-alive in router-view, so the initialization of ueditor must be placed in activated,
Ensure that ueditor will be re-rendered every time you enter the page, in deactivated Call ueditor's destroy method to ensure that the editor instance will be destroyed every time you leave the page, so that multiple ueditor instances can be rendered, and the editor content can be saved every time you switch.
If multiple tabs only need one instance, please call the reset() method
<template>
<p>
<p :id="this.id"></p>
</p>
</template>
<script>
export default {
name: 'editor',
props: ['id'],
data() {
return {
ue: '', //ueditor实例
content: '', //编辑器内容
}
},
methods: {
//初始化编辑器
initEditor() {
this.ue = UE.getEditor(this.id, {
initialFrameWidth: '100%',
initialFrameHeight: '350',
scaleEnabled: true
})
//编辑器准备就绪后会触发该事件
this.ue.addListener('ready',()=>{
//设置可以编辑
this.ue.setEnabled()
})
//编辑器内容修改时
this.selectionchange()
},
//编辑器内容修改时
selectionchange() {
this.ue.addListener('selectionchange', () => {
this.content = this.ue.getContent()
})
}
},
activated() {
//初始化编辑器
this.initEditor()
},
deactivated() {
//销毁编辑器实例,使用textarea代替
this.ue.destroy()
//重置编辑器,可用来做多个tab使用同一个编辑器实例
//如果要使用同一个实例,请注释destroy()方法
//this.ue.reset()
}
}
</script>Related recommendations:
The above is the detailed content of Detailed explanation of how to create multiple ueditors in vue. For more information, please follow other related articles on the PHP Chinese website!

Hot AI Tools

Undresser.AI Undress
AI-powered app for creating realistic nude photos

AI Clothes Remover
Online AI tool for removing clothes from photos.

Undress AI Tool
Undress images for free

Clothoff.io
AI clothes remover

Video Face Swap
Swap faces in any video effortlessly with our completely free AI face swap tool!

Hot Article
Hot Tools

Notepad++7.3.1
Easy-to-use and free code editor

SublimeText3 Chinese version
Chinese version, very easy to use

Zend Studio 13.0.1
Powerful PHP integrated development environment

Dreamweaver CS6
Visual web development tools

SublimeText3 Mac version
God-level code editing software (SublimeText3)
Hot Topics


 How to create a cumulative curve graph in Python?
Aug 23, 2023 pm 08:33 PM
How to create a cumulative curve graph in Python?
Aug 23, 2023 pm 08:33 PM
The ogive graph graphically represents the cumulative distribution function (CDF) of a set of data, sometimes called a cumulative frequency curve. It is used to examine data distribution and discover patterns and trends. Matplotlib, Pandas, and Numpy are some of the libraries and tools provided by Python for creating otive graphics. In this tutorial, we will look at how to use Matplotlib to generate ogive graphics in Python. To create a cumulative curve chart, we need to import the required libraries. In this example we will use Matplotlib, Pandas and Numpy. Matplotlib is a popular data visualization library for creating in Python
 How to create a constant in Python?
Aug 29, 2023 pm 05:17 PM
How to create a constant in Python?
Aug 29, 2023 pm 05:17 PM
Constants and variables are used to store data values in programming. A variable usually refers to a value that can change over time. A constant is a type of variable whose value cannot be changed during program execution. There are only six built-in constants available in Python, they are False, True, None, NotImplemented, Ellipsis(...) and __debug__. Apart from these constants, Python does not have any built-in data types to store constant values. Example An example of a constant is demonstrated below - False=100 outputs SyntaxError:cannotassigntoFalseFalse is a built-in constant in Python that is used to store boolean values
 How to personalize your iPhone on the latest iOS 17
Sep 21, 2023 am 08:17 AM
How to personalize your iPhone on the latest iOS 17
Sep 21, 2023 am 08:17 AM
How to Personalize Calls on iPhone Apple’s iOS 17 introduces a new feature called Contact Posters that allows you to personalize the look of your call screen on your iPhone. This feature allows you to design a poster using selected photos, colors, fonts, and Memoji as contact cards. So when you make a call, your custom image will appear on the recipient's iPhone exactly as you envisioned. You can choose to share your unique contact poster with all your saved contacts, or choose who can see it. Likewise, during a call exchange, you will also see other people's contact posters. Additionally, Apple lets you set specific contact photos for individual contacts, making calls from those contacts
 How to create a folder on Realme Phone?
Mar 23, 2024 pm 02:30 PM
How to create a folder on Realme Phone?
Mar 23, 2024 pm 02:30 PM
Title: Realme Phone Beginner’s Guide: How to Create Folders on Realme Phone? In today's society, mobile phones have become an indispensable tool in people's lives. As a popular smartphone brand, Realme Phone is loved by users for its simple and practical operating system. In the process of using Realme phones, many people may encounter situations where they need to organize files and applications on their phones, and creating folders is an effective way. This article will introduce how to create folders on Realme phones to help users better manage their phone content. No.
 How to create pixel art in GIMP
Feb 19, 2024 pm 03:24 PM
How to create pixel art in GIMP
Feb 19, 2024 pm 03:24 PM
This article will interest you if you are interested in using GIMP for pixel art creation on Windows. GIMP is a well-known graphics editing software that is not only free and open source, but also helps users create beautiful images and designs easily. In addition to being suitable for beginners and professional designers alike, GIMP can also be used to create pixel art, a form of digital art that utilizes pixels as the only building blocks for drawing and creating. How to Create Pixel Art in GIMP Here are the main steps to create pixel pictures using GIMP on a Windows PC: Download and install GIMP, then launch the application. Create a new image. Resize width and height. Select the pencil tool. Set the brush type to pixels. set up
 How to create a family with Gree+
Mar 01, 2024 pm 12:40 PM
How to create a family with Gree+
Mar 01, 2024 pm 12:40 PM
Many friends expressed that they want to know how to create a family in Gree+ software. Here is the operation method for you. Friends who want to know more, come and take a look with me. First, open the Gree+ software on your mobile phone and log in. Then, in the options bar at the bottom of the page, click the "My" option on the far right to enter the personal account page. 2. After coming to my page, there is a "Create Family" option under "Family". After finding it, click on it to enter. 3. Next jump to the page to create a family, enter the family name to be set in the input box according to the prompts, and click the "Save" button in the upper right corner after entering it. 4. Finally, a "save successfully" prompt will pop up at the bottom of the page, indicating that the family has been successfully created.
 How to create a Gantt chart using Highcharts
Dec 17, 2023 pm 07:23 PM
How to create a Gantt chart using Highcharts
Dec 17, 2023 pm 07:23 PM
How to use Highcharts to create a Gantt chart requires specific code examples. Introduction: The Gantt chart is a chart form commonly used to display project progress and time management. It can visually display the start time, end time and progress of the task. Highcharts is a powerful JavaScript chart library that provides rich chart types and flexible configuration options. This article will introduce how to use Highcharts to create a Gantt chart and give specific code examples. 1. Highchart
 How to Create a Contact Poster for Your iPhone
Mar 02, 2024 am 11:30 AM
How to Create a Contact Poster for Your iPhone
Mar 02, 2024 am 11:30 AM
In iOS17, Apple has added a contact poster feature to its commonly used Phone and Contacts apps. This feature allows users to set personalized posters for each contact, making the address book more visual and personal. Contact posters can help users identify and locate specific contacts more quickly, improving user experience. Through this feature, users can add specific pictures or logos to each contact according to their preferences and needs, making the address book interface more vivid. Apple in iOS17 provides iPhone users with a novel way to express themselves, and added a personalizable contact poster. The Contact Poster feature allows you to display unique, personalized content when calling other iPhone users. you
