

Play with js settings to randomly switch background images

The function of js should not be underestimated. If you want to develop something well, js will greatly increase your score. This article will bring you a simple example of js setting to randomly switch background images. The editor thinks it is quite good, so I will share it with you now and give it as a reference for everyone. Let’s follow the editor to take a look, I hope it can help everyone.
The examples are as follows:
<script>

var imgs =["http://images.cnblogs.com/cnblogs_com/xiaobo-Linux/1112236/o_2.jpg",
       "http://images.cnblogs.com/cnblogs_com/xiaobo-Linux/1112236/o_default.png",
       "http://images.cnblogs.com/cnblogs_com/xiaobo-Linux/1112236/o_3.jpg",
       "http://images.cnblogs.com/cnblogs_com/xiaobo-Linux/1112236/o_1.jpg",
       "http://images.cnblogs.com/cnblogs_com/xiaobo-Linux/1112236/o_4.jpg",
       "http://images.cnblogs.com/cnblogs_com/xiaobo-Linux/1112236/o_5.jpg",
       "http://images.cnblogs.com/cnblogs_com/xiaobo-Linux/1112236/o_6.jpg",
       "http://images.cnblogs.com/cnblogs_com/xiaobo-Linux/1112236/o_default-2.jpg",
       ];

var index=Math.floor(Math.random()*8);
var img = imgs[index];
    function time(){

       document.body.style.backgroundImage="url("+img+")";

    }

document.body.onload = function(){
 time();
}
</script>The code looks very simple, I wonder if you have mastered it? Hurry up and give it a try.
Related recommendations:
JS method of randomly switching background images on web pages_javascript skills
IE6 a tag switching background image cannot take effect immediately_html/css_WEB-ITnose
The above is the detailed content of Play with js settings to randomly switch background images. For more information, please follow other related articles on the PHP Chinese website!

Hot AI Tools

Undresser.AI Undress
AI-powered app for creating realistic nude photos

AI Clothes Remover
Online AI tool for removing clothes from photos.

Undress AI Tool
Undress images for free

Clothoff.io
AI clothes remover

Video Face Swap
Swap faces in any video effortlessly with our completely free AI face swap tool!

Hot Article
Hot Tools

Notepad++7.3.1
Easy-to-use and free code editor

SublimeText3 Chinese version
Chinese version, very easy to use

Zend Studio 13.0.1
Powerful PHP integrated development environment

Dreamweaver CS6
Visual web development tools

SublimeText3 Mac version
God-level code editing software (SublimeText3)
Hot Topics
 1655
1655
 14
1413
52
1306
25
1252
29
1225
24
14
1413
52
1306
25
1252
29
1225
24

 How to delete background image in win10 personalization settings
Dec 21, 2023 pm 02:31 PM
How to delete background image in win10 personalization settings
Dec 21, 2023 pm 02:31 PM
Every time the desktop background used in Win10 system will be displayed in the personalized background image in the settings, some users want to delete it, but don’t know how to do it. This article is about how to delete the personalized background image in Win10 shared by this site. View used desktop background images: 1. Click [right-click] on a blank space on the desktop, and select [Personalize] in the menu item that opens; 2. In the selection image in the background, you can view the desktop backgrounds you have used. Picture; delete the used desktop background picture: Note: This operation involves modifying the registry. Modifying the registry is risky. Please back up the data in advance. 1. Press the [Win+R] key combination at the same time to open the run window and enter [regedit] ] command, and then click [OK]; 2
 Operation tutorial for switching from win11 home version to professional version_Operation tutorial for switching from win11 home version to professional version
Mar 20, 2024 pm 01:58 PM
Operation tutorial for switching from win11 home version to professional version_Operation tutorial for switching from win11 home version to professional version
Mar 20, 2024 pm 01:58 PM
How to convert Win11 Home Edition to Win11 Professional Edition? In Win11 system, it is divided into Home Edition, Professional Edition, Enterprise Edition, etc., and most Win11 notebooks are pre-installed with Win11 Home Edition system. Today, the editor will show you the steps to switch from win11 home version to professional version! 1. First, right-click on this computer on the win11 desktop and properties. 2. Click Change Product Key or Upgrade Windows. 3. Then click Change Product Key after entering. 4. Enter the activation key: 8G7XN-V7YWC-W8RPC-V73KB-YWRDB and select Next. 5. Then it will prompt success, so you can upgrade win11 home version to win11 professional version.
 WebSocket and JavaScript: key technologies for implementing real-time monitoring systems
Dec 17, 2023 pm 05:30 PM
WebSocket and JavaScript: key technologies for implementing real-time monitoring systems
Dec 17, 2023 pm 05:30 PM
WebSocket and JavaScript: Key technologies for realizing real-time monitoring systems Introduction: With the rapid development of Internet technology, real-time monitoring systems have been widely used in various fields. One of the key technologies to achieve real-time monitoring is the combination of WebSocket and JavaScript. This article will introduce the application of WebSocket and JavaScript in real-time monitoring systems, give code examples, and explain their implementation principles in detail. 1. WebSocket technology
 How to switch between 4g and 5g on Xiaomi Mi 14Ultra?
Feb 23, 2024 am 11:49 AM
How to switch between 4g and 5g on Xiaomi Mi 14Ultra?
Feb 23, 2024 am 11:49 AM
Xiaomi 14Ultra is one of the most popular Xiaomi models this year. Xiaomi 14Ultra not only upgrades the processor and various configurations, but also brings many new functional applications to users. This can be seen from the sales of Xiaomi 14Ultra mobile phones. It is very popular, but there are some commonly used functions that you may not know yet. So how does Xiaomi 14Ultra switch between 4g and 5g? Let me introduce the specific content to you below! How to switch between 4g and 5g on Xiaomi 14Ultra? 1. Open the settings menu of your phone. 2. Find and select the "Network" and "Mobile Network" options in the settings menu. 3. In the mobile network settings, you will see the "Preferred network type" option. 4. Click or select this option and you will see
 How to implement dual system switching in Win10 system
Jan 03, 2024 pm 05:41 PM
How to implement dual system switching in Win10 system
Jan 03, 2024 pm 05:41 PM
Many friends may not be used to the win system when they first come into contact with it. There are dual systems in the computer. At this time, you can actually switch between the two systems. Let's take a look at the detailed steps for switching between the two systems. How to switch between two systems in win10 system 1. Shortcut key switching 1. Press the "win" + "R" keys to open Run 2. Enter "msconfig" in the run box and click "OK" 3. In the open "System Configuration" In the interface, select the system you need and click "Set as Default". After completion, "Restart" can complete the switch. Method 2. Select switch when booting 1. When you have dual systems, a selection operation interface will appear when booting. You can use the keyboard " Up and down keys to select the system
 Switch the dual system boot mode of Apple computer
Feb 19, 2024 pm 06:50 PM
Switch the dual system boot mode of Apple computer
Feb 19, 2024 pm 06:50 PM
How to switch between Apple dual systems when starting up Apple computers are powerful devices. In addition to their own macOS operating system, you can also choose to install other operating systems, such as Windows, to achieve dual system switching. So how do we switch between the two systems when booting? This article will introduce to you how to switch between dual systems on Apple computers. First of all, before installing dual systems, we need to confirm whether our Apple computer supports dual system switching. Generally speaking, Apple computers are based on
 How to uniformly replace ppt background images
Mar 25, 2024 pm 04:16 PM
How to uniformly replace ppt background images
Mar 25, 2024 pm 04:16 PM
The unified replacement of PPT background images is an important operation to improve the visual style of presentations, and can be achieved through two main methods: slide master replacement and batch replacement. Slide master replacement involves deleting the original image and inserting a new image in the master, thereby applying to all slides. The batch replacement function directly replaces the background images of all slides in the presentation. A unified background image not only enhances your presentation but also enhances your audience's focus. It is important to choose high-quality images that are consistent with the theme, and you should pay attention to adjusting details such as transparency and size. In addition, PPT also provides rich background setting options, such as gradients, textures and patterns, which can be customized according to needs.
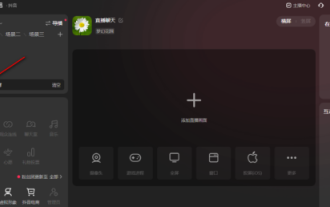 How to add a background image to Douyin Live Companion - How to add a background image to Douyin Live Companion
Mar 05, 2024 am 09:16 AM
How to add a background image to Douyin Live Companion - How to add a background image to Douyin Live Companion
Mar 05, 2024 am 09:16 AM
Many users who live broadcast on Douyin will use the Douyin Live Companion software, but do you know how to add a background image to the Douyin Live Companion? The following is the method of adding a background image to the Douyin Live Companion brought to you by the editor. If you are interested Users, please come and take a look below. First log in to Douyin Live Companion on your computer, and then enter the homepage. On the left, we select [Add Material] under [Scene 1]. Next, there will be a window to add materials on the page. We can directly select the [Picture] function and click to enter. We will then open a window where the image material is stored locally. We need to select the picture materials we want to add and then click the Open button in the lower right corner to add them. After adding the picture, we need to use the left mouse button to drag the picture to the appropriate
