

Detailed explanation of modules instances of vuex2.0

This article mainly introduces the modules of vuex2.0. The editor thinks it is quite good. Now I will share it with you and give you a reference. Let’s follow the editor to take a look, I hope it can help everyone.
What is module?
Background: State in Vue uses a single state tree structure. All the states should be placed in the state. If the project is more complex, the state is a large object. The store object will also become very large and difficult to manage.
module: Each module can have its own state, mutation, action, and getters, making the structure very clear and easy to manage.
How to use module?
General structure
const moduleA = {
 state: { ... },
 mutations: { ... },
 actions: { ... },
 getters: { ... }
 }
const moduleB = {
 state: { ... },
 mutations: { ... },
 actions: { ... }
 }

const store = new Vuex.Store({
 modules: {
  a: moduleA,
b: moduleB})Data inside the module: ①Internal state, the state inside the module is local, That is, the module is private, such as the list data in the car.js module state, which we need to obtain through this.$store.state.car.list; ② Internal getters, mutations, and actions are still registered in the global namespace. This This is so that multiple modules can respond to the same mutation at the same time; the result of this.$store.state.car.carGetter is undefined, which can be obtained through this.$store.state.carGetter.
Passing parameters: getters====({state(local state),getters(global getters object),roosState(root state)}); actions====({state(local State), commit, roosState (root state)}).
Create a new project to experience it, create a new project vuemodule through vue –cli, don’t forget to install vuex.
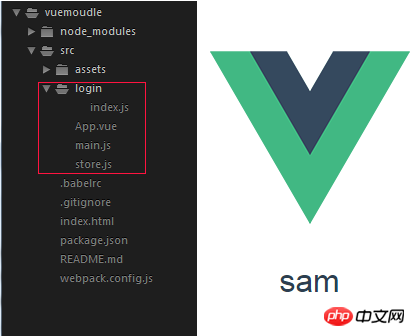
1, in the src directory Create a new login folder and create index.js in it to store the status of the login module. For the sake of simplicity, I put all the state, actions, mutations, and getters under the module in the index.js file.
First simply add a status to it, userName: “sam”
const state = {
  useName: "sam"
};
const mutations = {

};
const actions = {

};
const getters = {

};

// 不要忘记把state, mutations等暴露出去。
export default {
  state,
  mutations,
  actions,
  getters
}2, in the src directory, create a new store.js This is The root store, which introduces the login module through the modules attribute.
import Vue from "vue";
import Vuex from "Vuex";

Vue.use(Vuex);

// 引入login 模块
import login from "./login"

export default new Vuex.Store({
  // 通过modules属性引入login 模块。
  modules: {
    login: login
  }
})3, introduce store in main.js and inject it into the vue root instance.
import Vue from 'vue'
import App from './App.vue'

// 引入store
import store from "./store"

new Vue({
 el: '#app',
 store, // 注入到根实例中。
 render: h => h(App)
})4. Obtain the state under login through the computed attribute in app.vue. Note here that in the absence of modules, the component passes this.$ The store.state.attribute name can be obtained, but after there are modules, the state is restricted to the login namespace (module), so the module name (namespace) must be added in front of the attribute name, and this.$store.state is passed in the component. .Module name.Attribute name, here is the status successfully obtained from this.$store.state.login.userName
<template>
 <p id="app">
  <img src="./assets/logo.png">
  <h1>{{useName}}</h1>
 </p>
</template>

<script>
export default {
 // computed属性,从store 中获取状态state,不要忘记login命名空间。
 computed: {
  useName: function() {
   return this.$store.state.login.useName
  }
 }
}
</script>component. The project directory and display are as follows
4. Change the name through actions and mutations. This involves dispatch action, commit mutations, and mutations to change the state.
First Add changeName action and CHANGE_NAME mutations in the login folder index.js.
const mutations = {
  CHANGE_NAME (state, anotherName) {
    state.useName = anotherName;
  }
};

const actions = {
  changeName ({commit},anotherName) {
    commit("CHANGE_NAME", anotherName)
  }
};Add a button in app.vue:

Hot AI Tools

Undresser.AI Undress
AI-powered app for creating realistic nude photos

AI Clothes Remover
Online AI tool for removing clothes from photos.

Undress AI Tool
Undress images for free

Clothoff.io
AI clothes remover

AI Hentai Generator
Generate AI Hentai for free.

Hot Article
Hot Tools

Notepad++7.3.1
Easy-to-use and free code editor

SublimeText3 Chinese version
Chinese version, very easy to use

Zend Studio 13.0.1
Powerful PHP integrated development environment

Dreamweaver CS6
Visual web development tools

SublimeText3 Mac version
God-level code editing software (SublimeText3)
Hot Topics
 1377
1377
 52
52

 Detailed explanation of the mode function in C++
Nov 18, 2023 pm 03:08 PM
Detailed explanation of the mode function in C++
Nov 18, 2023 pm 03:08 PM
Detailed explanation of the mode function in C++ In statistics, the mode refers to the value that appears most frequently in a set of data. In C++ language, we can find the mode in any set of data by writing a mode function. The mode function can be implemented in many different ways, two of the commonly used methods will be introduced in detail below. The first method is to use a hash table to count the number of occurrences of each number. First, we need to define a hash table with each number as the key and the number of occurrences as the value. Then, for a given data set, we run
 Detailed explanation of obtaining administrator rights in Win11
Mar 08, 2024 pm 03:06 PM
Detailed explanation of obtaining administrator rights in Win11
Mar 08, 2024 pm 03:06 PM
Windows operating system is one of the most popular operating systems in the world, and its new version Win11 has attracted much attention. In the Win11 system, obtaining administrator rights is an important operation. Administrator rights allow users to perform more operations and settings on the system. This article will introduce in detail how to obtain administrator permissions in Win11 system and how to effectively manage permissions. In the Win11 system, administrator rights are divided into two types: local administrator and domain administrator. A local administrator has full administrative rights to the local computer
 Detailed explanation of division operation in Oracle SQL
Mar 10, 2024 am 09:51 AM
Detailed explanation of division operation in Oracle SQL
Mar 10, 2024 am 09:51 AM
Detailed explanation of division operation in OracleSQL In OracleSQL, division operation is a common and important mathematical operation, used to calculate the result of dividing two numbers. Division is often used in database queries, so understanding the division operation and its usage in OracleSQL is one of the essential skills for database developers. This article will discuss the relevant knowledge of division operations in OracleSQL in detail and provide specific code examples for readers' reference. 1. Division operation in OracleSQL
 Detailed explanation of remainder function in C++
Nov 18, 2023 pm 02:41 PM
Detailed explanation of remainder function in C++
Nov 18, 2023 pm 02:41 PM
Detailed explanation of the remainder function in C++ In C++, the remainder operator (%) is used to calculate the remainder of the division of two numbers. It is a binary operator whose operands can be any integer type (including char, short, int, long, etc.) or a floating-point number type (such as float, double). The remainder operator returns a result with the same sign as the dividend. For example, for the remainder operation of integers, we can use the following code to implement: inta=10;intb=3;
 Detailed explanation of the usage of Vue.nextTick function and its application in asynchronous updates
Jul 26, 2023 am 08:57 AM
Detailed explanation of the usage of Vue.nextTick function and its application in asynchronous updates
Jul 26, 2023 am 08:57 AM
Detailed explanation of the usage of Vue.nextTick function and its application in asynchronous updates. In Vue development, we often encounter situations where data needs to be updated asynchronously. For example, data needs to be updated immediately after modifying the DOM or related operations need to be performed immediately after the data is updated. The .nextTick function provided by Vue emerged to solve this type of problem. This article will introduce the usage of the Vue.nextTick function in detail, and combine it with code examples to illustrate its application in asynchronous updates. 1. Vue.nex
 Detailed explanation of php-fpm tuning method
Jul 08, 2023 pm 04:31 PM
Detailed explanation of php-fpm tuning method
Jul 08, 2023 pm 04:31 PM
PHP-FPM is a commonly used PHP process manager used to provide better PHP performance and stability. However, in a high-load environment, the default configuration of PHP-FPM may not meet the needs, so we need to tune it. This article will introduce the tuning method of PHP-FPM in detail and give some code examples. 1. Increase the number of processes. By default, PHP-FPM only starts a small number of processes to handle requests. In a high-load environment, we can improve the concurrency of PHP-FPM by increasing the number of processes
 Detailed explanation of the role and usage of PHP modulo operator
Mar 19, 2024 pm 04:33 PM
Detailed explanation of the role and usage of PHP modulo operator
Mar 19, 2024 pm 04:33 PM
The modulo operator (%) in PHP is used to obtain the remainder of the division of two numbers. In this article, we will discuss the role and usage of the modulo operator in detail, and provide specific code examples to help readers better understand. 1. The role of the modulo operator In mathematics, when we divide an integer by another integer, we get a quotient and a remainder. For example, when we divide 10 by 3, the quotient is 3 and the remainder is 1. The modulo operator is used to obtain this remainder. 2. Usage of the modulo operator In PHP, use the % symbol to represent the modulus
 Detailed explanation of the linux system call system() function
Feb 22, 2024 pm 08:21 PM
Detailed explanation of the linux system call system() function
Feb 22, 2024 pm 08:21 PM
Detailed explanation of Linux system call system() function System call is a very important part of the Linux operating system. It provides a way to interact with the system kernel. Among them, the system() function is one of the commonly used system call functions. This article will introduce the use of the system() function in detail and provide corresponding code examples. Basic Concepts of System Calls System calls are a way for user programs to interact with the operating system kernel. User programs request the operating system by calling system call functions
