This article mainly introduces to you the sliding verification function of using puppeteer to crack Jiexian. The basic process code implementation is introduced to you in very detail. Friends who need it can refer to it. I hope it can help everyone.
Basic process:
1. Open the front-end network and click to log in.
2. Fill in the account number and password.
3. Click the verification button, verify by sliding, and finally log in successfully.
Code implementation:
Checkout is available on github.
The specific code is as follows:
run.js
const puppeteer = require('puppeteer');
const devices = require('puppeteer/DeviceDescriptors');
const iPhone = devices['iPhone 6 Plus'];
let timeout = function (delay) {
  return new Promise((resolve, reject) => {
   setTimeout(() => {
     try {
      resolve(1)
     } catch (e) {
      reject(0)
     }
   }, delay);
  })
 }
 let page = null
 let btn_position = null
 let times = 0 // 执行重新滑动的次数
 const distanceError = [-10,2,3,5] // 距离误差
 async function run() {
 const browser = await puppeteer.launch({
  headless:false //这里我设置成false主要是为了让大家看到效果,设置为true就不会打开浏览器
 });
 page = await browser.newPage();
 // 1.打开前端网
 await page.emulate(iPhone);
 await page.goto('https://www.qdfuns.com/');
 await timeout(1000);
 // 2.打开登录页面
 page.click('a[data-type=login]')
 await timeout(1000);
 // 3.输入账号密码
 page.type('input[data-type=email]','你的账号')
 await timeout(500);
 page.type('input[placeholder=密码]','你的密码')
 await timeout(1000);
 // 4.点击验证
 page.click('.geetest_radar_tip')
 await timeout(1000);
 btn_position = await getBtnPosition();
 // 5.滑动
 drag(null)
 }
 /**
 * 计算按钮需要滑动的距离
 * */
 async function calculateDistance() {
 const distance = await page.evaluate(() => {
 // 比较像素,找到缺口的大概位置
 function compare(document) {
  const ctx1 = document.querySelector('.geetest_canvas_fullbg'); // 完成图片
  const ctx2 = document.querySelector('.geetest_canvas_bg'); // 带缺口图片
  const pixelDifference = 30; // 像素差
  let res = []; // 保存像素差较大的x坐标
  // 对比像素
  for(let i=57;i<260;i++){
  for(let j=1;j<160;j++) {
   const imgData1 = ctx1.getContext("2d").getImageData(1*i,1*j,1,1)
   const imgData2 = ctx2.getContext("2d").getImageData(1*i,1*j,1,1)
   const data1 = imgData1.data;
   const data2 = imgData2.data;
   const res1=Math.abs(data1[0]-data2[0]);
   const res2=Math.abs(data1[1]-data2[1]);
   const res3=Math.abs(data1[2]-data2[2]);
    if(!(res1 < pixelDifference && res2 < pixelDifference && res3 < pixelDifference)) {
    if(!res.includes(i)) {
     res.push(i);
    }
    }
  }
  }
  // 返回像素差最大值跟最小值,经过调试最小值往左小7像素,最大值往左54像素
  return {min:res[0]-7,max:res[res.length-1]-54}
 }
 return compare(document)
 })
 return distance;
 }
 /**
 * 计算滑块位置
 */
 async function getBtnPosition() {
 const btn_position = await page.evaluate(() => {
 const {clientWidth,clientHeight} = document.querySelector('.geetest_popup_ghost')
 return {btn_left:clientWidth/2-104,btn_top:clientHeight/2+59}
 })
 return btn_position;
 }
 /**
 * 尝试滑动按钮
 * @param distance 滑动距离
 * */
 async function tryValidation(distance) {
 //将距离拆分成两段,模拟正常人的行为
 const distance1 = distance - 10
 const distance2 = 10
 page.mouse.click(btn_position.btn_left,btn_position.btn_top,{delay:2000})
 page.mouse.down(btn_position.btn_left,btn_position.btn_top)
 page.mouse.move(btn_position.btn_left+distance1,btn_position.btn_top,{steps:30})
 await timeout(800);
 page.mouse.move(btn_position.btn_left+distance1+distance2,btn_position.btn_top,{steps:20})
 await timeout(800);
 page.mouse.up()
 await timeout(4000);
 // 判断是否验证成功
 const isSuccess = await page.evaluate(() => {
 return document.querySelector('.geetest_success_radar_tip_content') && document.querySelector('.geetest_success_radar_tip_content').innerHTML
 })
 await timeout(1000);
 // 判断是否需要重新计算距离
 const reDistance = await page.evaluate(() => {
 return document.querySelector('.geetest_result_content') && document.querySelector('.geetest_result_content').innerHTML
 })
 await timeout(1000);
 return {isSuccess:isSuccess==='验证成功',reDistance:reDistance.includes('怪物吃了拼图')}
 }
 /**
 * 拖动滑块
 * @param distance 滑动距离
 * */
 async function drag(distance) {
 distance = distance || await calculateDistance();
 const result = await tryValidation(distance.min)
 if(result.isSuccess) {
 await timeout(1000);
 //登录
 console.log('验证成功')
 page.click('#modal-member-login button')
 }else if(result.reDistance) {
 console.log('重新计算滑距离录,重新滑动')
 times = 0
 await drag(null)
 } else {
 if(distanceError[times]){
  times ++
  console.log('重新滑动')
  await drag({min:distance.max,max:distance.max+distanceError[times]})
 } else {
  console.log('滑动失败')
  times = 0
  run()
 }
 }
 }
 run()
package.json
{
 "name": "demo",
 "version": "1.0.0",
 "dependencies": {
 "puppeteer": "^1.0.0"
 }
}
Copy after login
Run
1. Save these two files to the folder and switch the terminal Go to the current path
2. npm i
3. Fill in the front-end network account and password
4. node run
Demo
The demonstration in the figure below can be divided into four steps:
1. Open the login page and enter the account and password written in advance.
2. When dragging the slider for the first time, it prompts "Been eaten by a monster", so the gap distance of the new picture is recalculated.
3. Secondly, after dragging three times, the message "Incorrect combination" appears, so drag again.
4. Verification successful, log in.
(Please put the mouse on the gif to see the demonstration effect, or please drag it to a new window to open the gif)

Instructions
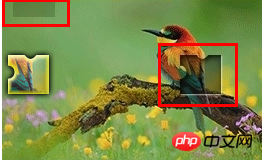
1 . There are three canvases for sliding verification, among which only the ones with classnames of 'geetest_canvas_fullbg' and 'geetest_canvas_bg' are required for pixel difference comparison. ps: The former is a complete picture, and the latter is a notched picture.

2. Every picture with a gap has a misleading shadow, so when comparing the pixel difference, the calculated distances are misleading shadow and gap respectively. Therefore, for the value of the sliding distance, I take '{min:res[0]-7,max:res[res.length-1]-54}'. When the notch is to the left of the misleading shadow, the min (minimum distance) value is the sliding distance, otherwise it is max (maximum distance) minus the slider width.
3. The sliding results are divided into three situations: successful verification, eaten, and failed. "Eat" will re-request the image, so the distance is recalculated before sliding; "Failed" will re-swipe. If it still fails after executing 4 times, the entire process will be re-run.
Related recommendations:
js plug-in to implement image sliding verification code example sharing
The above is the detailed content of How to crack sliding verification code using puppeteer. For more information, please follow other related articles on the PHP Chinese website!


![[Web front-end] Node.js quick start](https://img.php.cn/upload/course/000/000/067/662b5d34ba7c0227.png)


