How to set up routing in Vue.js
This time I will show you how to set up routing in Vue.js, and what are the notes for setting up routing in Vue.js. Here is a practical case, let’s take a look.
① Routing map
Import vue-router in main.js
import VRouter from 'vue-router'
Set global routing
Vue.use(VRouter)
Instantiate router
let router = new VRouter({ // 如果mode设为history, 那么地址就可以不使用哈希(# 哈希)了,就可以直接访问. http://localhost:8080/#/apple ==>> http://localhost:8080/apple
  mode: 'history',  routes: [    //  做一个映射表
    {      path: '/apple',      component: Apple
    },
    {      path: '/banana',      component: Banana
    }
  ]
})
/* eslint-disable no-new */new Vue({  el: '#app',
  router,
  template: '<app></app>',
  components: { App }
})②RoutingView
Embed
<template> <div>
 <!--
访问apple的时候,将apple的视图塞到这个位置
访问banana的时候,将banana的视图塞到这个位置
-->
<router-view></router-view>
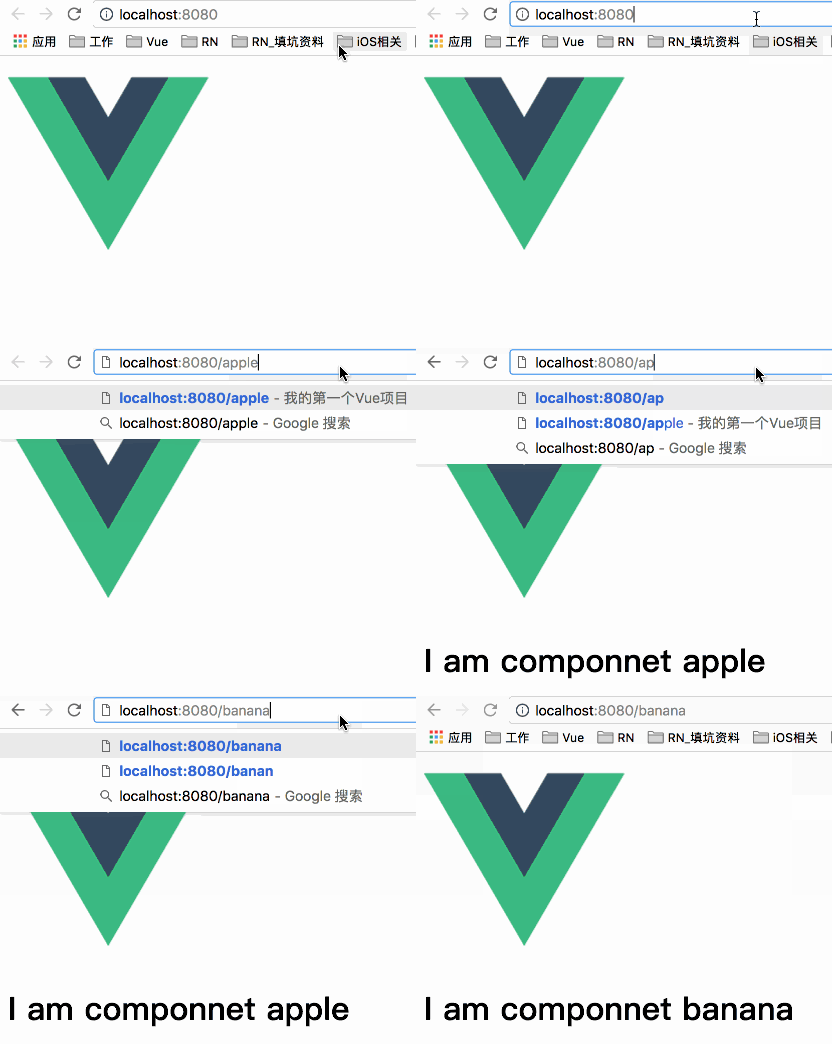
</div></template>Achieve effect

③ RouteNavigation
In In the app.vue file, embed the router-link tag, which can achieve the effect of a tag
Specific use:
<template>
<div id="app">
 <!--
访问apple的时候,将apple的视图塞到这个位置
访问banana的时候,将banana的视图塞到这个位置
-->
<router-view></router-view>
<router-link :to="{path:'apple'}">to apple</router-link>
<router-link :to="{path:'banana'}">to banana</router-link>
</div></template>Effect:

I believe you have mastered the method after reading the case in this article, For more exciting content, please pay attention to other related articles on the php Chinese website!
Recommended reading:
Vue tag attributes and conditional rendering of Vue.js
List rendering v of Vue.js -for array object subcomponent
The above is the detailed content of How to set up routing in Vue.js. For more information, please follow other related articles on the PHP Chinese website!

Hot AI Tools

Undresser.AI Undress
AI-powered app for creating realistic nude photos

AI Clothes Remover
Online AI tool for removing clothes from photos.

Undress AI Tool
Undress images for free

Clothoff.io
AI clothes remover

AI Hentai Generator
Generate AI Hentai for free.

Hot Article

Hot Tools

Notepad++7.3.1
Easy-to-use and free code editor

SublimeText3 Chinese version
Chinese version, very easy to use

Zend Studio 13.0.1
Powerful PHP integrated development environment

Dreamweaver CS6
Visual web development tools

SublimeText3 Mac version
God-level code editing software (SublimeText3)

Hot Topics
 1377
1377
 52
52
 How to implement an online speech recognition system using WebSocket and JavaScript
Dec 17, 2023 pm 02:54 PM
How to use WebSocket and JavaScript to implement an online speech recognition system Introduction: With the continuous development of technology, speech recognition technology has become an important part of the field of artificial intelligence. The online speech recognition system based on WebSocket and JavaScript has the characteristics of low latency, real-time and cross-platform, and has become a widely used solution. This article will introduce how to use WebSocket and JavaScript to implement an online speech recognition system.
 WebSocket and JavaScript: key technologies for implementing real-time monitoring systems
Dec 17, 2023 pm 05:30 PM
WebSocket and JavaScript: Key technologies for realizing real-time monitoring systems Introduction: With the rapid development of Internet technology, real-time monitoring systems have been widely used in various fields. One of the key technologies to achieve real-time monitoring is the combination of WebSocket and JavaScript. This article will introduce the application of WebSocket and JavaScript in real-time monitoring systems, give code examples, and explain their implementation principles in detail. 1. WebSocket technology
 Java Apache Camel: Building a flexible and efficient service-oriented architecture
Feb 19, 2024 pm 04:12 PM
Apache Camel is an Enterprise Service Bus (ESB)-based integration framework that can easily integrate disparate applications, services, and data sources to automate complex business processes. ApacheCamel uses route-based configuration to easily define and manage integration processes. Key features of ApacheCamel include: Flexibility: ApacheCamel can be easily integrated with a variety of applications, services, and data sources. It supports multiple protocols, including HTTP, JMS, SOAP, FTP, etc. Efficiency: ApacheCamel is very efficient, it can handle a large number of messages. It uses an asynchronous messaging mechanism, which improves performance. Expandable
 JavaScript and WebSocket: Building an efficient real-time weather forecasting system
Dec 17, 2023 pm 05:13 PM
JavaScript and WebSocket: Building an efficient real-time weather forecast system Introduction: Today, the accuracy of weather forecasts is of great significance to daily life and decision-making. As technology develops, we can provide more accurate and reliable weather forecasts by obtaining weather data in real time. In this article, we will learn how to use JavaScript and WebSocket technology to build an efficient real-time weather forecast system. This article will demonstrate the implementation process through specific code examples. We
 Simple JavaScript Tutorial: How to Get HTTP Status Code
Jan 05, 2024 pm 06:08 PM
JavaScript tutorial: How to get HTTP status code, specific code examples are required. Preface: In web development, data interaction with the server is often involved. When communicating with the server, we often need to obtain the returned HTTP status code to determine whether the operation is successful, and perform corresponding processing based on different status codes. This article will teach you how to use JavaScript to obtain HTTP status codes and provide some practical code examples. Using XMLHttpRequest
 How to get HTTP status code in JavaScript the easy way
Jan 05, 2024 pm 01:37 PM
Introduction to the method of obtaining HTTP status code in JavaScript: In front-end development, we often need to deal with the interaction with the back-end interface, and HTTP status code is a very important part of it. Understanding and obtaining HTTP status codes helps us better handle the data returned by the interface. This article will introduce how to use JavaScript to obtain HTTP status codes and provide specific code examples. 1. What is HTTP status code? HTTP status code means that when the browser initiates a request to the server, the service
 How to use Golang functions to handle web request routing
May 02, 2024 am 10:18 AM
In Golang, using functions to handle web request routing is an extensible and modular method of building APIs. It involves the following steps: Install the HTTP router library. Create a router. Define path patterns and handler functions for routes. Write handler functions to handle requests and return responses. Run the router using an HTTP server. This process allows for a modular approach when handling incoming requests, improving reusability, maintainability, and testability.
 Dynamic addition and deletion methods of routes in uniapp
Dec 17, 2023 pm 02:55 PM
Uniapp is a cross-end framework based on Vue.js. It supports one-time writing and generates multi-end applications such as H5, mini programs, and APPs at the same time. It pays great attention to performance and development efficiency during the development process. In Uniapp, the dynamic addition and deletion of routes is a problem that is often encountered during the development process. Therefore, this article will introduce the dynamic addition and deletion of routes in Uniapp and provide specific code examples. 1. Dynamic addition of routes Dynamic addition of routes can be done according to actual needs when the page is loaded or after user operation.


