Home > Web Front-end > JS Tutorial > body text

Detailed explanation of the steps to generate routes using Angular CLI

php中世界最好的语言
Release: 2018-05-03 14:31:18
Original
1762 people have browsed it

This time I will bring you a detailed explanation of the Angular CLI generation routing steps, what are the notes of the Angular CLI generation path, the following is a practical case, let's take a look.

We know that using ng g module admin will generate admin module.

And using ng g m sales --routing will generate sales and sales-routing. module.

sales-routing contains the routing information, and it is imported into the sales module.

Generate routes for the application.

First Create a project:

ng new my-routing --routing
Copy after login

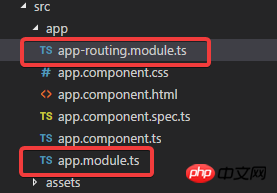
You can see that two modules are generated.

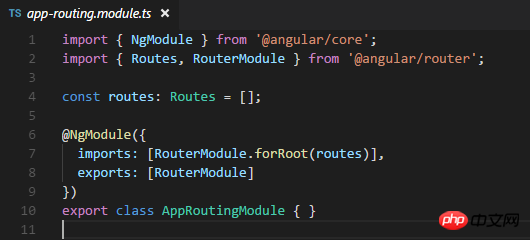
Look at the routing module:

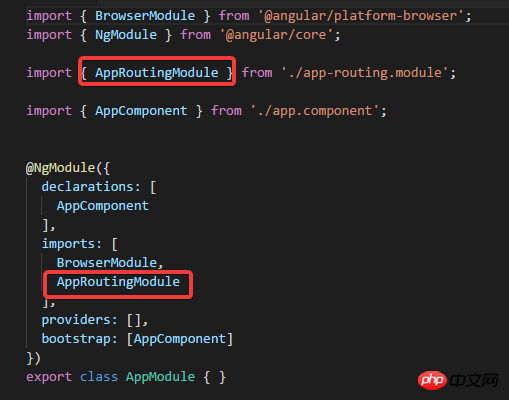
Look at the app module again:

The AppRoutingModule has been imported.

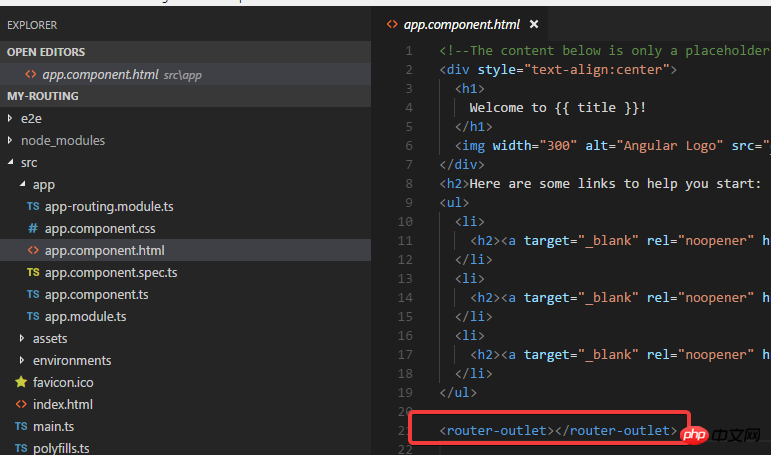
Look at app.component.html again:

router-outlet has been written. Very good.

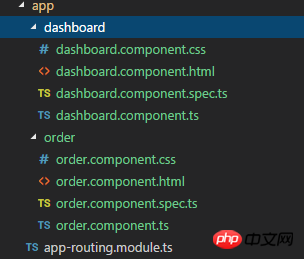
The following will generate two more components:

ng g c dashboard
ng g c order
Copy after login

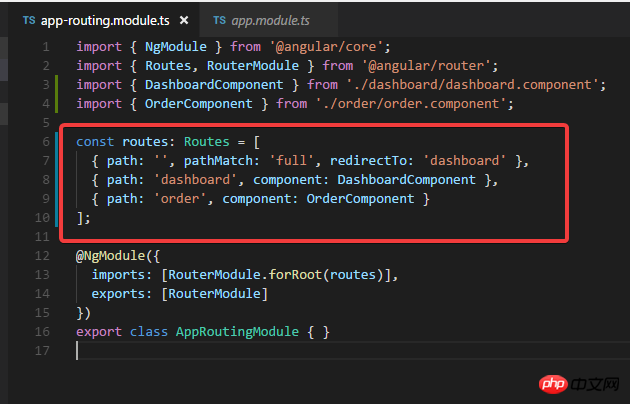
Then set the routing in app-routing.module:

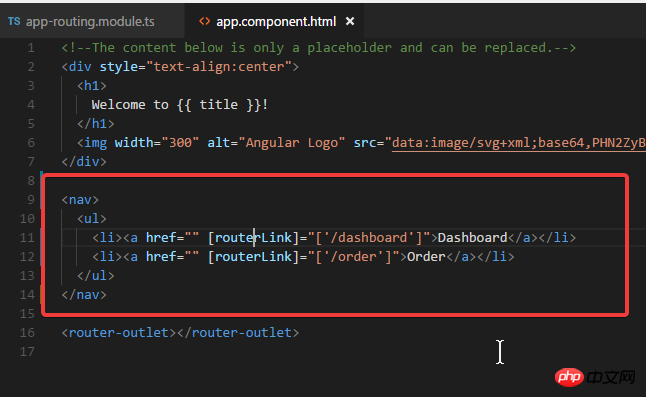
Modify the html again:

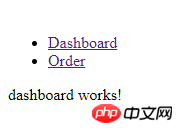
Run Next application: ng serve -o

Hmm. No problem.

For an application, there are In the case of multiple modules.

Generate another module with a routing module (you can first use the -d parameter to view the files to be generated):

ng g m admin --routing
Copy after login

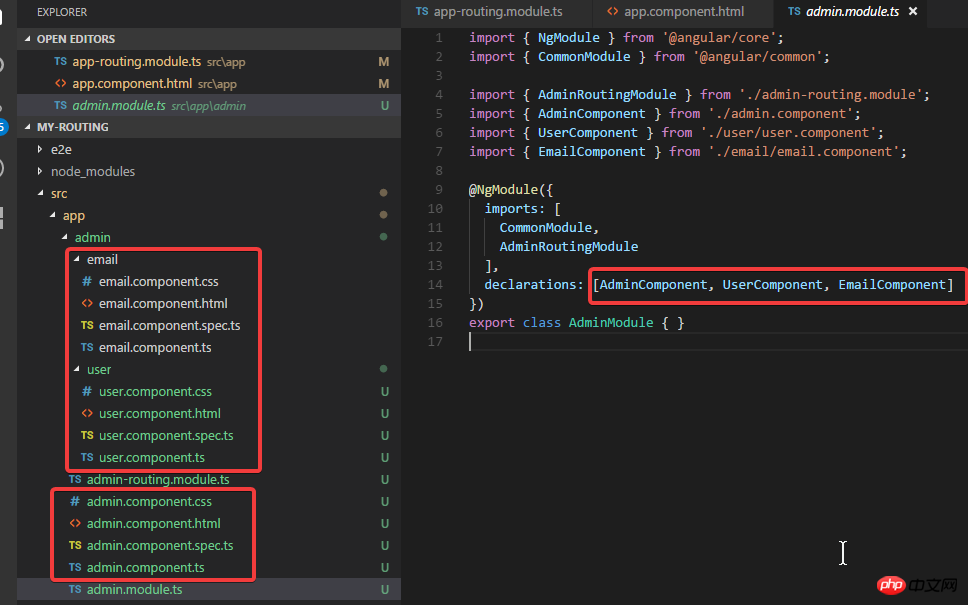
In the admin module, create another admin component:

ng g c admin
ng g c admin/email -m admin
ng g c admin/user -m admin
Copy after login

In fact, the -m parameter of the last two commands can be removed, because the path admin/ has been specified, so it will be in admin by default Make the declaration in module instead of app module.

Then you need to modify app.module:

Add the admin module into it.

Then Modify admin.component.html, add router-outlet:

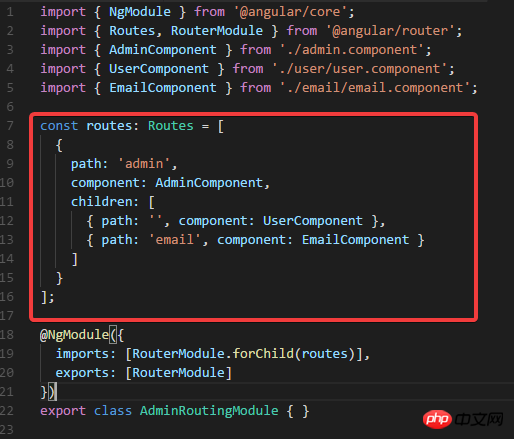
and then modify admin-routing.module.ts:

Run: ng serve -o

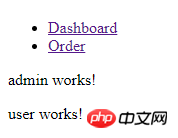
Directly enter the address: http://localhost:4200/admin

You can see:

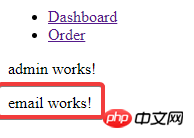
And enter the URL: http://localhost:4200/admin/email

, you will see:

So no problem.

Generate Gurad.

ng g guard xxx
Copy after login

This command will generate xxx.guard.ts

I believe you have mastered the method after reading the case in this article. For more exciting information, please pay attention to other related articles on the php Chinese website!

Recommended reading:

Detailed explanation of Angular component interaction steps

How to make jQuery enter trigger button event

The above is the detailed content of Detailed explanation of the steps to generate routes using Angular CLI. For more information, please follow other related articles on the PHP Chinese website!

Related labels:
source:php.cn
Statement of this Website
The content of this article is voluntarily contributed by netizens, and the copyright belongs to the original author. This site does not assume corresponding legal responsibility. If you find any content suspected of plagiarism or infringement, please contact admin@php.cn
Popular Tutorials
More>
Latest Downloads
More>
Web Effects
Website Source Code
Website Materials
Front End Template
About us Disclaimer Sitemap
php.cn:Public welfare online PHP training,Help PHP learners grow quickly!