

Detailed explanation of React Form component encapsulation steps
This time I will bring you a detailed explanation of the steps for encapsulating React Form components. What are the precautions for encapsulating React Form components? The following is a practical case, let’s take a look.
Preface
For web systems, form submission is a very common way to interact with users, such as when submitting an order. , you need to enter the recipient, mobile phone number, address and other information, or when setting up the system, you need to fill in some personal preference information. Form submission is a structured operation that can simplify development by encapsulating some common functions. This article will discuss the design ideas of FormForm component functions
Generally speaking, the functions of the Form component include the following points:- Form Layout
- Form Field
- Encapsulation
Form Validation&Error Prompt
- Form submission
Form layout
There are generally 3 ways of commonly used form layout:Inline layout

Horizontal layout

 The implementation is relatively simple, just nest css. For example, the structure of the form is as follows:
<form class="form">
  <label class="label"/>
  <field class="field"/>
</form>
corresponds to 3 layouts. You only need to add the corresponding class in the form tag:
<!--行内布局-->
<form class="form inline">
  <label class="label"/>
  <field class="field"/>
</form>
<!--水平布局-->
<form class="form horizontal">
  <label class="label"/>
  <field class="field"/>
</form>
<!--垂直布局-->
<form class="form vertical">
  <label class="label"/>
  <field class="field"/>
</form>
Correspondingly, you need to define the css of the 3 layouts:
.inline .label {
  display: inline-block;
  ...
}
.inline .field {
  display: inline-block;
  ...
}
.horizontal .label {
  display: inline-block;
  ...
}
.horizontal .field {
  display: inline-block;
  ...
}
.vertical .label {
  display: block;
  ...
}
.vertical .field {
  display: block;
  ...
}Form field encapsulationThe field encapsulation part generally encapsulates the components of the component library for Form, such as Input component, Select component, Checkbox component, etc. When existing fields cannot meet your needs, you can customize fields.
The fields of the form generally include two parts, one is the title and the other is the content. ZentForm encapsulates the structure and style through the high-order function getControlGroup. Its input parameter is the component to be displayed:
export default Control => {
  render() {
    return (
      <p className={groupClassName}>
        <label className="zent-formcontrol-label">
          {required ? <em className="zent-formrequired">*</em> : null}
          {label}
        </label>
        <p className="zent-formcontrols">
          <Control {...props} {...controlRef} />
          {showError && (
            <p className="zent-formerror-desc">{props.error}</p>
          )}
          {notice && <p className="zent-formnotice-desc">{notice}</p>}
          {helpDesc && <p className="zent-formhelp-desc">{helpDesc}</p>}
        </p>
      </p>
     );
  }
}The label and error information used here is passed in through the Field component :
<Field
label="预约门店:"
name="dept"
component={CustomizedComp}
validations={{
required: true,
}}
validationErrors={{
required: '预约门店不能为空',
}}
required
/>The CustomizedComp here is the component returned after being encapsulated by getControlGroup.
The interaction between fields and forms is an issue that needs to be considered. The form needs to know the field values it contains and needs to verify the fields at the appropriate time. The implementation of ZentForm is to maintain a field array in the higher-order component of the Form, and the content of the array is an instance of Field. Subsequently, the purpose of value acquisition and verification is achieved by operating these instances.
ZentForm is used as follows:
class FieldForm extends React.Component {
  render() {
    return (
      <Form>
        <Field
          name="name"
          component={CustomizedComp}
      </Form>
    )
  }
}
export default createForm()(FieldForm);Form and Field are components provided by the component library, CustomizedComp is a custom component, and createForm is a high-order function provided by the component library. In the component returned by createForm, an array of fields is maintained, and two methods, attachToForm and detachFromForm, are provided to operate this array. These two methods are saved in the context object, and Field can be called when loading and unloading. The simplified code is as follows:
/**
 * createForm高阶函数
 */
const createForm = (config = {}) => {
  ...
  return WrappedForm => {
    return class Form extends Component {
      constructor(props) {
        super(props);
        this.fields = [];
      }

      getChildContext() {
        return {
          zentForm: {
            attachToForm: this.attachToForm,
            detachFromForm: this.detachFromForm,
          }
        }
      }

      attachToForm = field => {
        if (this.fields.indexOf(field) < 0) {
          this.fields.push(field);
        }
      };

      detachFromForm = field => {
        const fieldPos = this.fields.indexOf(field);
        if (fieldPos >= 0) {
          this.fields.splice(fieldPos, 1);
        }
      };

      render() {
        return createElement(WrappedForm, {...});
      }
    }
  }
}
/**
 * Field组件
 */
class Field extends Component {
  componentWillMount() {
    this.context.zentForm.attachToForm(this);
  }

  componentWillUnmount() {
    this.context.zentForm.detachFromForm(this);
  }

  render() {
    const { component } = this.props;
    return createElement(component, {...});
  }
}When you need to obtain the form field value, you only need to traverse the fields array and then call the corresponding method of the Field instance:
/**
 * createForm高阶函数
 */
const createForm = (config = {}) => {
  ...
  return WrappedForm => {
    return class Form extends Component {
      getFormValues = () => {
        return this.fields.reduce((values, field) => {
          const name = field.getName();
          const fieldValue = field.getValue();
          values[name] = fieldValue;
          return values;
        }, {});
       };
    }
  }
}
/**
 * Field组件
 */
class Field extends Component {
  getValue = () => {
    return this.state._value;
  };
}Form validation & error prompt 表单验证是一个重头戏,只有验证通过了才能提交表单。验证的时机也有多种,如字段变更时、鼠标移出时和表单提交时。ZentForm提供了一些常用的验证规则,如非空验证,长度验证,邮箱地址验证等。当然还能自定义一些更复杂的验证方式。自定义验证方法可以通过两种方式传入ZentForm,一种是通过给createForm传参: 另一种方式是给Field组件传属性: 使用createForm传参的方式,验证规则是共享的,而Field的属性传参是字段专用的。validationErrors指定校验失败后的提示信息。这里的错误信息会显示在前面getControlGroup所定义HTML中 ZentForm的核心验证逻辑是createForm的runRules方法, 默认的校验时机是字段值改变的时候,可以通过Field的 对应的,在Field组件中有2个方法来处理change和blur事件: 当触发验证的时候,ZentForm是会对表单对所有字段进行验证,可以通过指定 表单提交 表单提交时,一般会经历如下几个步骤 表单验证 表单提交 提交成功处理 提交失败处理 ZentForm通过handleSubmit高阶函数定义了上述几个步骤,只需要传入表单提交的逻辑即可: 使用方式如下: ZentForm不足之处 ZentForm虽然功能强大,但仍有一些待改进之处: 父组件维护了所有字段的实例,直接调用实例的方法来取值或者验证。这种方式虽然简便,但有违React声明式编程和函数式编程的设计思想,并且容易产生副作用,在不经意间改变了字段的内部属性。 大部分的组件重使用了shouldComponentUpdate,并对state和props进行了深比较,对性能有比较大的影响,可以考虑使用PureComponent。 太多的情况下对整个表单字段进行了校验,比较合理的情况应该是某个字段修改的时候只校验本身,在表单提交时再校验所有的字段。 表单提交操作略显繁琐,还需要调用一次handleSubmit,不够优雅。 结语 本文讨论了Form表单组件设计的思路,并结合有赞的ZentForm组件介绍具体的实现方式。ZentForm的功能十分强大,本文只是介绍了其核心功能,另外还有表单的异步校验、表单的格式化和表单的动态添加删除字段等高级功能都还没涉及到,感兴趣的朋友可点击前面的链接自行研究。 相信看了本文案例你已经掌握了方法,更多精彩请关注php中文网其它相关文章! 推荐阅读:createForm({
formValidations: {
rule1(values, value){
},
rule2(values, value){
},
}
})(FormComp);<Field
validations={{
rule1(values, value){
},
rule2(values, value){
},
}}
validationErrors={{
rule1: 'error1',
rule2: 'error2'
}}
/>{showError && (<p className="zent-formerror-desc">{props.error}</p>)}runRules = (value, currentValues, validations = {}) => {
const results = {
errors: [],
failed: [],
};
function updateResults(validation, validationMethod) {
// validation方法可以直接返回错误信息,否则需要返回布尔值表明校验是否成功
if (typeof validation === 'string') {
results.errors.push(validation);
results.failed.push(validationMethod);
} else if (!validation) {
results.failed.push(validationMethod);
}
}
Object.keys(validations).forEach(validationMethod => {
...
// 使用自定义校验方法或内置校验方法(可以按需添加)
if (typeof validations[validationMethod] === 'function') {
const validation = validations[validationMethod](
currentValues,
value
);
updateResults(validation, validationMethod);
} else {
const validation = validationRules[validationMethod](
currentValues,
value,
validations[validationMethod]
);
}
});
return results;
};validate<a href="http://www.php.cn/wiki/1464.html" target="_blank">OnChange</a>和validateOnBlur来改变校验时机。<Field
validateOnChange={false}
validateOnBlur={false}
validations={{
required: true,
matchRegex: /^[a-zA-Z]+$/
}}
validationErrors={{
required: '值不能为空',
matchRegex: '只能为字母'
}}
/>class Field extends Component {
handleChange = (event, options = { merge: false }) => {
...
this.setValue(newValue, validateOnChange);
...
}
handleBlur = (event, options = { merge: false }) => {
...
this.setValue(newValue, validateOnBlur);
...
}
setValue = (value, needValidate = true) => {
this.setState(
{
_value: value,
_isDirty: true,
},
() => {
needValidate && this.context.zentForm.validate(this);
}
);
};
}relatedFields来告诉表单哪些字段需要同步进行验证。
const handleSubmit = (submit, zentForm) => {
  const doSubmit = () => {
    ...
    result = submit(values, zentForm);
    ...
    return result.then(
      submitResult => {
        ...
        if (onSubmitSuccess) {
          handleOnSubmitSuccess(submitResult);
        }
        return submitResult;
      },
      submitError => {
        ...
        const error = handleSubmitError(submitError);
        if (error || onSubmitFail) {
          return error;
        }
        throw submitError;
      }
    );
  }

  const afterValidation = () => {
    if (!zentForm.isValid()) {
      ...
      if (onSubmitFail) {
       handleOnSubmitError(new SubmissionError(validationErrors));
      }
    } else {
      return doSubmit();
    }
  };
  const allIsValidated = zentForm.fields.every(field => {
    return field.props.validateOnChange || field.props.validateOnBlur;
  });
  if (allIsValidated) {
    // 不存在没有进行过同步校验的field
    afterValidation();
  } else {
    zentForm.validateForm(true, afterValidation);
  }
}const { handleSubmit } = this.props;
<Form onSubmit={handleSubmit(this.submit)} horizontal>
The above is the detailed content of Detailed explanation of React Form component encapsulation steps. For more information, please follow other related articles on the PHP Chinese website!

Hot AI Tools

Undresser.AI Undress
AI-powered app for creating realistic nude photos

AI Clothes Remover
Online AI tool for removing clothes from photos.

Undress AI Tool
Undress images for free

Clothoff.io
AI clothes remover

Video Face Swap
Swap faces in any video effortlessly with our completely free AI face swap tool!

Hot Article
Hot Tools

Notepad++7.3.1
Easy-to-use and free code editor

SublimeText3 Chinese version
Chinese version, very easy to use

Zend Studio 13.0.1
Powerful PHP integrated development environment

Dreamweaver CS6
Visual web development tools

SublimeText3 Mac version
God-level code editing software (SublimeText3)
Hot Topics
 1673
1673
 14
1428
52
1333
25
1277
29
1257
24
14
1428
52
1333
25
1277
29
1257
24

 Steps to upgrade to the latest version of WeChat (Easily master the upgrade method to the latest version of WeChat)
Jun 01, 2024 pm 10:24 PM
Steps to upgrade to the latest version of WeChat (Easily master the upgrade method to the latest version of WeChat)
Jun 01, 2024 pm 10:24 PM
WeChat is one of the social media platforms in China that continuously launches new versions to provide a better user experience. Upgrading WeChat to the latest version is very important to keep in touch with family and colleagues, to stay in touch with friends, and to keep abreast of the latest developments. 1. Understand the features and improvements of the latest version. It is very important to understand the features and improvements of the latest version before upgrading WeChat. For performance improvements and bug fixes, you can learn about the various new features brought by the new version by checking the update notes on the WeChat official website or app store. 2. Check the current WeChat version We need to check the WeChat version currently installed on the mobile phone before upgrading WeChat. Click to open the WeChat application "Me" and then select the menu "About" where you can see the current WeChat version number. 3. Open the app
 This Apple ID is not yet in use in the iTunes Store: Fix
Jun 10, 2024 pm 05:42 PM
This Apple ID is not yet in use in the iTunes Store: Fix
Jun 10, 2024 pm 05:42 PM
When logging into iTunesStore using AppleID, this error saying "This AppleID has not been used in iTunesStore" may be thrown on the screen. There are no error messages to worry about, you can fix them by following these solution sets. Fix 1 – Change Shipping Address The main reason why this prompt appears in iTunes Store is that you don’t have the correct address in your AppleID profile. Step 1 – First, open iPhone Settings on your iPhone. Step 2 – AppleID should be on top of all other settings. So, open it. Step 3 – Once there, open the “Payment & Shipping” option. Step 4 – Verify your access using Face ID. step
 Shazam app not working in iPhone: Fix
Jun 08, 2024 pm 12:36 PM
Shazam app not working in iPhone: Fix
Jun 08, 2024 pm 12:36 PM
Having issues with the Shazam app on iPhone? Shazam helps you find songs by listening to them. However, if Shazam isn't working properly or doesn't recognize the song, you'll have to troubleshoot it manually. Repairing the Shazam app won't take long. So, without wasting any more time, follow the steps below to resolve issues with Shazam app. Fix 1 – Disable Bold Text Feature Bold text on iPhone may be the reason why Shazam is not working properly. Step 1 – You can only do this from your iPhone settings. So, open it. Step 2 – Next, open the “Display & Brightness” settings there. Step 3 – If you find that “Bold Text” is enabled
 iPhone screenshots not working: How to fix it
May 03, 2024 pm 09:16 PM
iPhone screenshots not working: How to fix it
May 03, 2024 pm 09:16 PM
Screenshot feature not working on your iPhone? Taking a screenshot is very easy as you just need to hold down the Volume Up button and the Power button at the same time to grab your phone screen. However, there are other ways to capture frames on the device. Fix 1 – Using Assistive Touch Take a screenshot using the Assistive Touch feature. Step 1 – Go to your phone settings. Step 2 – Next, tap to open Accessibility settings. Step 3 – Open Touch settings. Step 4 – Next, open the Assistive Touch settings. Step 5 – Turn on Assistive Touch on your phone. Step 6 – Open “Customize Top Menu” to access it. Step 7 – Now you just need to link any of these functions to your screen capture. So click on the first
 Clock app missing in iPhone: How to fix it
May 03, 2024 pm 09:19 PM
Clock app missing in iPhone: How to fix it
May 03, 2024 pm 09:19 PM
Is the clock app missing from your phone? The date and time will still appear on your iPhone's status bar. However, without the Clock app, you won’t be able to use world clock, stopwatch, alarm clock, and many other features. Therefore, fixing missing clock app should be at the top of your to-do list. These solutions can help you resolve this issue. Fix 1 – Place the Clock App If you mistakenly removed the Clock app from your home screen, you can put the Clock app back in its place. Step 1 – Unlock your iPhone and start swiping to the left until you reach the App Library page. Step 2 – Next, search for “clock” in the search box. Step 3 – When you see “Clock” below in the search results, press and hold it and
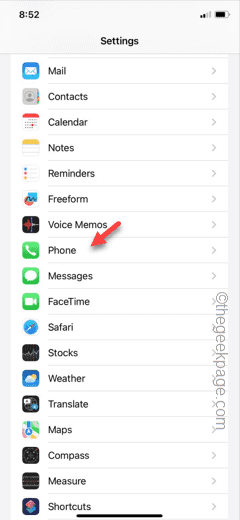 WiFi calling not working on iPhone: Fix
Jun 03, 2024 am 11:16 AM
WiFi calling not working on iPhone: Fix
Jun 03, 2024 am 11:16 AM
Can't enable Wi-Fi calling on iPhone? Call quality is improved and you can communicate even from remote locations where cellular networks are not as strong. Wi-Fi Calling also improves standard call and video call quality. So, if you can't use Wi-Fi calling on your phone, these solutions might help you fix the problem. Fix 1 – Enable Wi-Fi Calling Manually You must enable the Wi-Fi Calling feature in your iPhone settings. Step 1 – For this, you have to open Settings. Step 2 – Next, just scroll down to find and open the “Phone” settings Step 3 – In the phone settings, scroll down and open the “Wi-Fi Calling” setting. Step 4 – In the Wi-Fi Calling page, change “This iPhone
 Screen recording goes black: here's the fix
May 03, 2024 pm 09:13 PM
Screen recording goes black: here's the fix
May 03, 2024 pm 09:13 PM
Are you trying to record something on your phone screen and it's going black? Typically, you can initiate screen recording from Control Center. In some cases, you cannot record items on the screen. We have mentioned all the scenarios along with the list of possible solutions that can help you record your screen properly. Reasons why screen recording goes black – If you try to record any DRM (Digital Rights Management) protected content while it’s playing on your iPhone screen, you won’t get anything. The output will be a pitch black screen. All leading OTT platforms like Netflix, Disney+, Hulu, and Peacock have this DRM that blocks any screen recording functionality. 2. Several websites prohibit the use of screen capture
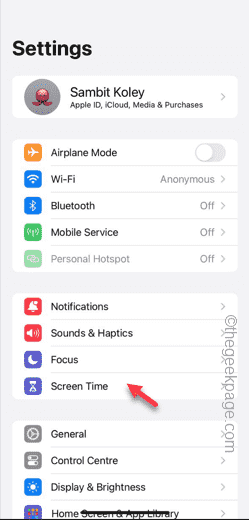
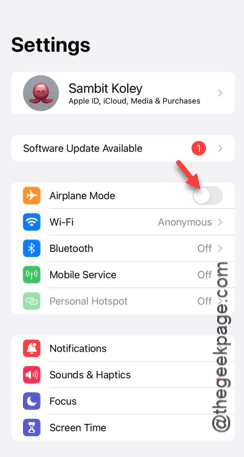 iPhone stuck in airplane mode: How to fix it
Jun 15, 2024 pm 02:16 PM
iPhone stuck in airplane mode: How to fix it
Jun 15, 2024 pm 02:16 PM
Airplane mode is very convenient in some situations. However, the same airplane mode may give you a headache if your iPhone suddenly gets stuck on it. In this article, we have designed this set of solutions to get your iPhone out of airplane mode. Quick fix – 1. Try disabling Airplane Mode directly from Control Center. 2. If you are unable to disable Airplane Mode from Control Center, you can disable Airplane Mode directly from the Settings tab – If these tips don’t work, follow the fixes below to resolve the issue. Fix 1 – Force Restart Your Device The process of force restarting your device is very simple. All you have to do is follow these step-by-step instructions. Step 1 – You can start the process by pressing and releasing the Volume Up button. step
