

Detailed explanation of how to use $http service in AngularJS
This time I will bring you a detailed explanation of how to use the $http service in AngularJS, what are the precautions of the $http service in AngularJS, the following is a practical case, let’s take a look .
We can use the built-in $http service to communicate directly with the outside world. The $http service simply encapsulates the browser's native XMLHttpRequest object.
1. Chain call
#$http service is a function that can only accept one parameter. This parameter is an object, including the To generate the configuration content of the HTTP request. This function returns a promise object with two methods: success and error.
$http({
url:'data.json',
method:'GET'
}).success(function(data,header,config,status){
//响应成功
}).error(function(data,header,config,status){
//处理响应失败
});2. Return a promise object
var promise=$http({
method:'GET',
url:"data.json"
});Since the $http method returns a promise object, we can use the then method when the response returns to handle callbacks. If you use the then method, you will get a special parameter, which represents the success or failure information of the corresponding object, and can also accept two optional functions as parameters. Or you can use success and error callbacks instead.
promise.then(function(resp){
//resp是一个响应对象
},function(resp){
//带有错误信息的resp
});Or like this:
promise.success(function(data,status,config,headers){
//处理成功的响应
});
promise.error(function(data,status,hedaers,config){
//处理失败后的响应
});The main difference between the then() method and the other two methods is that it will receive the complete response object, while success() and error() will Destruct the response object.
3. Quick get request
①$http.get('/api/users.json');
get() method returns HttpPromise object.
You can also send, for example: delete/head/jsonp/post/put. Please refer to page 148 for specific parameters acceptable in the function.
② Take the example of sending a jsonp request again: In order to send a JSONP request, where The url must contain the words JSON_CALLBACK.
jsonp(url,config) where config is optional
var promise=$http.jsonp("/api/users.json?callback=JSON_CALLBACK");4. You can also use $http as a function. In this case, you need to pass in a setting Object, used to illustrate how to construct an XHR object.
$http({
method:'GET',
url:'/api/users.json',
params:{
'username':'tan'
});The setting object can contain the following main keys:
①method
can be: GET/DELETE/HEAD/JSONP/POST/PUT
②url: absolute or relative request target
③params (string map or object)
The value of this key is a string map or object, which will be converted The query string is appended to the URL. If the value is not a string, it will be JSON serialized.
For example:
//参数会转为?name=ari的形式
$http({
params:{'name':'ari'}
});④data (string or object)
This object contains the data that will be sent to the server as the message body. Typically used when sending a POST request.
Starting from AngularJS 1.3, it can also send binary data in POST requests. To send a blob object, you can simply pass it by using the data parameter.
For example:
var blob=new Blob(['Hello world'],{type:'text/plain'});
$http({
method:'POST',
url:'/',
data:blob
});4. Response object
The response object passed by AngularJS to the then() method contains four attributes.
◇data: This data represents the converted response body (if conversion is defined)
◇status: The HTTP status code of the response
◇headers: This function is a getter function for header information. It can accept a parameter to obtain the corresponding name value.
For example, use the following code to obtain the value of X-Auth-ID:
$http({
method: 'GET',
url: '/api/users.json'
}).then (resp) {
// 读取X-Auth-ID
resp.headers('X-Auth-ID');
});◇config: This object is the complete settings object used to generate the original request.
◇statusText (string): This string is the HTTP status text of the response.
5. Caching HTTP requests
By default, the $http service does not cache requests locally. When making individual requests, we can enable caching by passing a boolean value or a cache instance to the $http request.
$http.get('/api/users.json',{ cache: true })
.success(function(data) {})
.error(function(data) {});第一次发送请求时,$http服务会向/api/users.json发送一个GET请求。第二次发送同一个GET请求时,$http服务会从缓存中取回请求的结果,而不会真的发送一个HTTP GET请求。
在这个例子里,由于设置了启用缓存,AngularJS默认会使用$cacheFactory,这个服务是AngularJS在启动时自动创建的。
如果想要对AngularJS使用的缓存进行更多的自定义控制,可以向请求传入一个自定义的缓存实例代替true。
相信看了本文案例你已经掌握了方法,更多精彩请关注php中文网其它相关文章!
推荐阅读:
The above is the detailed content of Detailed explanation of how to use $http service in AngularJS. For more information, please follow other related articles on the PHP Chinese website!

Hot AI Tools

Undresser.AI Undress
AI-powered app for creating realistic nude photos

AI Clothes Remover
Online AI tool for removing clothes from photos.

Undress AI Tool
Undress images for free

Clothoff.io
AI clothes remover

AI Hentai Generator
Generate AI Hentai for free.

Hot Article
Hot Tools

Notepad++7.3.1
Easy-to-use and free code editor

SublimeText3 Chinese version
Chinese version, very easy to use

Zend Studio 13.0.1
Powerful PHP integrated development environment

Dreamweaver CS6
Visual web development tools

SublimeText3 Mac version
God-level code editing software (SublimeText3)
Hot Topics
 1376
1376
 52
52

 How to use DirectX repair tool? Detailed usage of DirectX repair tool
Mar 15, 2024 am 08:31 AM
How to use DirectX repair tool? Detailed usage of DirectX repair tool
Mar 15, 2024 am 08:31 AM
The DirectX repair tool is a professional system tool. Its main function is to detect the DirectX status of the current system. If an abnormality is found, it can be repaired directly. There may be many users who don’t know how to use the DirectX repair tool. Let’s take a look at the detailed tutorial below. 1. Use repair tool software to perform repair detection. 2. If it prompts that there is an abnormal problem in the C++ component after the repair is completed, please click the Cancel button, and then click the Tools menu bar. 3. Click the Options button, select the extension, and click the Start Extension button. 4. After the expansion is completed, re-detect and repair it. 5. If the problem is still not solved after the repair tool operation is completed, you can try to uninstall and reinstall the program that reported the error.
 Introduction to HTTP 525 status code: explore its definition and application
Feb 18, 2024 pm 10:12 PM
Introduction to HTTP 525 status code: explore its definition and application
Feb 18, 2024 pm 10:12 PM
Introduction to HTTP 525 status code: Understand its definition and usage HTTP (HypertextTransferProtocol) 525 status code means that an error occurred on the server during the SSL handshake, resulting in the inability to establish a secure connection. The server returns this status code when an error occurs during the Transport Layer Security (TLS) handshake. This status code falls into the server error category and usually indicates a server configuration or setup problem. When the client tries to connect to the server via HTTPS, the server has no
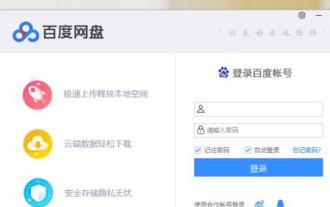 How to use Baidu Netdisk-How to use Baidu Netdisk
Mar 04, 2024 pm 09:28 PM
How to use Baidu Netdisk-How to use Baidu Netdisk
Mar 04, 2024 pm 09:28 PM
Many friends still don’t know how to use Baidu Netdisk, so the editor will explain how to use Baidu Netdisk below. If you are in need, hurry up and take a look. I believe it will be helpful to everyone. Step 1: Log in directly after installing Baidu Netdisk (as shown in the picture); Step 2: Then select "My Sharing" and "Transfer List" according to the page prompts (as shown in the picture); Step 3: In "Friend Sharing", you can share pictures and files directly with friends (as shown in the picture); Step 4: Then select "Share" and then select computer files or network disk files (as shown in the picture); Fifth Step 1: Then you can find friends (as shown in the picture); Step 6: You can also find the functions you need in the "Function Treasure Box" (as shown in the picture). The above is the editor’s opinion
 Learn to copy and paste quickly
Feb 18, 2024 pm 03:25 PM
Learn to copy and paste quickly
Feb 18, 2024 pm 03:25 PM
How to use the copy-paste shortcut keys Copy-paste is an operation we often encounter when using computers every day. In order to improve work efficiency, it is very important to master the copy and paste shortcut keys. This article will introduce some commonly used copy and paste shortcut keys to help readers perform copy and paste operations more conveniently. Copy shortcut key: Ctrl+CCtrl+C is the shortcut key for copying. By holding down the Ctrl key and then pressing the C key, you can copy the selected text, files, pictures, etc. to the clipboard. To use this shortcut key,
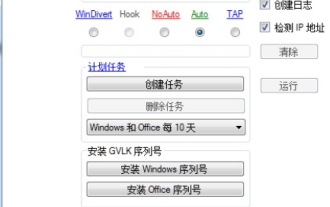 What is the KMS activation tool? How to use the KMS activation tool? How to use KMS activation tool?
Mar 18, 2024 am 11:07 AM
What is the KMS activation tool? How to use the KMS activation tool? How to use KMS activation tool?
Mar 18, 2024 am 11:07 AM
The KMS Activation Tool is a software tool used to activate Microsoft Windows and Office products. KMS is the abbreviation of KeyManagementService, which is key management service. The KMS activation tool simulates the functions of the KMS server so that the computer can connect to the virtual KMS server to activate Windows and Office products. The KMS activation tool is small in size and powerful in function. It can be permanently activated with one click. It can activate any version of the window system and any version of Office software without being connected to the Internet. It is currently the most successful and frequently updated Windows activation tool. Today I will introduce it Let me introduce to you the kms activation work
 How to merge cells using shortcut keys
Feb 26, 2024 am 10:27 AM
How to merge cells using shortcut keys
Feb 26, 2024 am 10:27 AM
How to use the shortcut keys for merging cells In daily work, we often need to edit and format tables. Merging cells is a common operation that can merge multiple adjacent cells into one cell to improve the beauty of the table and the information display effect. In mainstream spreadsheet software such as Microsoft Excel and Google Sheets, the operation of merging cells is very simple and can be achieved through shortcut keys. The following will introduce the shortcut key usage for merging cells in these two software. exist
 How to use potplayer-How to use potplayer
Mar 04, 2024 pm 06:10 PM
How to use potplayer-How to use potplayer
Mar 04, 2024 pm 06:10 PM
Potplayer is a very powerful media player, but many friends still don’t know how to use potplayer. Today I will introduce how to use potplayer in detail, hoping to help everyone. 1. PotPlayer shortcut keys. The default common shortcut keys for PotPlayer player are as follows: (1) Play/pause: space (2) Volume: mouse wheel, up and down arrow keys (3) forward/backward: left and right arrow keys (4) bookmark: P- Add bookmarks, H-view bookmarks (5) full screen/restore: Enter (6) multiple speeds: C-accelerate, 7) Previous/next frame: D/
 How to use Xiaoma win7 activation tool - How to use Xiaoma win7 activation tool
Mar 04, 2024 pm 06:16 PM
How to use Xiaoma win7 activation tool - How to use Xiaoma win7 activation tool
Mar 04, 2024 pm 06:16 PM
I believe that many users are using the Xiaoma win7 activation tool, but do you know how to use the Xiaoma win7 activation tool? Then, the editor will bring you how to use the Xiaoma win7 activation tool. For those who are interested in this, please come to the following article Let's see. The first step is to go to "My Computer" after reinstalling the system, click "System Properties" in the upper menu, and check the Windows activation status. In the second step, click to download the win7 activation tool online and click to open it (there are many resources available everywhere). The third step is to open the Xiaoma activation tool and click "Activate Windows permanently". The fourth step is to wait for the activation process to complete activation. Step 5: Check the Windows activation status again and find that the system has been activated.
