How to install npm in vue.js
This time I will show you how to install npm in vue.js. What are the precautions for installing npm in vue.js? The following is a practical case, let's take a look.
First clarify the relationship between nodejs and npm:node.js is a running environment for javascript, which is a runtime environment for the Google V8 engine. of packaging. It is a server-side JavaScript interpreter.
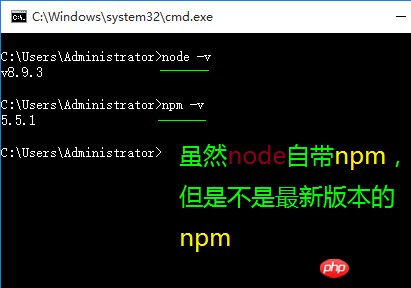
Inclusion relationship, nodejs contains npm. For example, if you install nodejs, you will find the version number of npm when you open cmd and enter npm -v, indicating that npm has been installed. Quote from the master’s summary:In fact, npm is the package manager of nodejs. When we develop on Node.js, we will use a lot of javascript codes that have been written by others. If every time we need someone else's code, we have to search it by name, download the source code, decompress it, and then use it, it will be very troublesome. So the package manager npm appeared. Everyone uploads the source code they have written to the npm official website. If you want to use one or more of them, you can install it directly through npm, regardless of where the source code is. And if we want to use module A, and module A depends on module B, and module B depends on modules C and D, npm will download and manage all dependent packages based on the dependency relationships. Just imagine how troublesome it would be if we had to do all this work ourselves!node -v View node version, built-in package npm Manager to install dependent packages.
npm install -g typescript


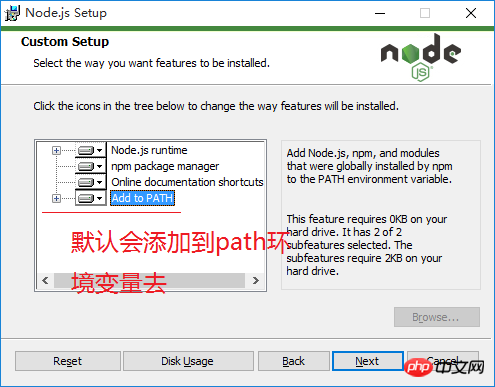
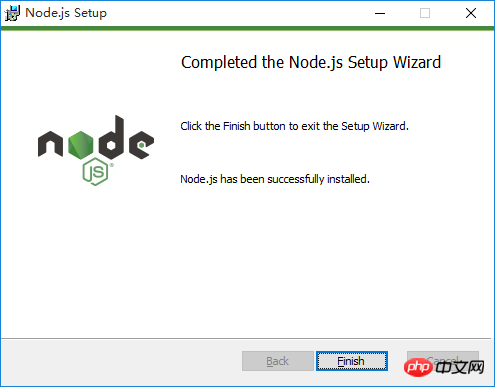

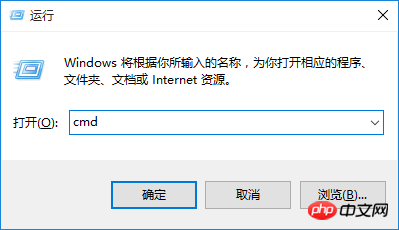 ##Open CMD and check if it is normal

 Look at the other two directories, npm’s local warehouse runs in the user directory of the system disk c drive (I didn’t see npm-cache Because it has not been used before, the cache directory is generated as soon as it is used), we try to move these two directories back to D:\nodejs. First create the two directories as shown below
 Then run the following 2 commands npm config set prefix "D:\nodejs\node_global" npm config set cache "D:\nodejs\node_cache"
As shown above, let's pay attention to npm's local warehouse again, enter the command npm list -global

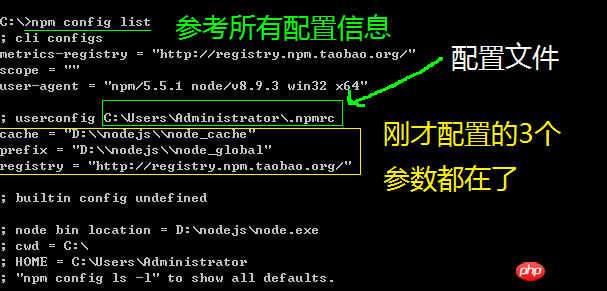
Enter the command npm config set registry=http://registry.npm .taobao.org Configure the mirror station
 Enter the
command npm config list to display all configuration information. We focus on a configuration file C:\Users\Administrator\ .npmrc
Use texteditorEdit it, you can see the configuration information just now


Check whether the mirror station is OK. Command 1 npm config get registry

Check whether the mirror station is OK. Command 2 Npm info vue see See if you can get vue information

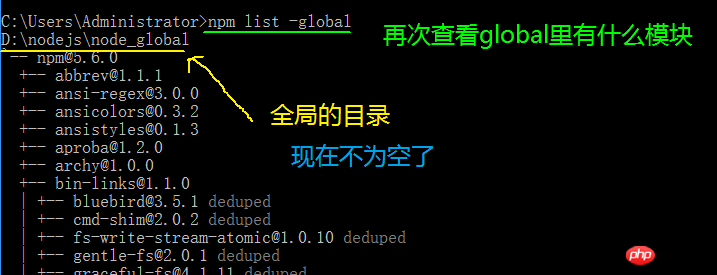
Note that at this time, the default module D:\nodejs\node_modules directory will change to D:\nodejs\node_global\node_modules directory, if you directly run commands such as npm install, an error will be reported. We need to do 1 thing: 1. Add the environment variable NODE_PATH. The content is: D:\nodejs\node_global\node_modules

(Note that you need to reopen CMD for this operation. The environment variables take effect) 1. Test the NPM installation vue.js command: npm install vue -g The -g here refers to installing to the global global directory


2. Test NPM installation vue-router command: npm install vue-router -g


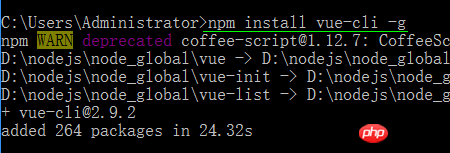
Run npm install vue-cli -g to install vue scaffolding


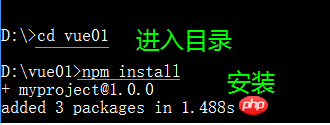
Run npm install to install dependencies

npm run dev

Success interface, prompts to open the address http://localhost:8080

Automatically open the browser http://localhost:8080/#/

npm run build generates static files, open the newly generated index.html file in the dist folder, and the directory description of vue01 created under nmp:

I believe you have mastered the method after reading the case in this article. For more exciting information, please pay attention to other related articles on the php Chinese website!
Recommended reading:
How does axios solve the 302 status code problem
JS operation picture black and white
The above is the detailed content of How to install npm in vue.js. For more information, please follow other related articles on the PHP Chinese website!

Hot AI Tools

Undresser.AI Undress
AI-powered app for creating realistic nude photos

AI Clothes Remover
Online AI tool for removing clothes from photos.

Undress AI Tool
Undress images for free

Clothoff.io
AI clothes remover

AI Hentai Generator
Generate AI Hentai for free.

Hot Article

Hot Tools

Notepad++7.3.1
Easy-to-use and free code editor

SublimeText3 Chinese version
Chinese version, very easy to use

Zend Studio 13.0.1
Powerful PHP integrated development environment

Dreamweaver CS6
Visual web development tools

SublimeText3 Mac version
God-level code editing software (SublimeText3)

Hot Topics
 1382
1382
 52
52
 PyCharm usage tutorial: guide you in detail to run the operation
Feb 26, 2024 pm 05:51 PM
PyCharm is a very popular Python integrated development environment (IDE). It provides a wealth of functions and tools to make Python development more efficient and convenient. This article will introduce you to the basic operation methods of PyCharm and provide specific code examples to help readers quickly get started and become proficient in operating the tool. 1. Download and install PyCharm First, we need to go to the PyCharm official website (https://www.jetbrains.com/pyc
 What is sudo and why is it important?
Feb 21, 2024 pm 07:01 PM
sudo (superuser execution) is a key command in Linux and Unix systems that allows ordinary users to run specific commands with root privileges. The function of sudo is mainly reflected in the following aspects: Providing permission control: sudo achieves strict control over system resources and sensitive operations by authorizing users to temporarily obtain superuser permissions. Ordinary users can only obtain temporary privileges through sudo when needed, and do not need to log in as superuser all the time. Improved security: By using sudo, you can avoid using the root account during routine operations. Using the root account for all operations may lead to unexpected system damage, as any mistaken or careless operation will have full permissions. and
 Linux Deploy operation steps and precautions
Mar 14, 2024 pm 03:03 PM
LinuxDeploy operating steps and precautions LinuxDeploy is a powerful tool that can help users quickly deploy various Linux distributions on Android devices, allowing users to experience a complete Linux system on their mobile devices. This article will introduce the operating steps and precautions of LinuxDeploy in detail, and provide specific code examples to help readers better use this tool. Operation steps: Install LinuxDeploy: First, install
 What to do if you forget to press F2 for win10 boot password
Feb 28, 2024 am 08:31 AM
Presumably many users have several unused computers at home, and they have completely forgotten the power-on password because they have not been used for a long time, so they would like to know what to do if they forget the password? Then let’s take a look together. What to do if you forget to press F2 for win10 boot password? 1. Press the power button of the computer, and then press F2 when turning on the computer (different computer brands have different buttons to enter the BIOS). 2. In the bios interface, find the security option (the location may be different for different brands of computers). Usually in the settings menu at the top. 3. Then find the SupervisorPassword option and click it. 4. At this time, the user can see his password, and at the same time find the Enabled next to it and switch it to Dis.
 Huawei Mate60 Pro screenshot operation steps sharing
Mar 23, 2024 am 11:15 AM
With the popularity of smartphones, the screenshot function has become one of the essential skills for daily use of mobile phones. As one of Huawei's flagship mobile phones, Huawei Mate60Pro's screenshot function has naturally attracted much attention from users. Today, we will share the screenshot operation steps of Huawei Mate60Pro mobile phone, so that everyone can take screenshots more conveniently. First of all, Huawei Mate60Pro mobile phone provides a variety of screenshot methods, and you can choose the method that suits you according to your personal habits. The following is a detailed introduction to several commonly used interceptions:
 PHP PDO Tutorial: An Advanced Guide from Basics to Mastery
Feb 19, 2024 pm 06:30 PM
1. Introduction to PDO PDO is an extension library of PHP, which provides an object-oriented way to operate the database. PDO supports a variety of databases, including Mysql, postgresql, oracle, SQLServer, etc. PDO enables developers to use a unified API to operate different databases, which allows developers to easily switch between different databases. 2. PDO connects to the database. To use PDO to connect to the database, you first need to create a PDO object. The constructor of the PDO object receives three parameters: database type, host name, database username and password. For example, the following code creates an object that connects to a mysql database: $dsn="mysq
 PHP string manipulation: a practical way to effectively remove spaces
Mar 24, 2024 am 11:45 AM
PHP String Operation: A Practical Method to Effectively Remove Spaces In PHP development, you often encounter situations where you need to remove spaces from a string. Removing spaces can make the string cleaner and facilitate subsequent data processing and display. This article will introduce several effective and practical methods for removing spaces, and attach specific code examples. Method 1: Use the PHP built-in function trim(). The PHP built-in function trim() can remove spaces at both ends of the string (including spaces, tabs, newlines, etc.). It is very convenient and easy to use.
 How to bind WeChat on Ele.me
Apr 01, 2024 pm 03:46 PM
Ele.me is a software that brings together a variety of different delicacies. You can choose and place an order online. The merchant will make it immediately after receiving the order. Users can bind WeChat through the software. If you want to know the specific operation method , remember to check out the PHP Chinese website. Instructions on how to bind WeChat to Ele.me: 1. First open the Ele.me software. After entering the homepage, we click [My] in the lower right corner; 2. Then in the My page, we need to click [Account] in the upper left corner; 3. Then come to the personal information page where we can bind mobile phones, WeChat, Alipay, and Taobao. Here we click [WeChat]; 4. After the final click, select the WeChat account that needs to be bound in the WeChat authorization page and click Just [Allow];


