
This article mainly introduces the sample code of Angular integrating zTree. Now I will share it with you and give you a reference.
1 Prerequisite preparation
1.1 Create a new angular4 project
Reference blog post: Click to go

1.2 Go to zTree official website to download zTree
zTree official website: Click to go to
##2 Programming steps

<!doctype html>
<html lang="en">
<head>
 <meta charset="utf-8">
 <title>TestZtree</title>
 <base href="/" rel="external nofollow" >

 <meta name="viewport" content="width=device-width, initial-scale=1">
 <link rel="icon" type="image/x-icon" href="favicon.ico" rel="external nofollow" >

 <link rel="stylesheet" type="text/css" href="./assets/zTree/css/zTreeStyle/zTreeStyle.css" rel="external nofollow" >
 <link rel="stylesheet" type="text/css" href="./assets/zTree/css/demo.css" rel="external nofollow" >
 <script src="./assets/zTree/js/jquery-1.4.4.min.js"></script>
 <script src="./assets/zTree/js/jquery.ztree.core.js"></script>
</head>
<body>
 <app-root></app-root>
</body>
</html>
declare var $ : any;

import { Component, OnInit } from '@angular/core';
declare var $ : any;
@Component({
selector: 'app-root',
templateUrl: './app.component.html',
styleUrls: ['./app.component.scss']
})
export class AppComponent implements OnInit {
// setting = {
// view: {
// showLine: true,
// showIcon: true,
// fontCss: this.getFont
// },
// data: {
// simpleData: {
// enable: true,
// idKey: 'id',
// pIdKey: 'pId'
// }
// },
// callback: {
// onClick: this.onCzTreeOnClick
// }
// };
// zNodes = [
// {id: 1, pId: 0, name: '1 一级标题', open: true, iconOpen:"assets/zTree/css/zTreeStyle/img/diy/1_open.png", iconClose:"assets/zTree/css/zTreeStyle/img/diy/1_close.png"},
// {id: 11, pId: 1, name: '1.1 二级标题', open: true, font:{'background-color':'skyblue', 'color':'white'}},
// {id: 111, pId: 11, name: '1.1.1 三级标题 -> 博客园', url: 'http://www.cnblogs.com/NeverCtrl-C/'},
// {id: 112, pId: 11, name: '1.1.2 三级标题 -> 单击', click: "alert('你单击了')"},
// {id: 12, pId: 1, name: '1.2 二级标题'},
// {id: 2, pId: 0, name: '2 一级标题'}
// ]
// getFont(treeId, node) {
// return node.font ? node.font : {};
// }
// onCzTreeOnClick(event, treeId, treeNode, clickFlag) {
// alert(treeNode.name);
// }
setting = {
data: {
simpleData: {
enable: true
}
}
};
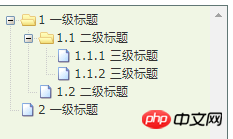
zNodes = [
{id: 1, pId: 0, name: '1 一级标题'},
{id: 11, pId: 1, name: '1.1 二级标题'},
{id: 111, pId: 11, name: '1.1.1 三级标题'},
{id: 112, pId: 11, name: '1.1.2 三级标题'},
{id: 12, pId: 1, name: '1.2 二级标题'},
{id: 2, pId: 0, name: '2 一级标题'}
];
constructor() { }
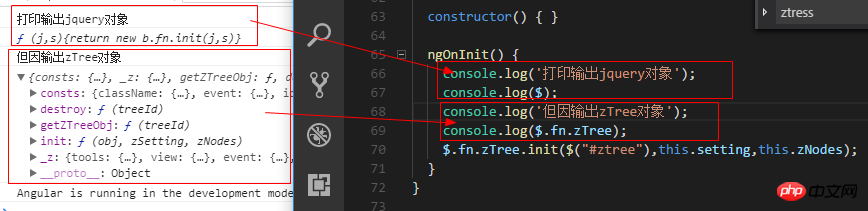
ngOnInit() {
console.log($);
console.log($.fn.zTree);
$.fn.zTree.init($("#ztree"),this.setting,this.zNodes);
}
}<ul id="ztree" class="ztree"><ul></ul>
3 Basic functions of zTree
3.1 Do not display connecting lines
3.1.1 Official documentationDoes not display connecting lines between titles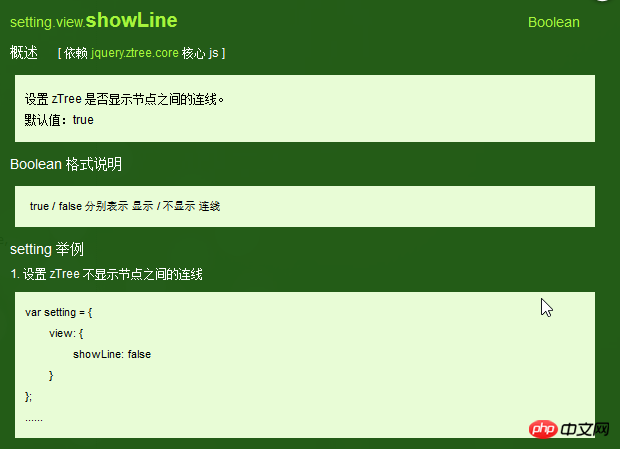
3.1.2 Programming Steps
Specify the value of showLine attribute as false in the basic configuration object
 setting = {
  data: {
   simpleData: {
    enable: true
   }
  },
  view: {
   showLine: false
  }
};3.2 Do not display the node icon
3.2. 1 Official documentRemove the icon in front of the node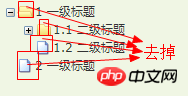

setting = {
  data: {
   simpleData: {
    enable: true
   }
  },
  view: {
   showLine: false,
   showIcon: false
  }
};3.3 Customize the node icon
3.3.1 Official documentChange the node icon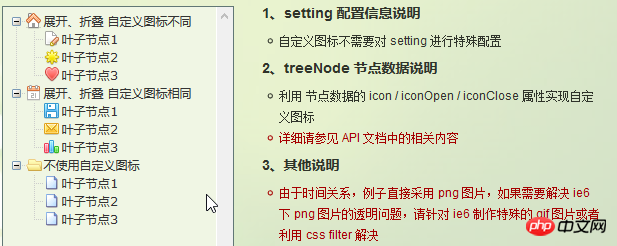

3.4 Custom font
3.4.1 Official documentationChange the style of node font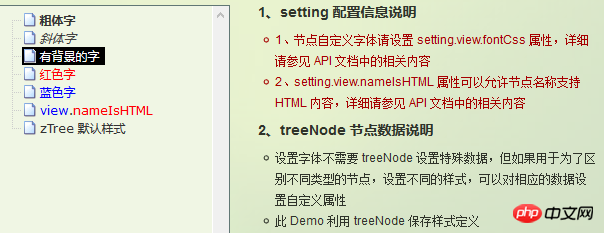


3.5 Hyperlink
3.5.1 Official document Clicking on the node title will automatically jump to the corresponding urlNote 01: The click attribute can only perform the simplest click event operation. Equivalent to onclick="...". If the operation is more complex, use the onClick event callback function.
3.5.2 Programming steps
Set the url and click attributes for the treeNode node dataTips 01: When setting the click attribute, the attribute value must be some simple onClick event Tip 02: When setting the target attribute, the attribute values are _blank and _self_blank -> Use one Open in new window_self -> Open in original window
zNodes = [
  {id: 1, pId: 0, name: '1 一级标题', open: true, iconOpen:"assets/zTree/css/zTreeStyle/img/diy/1_open.png", iconClose:"assets/zTree/css/zTreeStyle/img/diy/1_close.png"},
  {id: 11, pId: 1, name: '1.1 二级标题', open: true, font:{'background-color':'skyblue', 'color':'white'}},
  {id: 111, pId: 11, name: '1.1.1 三级标题 -> 博客园1', url: 'http://www.cnblogs.com/NeverCtrl-C/', target: '_blank'},
  {id: 113, pId: 11, name: '1.1.1 三级标题 -> 博客园2', url: 'http://www.cnblogs.com/NeverCtrl-C/', target: '_self'},
  {id: 112, pId: 11, name: '1.1.2 三级标题 -> 单击', click: "alert('你单击了')"},
  {id: 12, pId: 1, name: '1.2 二级标题'},
  {id: 2, pId: 0, name: '2 一级标题'}
]3.6 Click Control
3.6.1 Official Document
The corresponding method is triggered when the node title is clickedTip 01: You can use this usage to implement route jump in angular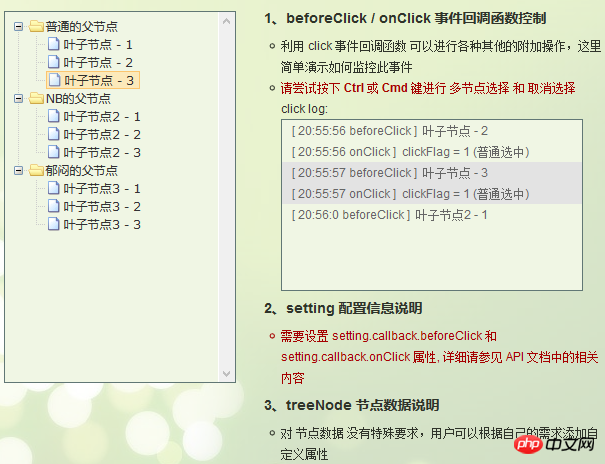
3.6.2 Programming steps
设置基本配置对象的onClick属性
技巧01:onClick属性值是一个方法的引用,我们需要自己编写这个方法
 setting = {
  view: {
    showLine: true,
    showIcon: true,
    fontCss: this.getFont
  },
  data: {
   simpleData: {
    enable: true,
    idKey: 'id',
    pIdKey: 'pId'
   }
  },
  callback: {
   onClick: this.onCzTreeOnClick
  }
 };
编写onClick触发方法
 onCzTreeOnClick(event, treeId, treeNode, clickFlag) {
  alert(treeNode.name);
}上面是我整理给大家的,希望今后会对大家有帮助。
相关文章:
在Webpack中路径压缩图片上传尺寸获取的问题(详细教程)
The above is the detailed content of How to integrate zTree code in Angular. For more information, please follow other related articles on the PHP Chinese website!
 How to implement jsp paging function
 The difference between php and js
 What does unsigned integer mean?
 Python re module usage
 How long does it take for Douyin recharge to arrive?
 The difference and connection between java and javascript
 Python crawler method to obtain data
 How Oracle creates a database


![[Web front-end] Node.js quick start](https://img.php.cn/upload/course/000/000/067/662b5d34ba7c0227.png)


