This article mainly introduces how to use ES6 classes to imitate Vue to write a two-way binding sample code. The content is quite good. I will share it with you now and give it as a reference.
This article introduces how to use ES6 classes to imitate Vue to write a two-way binding sample code and share it with everyone. The details are as follows:
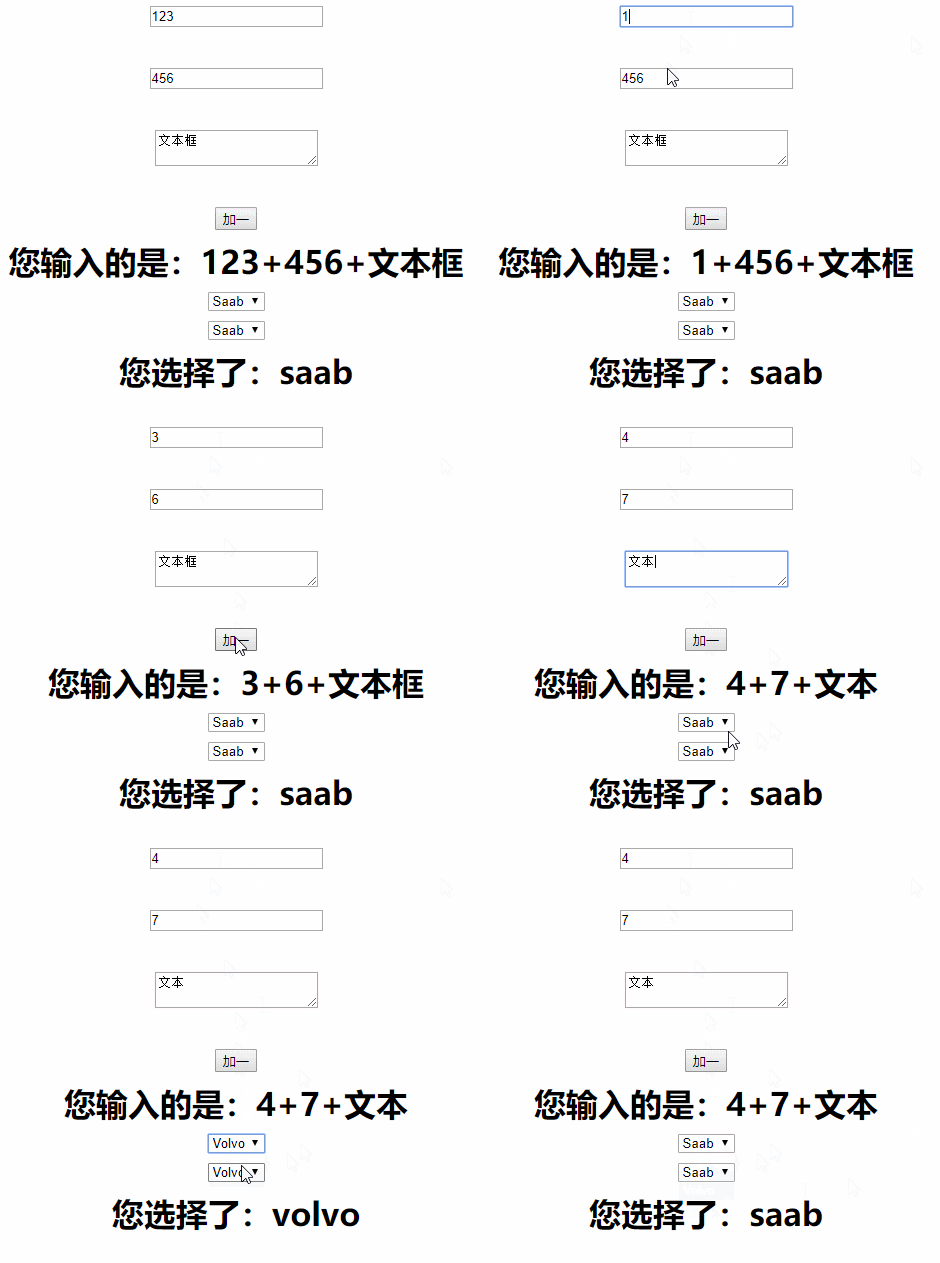
The final effect is as follows:

Constructor(constructor)
Construct a TinyVue object, including basic el, data, methods
class TinyVue{
 constructor({el, data, methods}){
  this.$data = data
  this.$el = document.querySelector(el)
  this.$methods = methods
  // 初始化
  this._compile()
  this._updater()
  this._watcher()
 }
}Compiler(compile)
is used to parse the click event @click of the v-model and element bound to the input box and drop-down box.
First create a function to load events:
// el为元素tagName,attr为元素属性(v-model,@click)
_initEvents(el, attr, callBack) {
 this.$el.querySelectorAll(el).forEach(i => {
  if(i.hasAttribute(attr)) {
   let key = i.getAttribute(attr)
   callBack(i, key)
  }
 })
}Load input box event
this._initEvents('input, textarea', 'v-model', (i, key) => {
 i.addEventListener('input', () => {
  Object.assign(this.$data, {[key]: i.value})
 })
})Load selection box event
this._initEvents('select', 'v-model', (i, key) => {
 i.addEventListener('change', () => Object.assign(this.$data, {[key]: i.options[i.options.selectedIndex].value}))
}) Loading the click event
The click event corresponds to the event in methods
this._initEvents('*', '@click', (i, key) => {
 i.addEventListener('click', () => this.$methods[key].bind(this.$data)())
})View updater(updater)
In the same way, first create a public function to process the views in different elements, including the value of input, textarea, the selection value of select, and the innerHTML of p
_initView(el, attr, callBack) {
 this.$el.querySelectorAll(el, attr, callBack).forEach(i => {
  if(i.hasAttribute(attr)) {
   let key = i.getAttribute(attr),
    data = this.$data[key]
   callBack(i, key, data)
  }
 })
}Update the input box view
this._initView('input, textarea', 'v-model', (i, key, data) => {
 i.value = data
})Update the selection box View
this._initView('select', 'v-model', (i, key, data) => {
 i.querySelectorAll('option').forEach(v => {
  if(v.value == data) v.setAttribute('selected', true)
  else v.removeAttribute('selected')
 })
})Update innerHTML
The implementation method here is a bit low, I only think of regular replacement {{text}}
let regExpInner = /\{{ *([\w_\-]+) *\}}/g
this.$el.querySelectorAll("*").forEach(i => {
 let replaceList = i.innerHTML.match(regExpInner) || (i.hasAttribute('vueID') && i.getAttribute('vueID').match(regExpInner))
 if(replaceList) {
  if(!i.hasAttribute('vueID')) {
   i.setAttribute('vueID', i.innerHTML)
  }
  i.innerHTML = i.getAttribute('vueID')
  replaceList.forEach(v => {
   let key = v.slice(2, v.length - 2)
   i.innerHTML = i.innerHTML.replace(v, this.$data[key])
  })
 }
})Listener (watcher)
Update the view after data changes
<p id="app">
<input type="text" v-model="text1"><br>
<input type="text" v-model="text2"><br>
<textarea type="text" v-model="text3"></textarea><br>
<button @click="add">加一</button>
<h1>您输入的是:{{text1}}+{{text2}}+{{text3}}</h1>
<select v-model="select">
<option value="volvo">Volvo</option>
<option value="saab">Saab</option>
</select>
<select v-model="select">
<option value="volvo">Volvo</option>
<option value="saab">Saab</option>
</select>
<h1>您选择了:{{select}}</h1>
</p>
<script src="./TinyVue.js"></script>
<script>
let app = new TinyVue({
el: '#app',
data: {
text1: 123,
text2: 456,
text3: '文本框',
select: 'saab'
},
methods: {
add() {
this.text1 ++
this.text2 ++
}
}
})
</script>TinyVue full code
class TinyVue{
 constructor({el, data, methods}){
  this.$data = data
  this.$el = document.querySelector(el)
  this.$methods = methods
  this._compile()
  this._updater()
  this._watcher()
 }
 _watcher(data = this.$data) {
  let that = this
  Object.keys(data).forEach(i => {
   let value = data[i]
   Object.defineProperty(data, i, {
    enumerable: true,
    configurable: true,
    get: function () {
     return value;
    },
    set: function (newVal) {
     if (value !== newVal) {
      value = newVal;
      that._updater()
     }
    }
   })
  })
 }
 _initEvents(el, attr, callBack) {
  this.$el.querySelectorAll(el).forEach(i => {
   if(i.hasAttribute(attr)) {
    let key = i.getAttribute(attr)
    callBack(i, key)
   }
  })
 }
 _initView(el, attr, callBack) {
  this.$el.querySelectorAll(el, attr, callBack).forEach(i => {
   if(i.hasAttribute(attr)) {
    let key = i.getAttribute(attr),
     data = this.$data[key]
    callBack(i, key, data)
   }
  })
 }
 _updater() {
  this._initView('input, textarea', 'v-model', (i, key, data) => {
   i.value = data
  })
  this._initView('select', 'v-model', (i, key, data) => {
   i.querySelectorAll('option').forEach(v => {
    if(v.value == data) v.setAttribute('selected', true)
    else v.removeAttribute('selected')
   })
  })
  let regExpInner = /\{{ *([\w_\-]+) *\}}/g
  this.$el.querySelectorAll("*").forEach(i => {
   let replaceList = i.innerHTML.match(regExpInner) || (i.hasAttribute('vueID') && i.getAttribute('vueID').match(regExpInner))
   if(replaceList) {
    if(!i.hasAttribute('vueID')) {
     i.setAttribute('vueID', i.innerHTML)
    }
    i.innerHTML = i.getAttribute('vueID')
    replaceList.forEach(v => {
     let key = v.slice(2, v.length - 2)
     i.innerHTML = i.innerHTML.replace(v, this.$data[key])
    })
   }
  })
 }
 _compile() {
  this._initEvents('*', '@click', (i, key) => {
   i.addEventListener('click', () => this.$methods[key].bind(this.$data)())
  })
  this._initEvents('input, textarea', 'v-model', (i, key) => {
   i.addEventListener('input', () => {
    Object.assign(this.$data, {[key]: i.value})
   })
  })
  this._initEvents('select', 'v-model', (i, key) => {
   i.addEventListener('change', () => Object.assign(this.$data, {[key]: i.options[i.options.selectedIndex].value}))
  })
 }
}The above is the entire content of this article, I hope it will be helpful to everyone's learning, and more For more related content, please pay attention to the PHP Chinese website!
Related recommendations:
Vue2.0 Multi-Tab switching component encapsulation introduction
About Vue form demo v-model Two-way binding problem
The above is the detailed content of Use ES6 classes to imitate Vue to write an example of two-way binding. For more information, please follow other related articles on the PHP Chinese website!


