 Web Front-end
 JS Tutorial
 Code implementation of uploading picture pop-up layer using rich text editor
Code implementation of uploading picture pop-up layer using rich text editor
The content of this article is about the code implementation of using the rich text editor to upload the image pop-up layer. It has certain reference value. Friends in need can refer to it. I hope it will be helpful to you.
I asked a question two days ago, mainly because I am lazy and wanted to find a ready-made image that I uploaded before.
Regarding this, I found that there is no similar project in the entire community. I tried it out today and got the following results

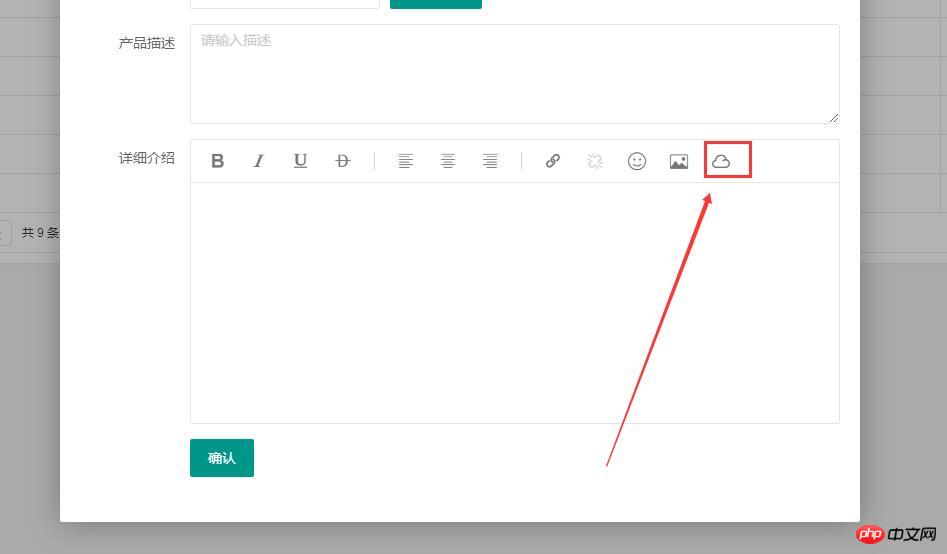
Customize the toolbar on the editor and add a new Created a menu cloud disk.
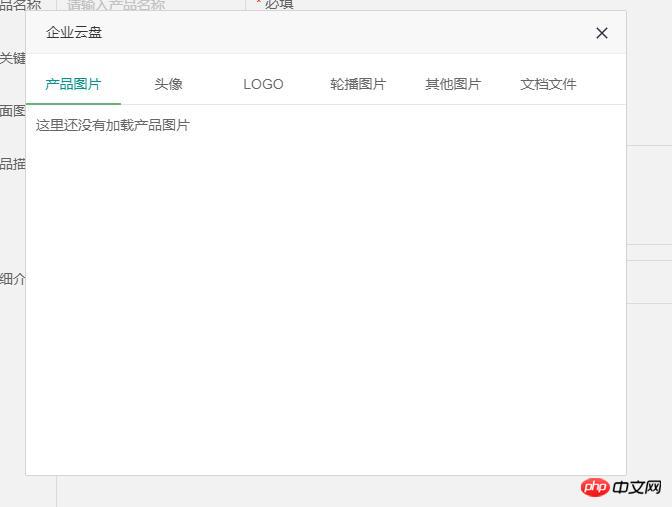
Click on the cloud disk and a pop-up window similar to an emoticon will pop up as follows
 This is what I have always wanted to make a pop-up window similar to UEditor.
After modification, the images and files previously uploaded by users can be called up in the editor. There is no need to modify the images uploaded by the editor.
Core Code
1. Customize the editor toolbar
1 2 3 4 5 6 7 8 9 10 11 12 13 |
|
2. Add a new click event
1 2 3 4 5 6 7 8 9 10 11 12 13 14 15 16 17 18 19 20 21 22 |
|
3. Cloud disk panel
1 2 3 4 5 6 7 8 9 10 11 12 13 14 15 16 17 18 19 20 21 22 23 24 25 26 27 28 29 30 31 32 |
|
Other details are difficult to display because they involve project data.
Related recommendations:
Rich text editor Problems related to deleting pictures
The above is the detailed content of Code implementation of uploading picture pop-up layer using rich text editor. For more information, please follow other related articles on the PHP Chinese website!

Hot AI Tools

Undresser.AI Undress
AI-powered app for creating realistic nude photos

AI Clothes Remover
Online AI tool for removing clothes from photos.

Undress AI Tool
Undress images for free

Clothoff.io
AI clothes remover

Video Face Swap
Swap faces in any video effortlessly with our completely free AI face swap tool!

Hot Article

Hot Tools

Notepad++7.3.1
Easy-to-use and free code editor

SublimeText3 Chinese version
Chinese version, very easy to use

Zend Studio 13.0.1
Powerful PHP integrated development environment

Dreamweaver CS6
Visual web development tools

SublimeText3 Mac version
God-level code editing software (SublimeText3)

Hot Topics
 1677
1677
 14
14
 1431
1431
 52
52
 1334
1334
 25
25
 1280
1280
 29
29
 1257
1257
 24
24
 Create a rich text editor using PHP and CKEditor
May 11, 2023 pm 04:06 PM
With the widespread use of web applications, creating rich text editors has become more and more common. CKEditor is widely recognized as one of the best rich text editors because of its good customizability and ease of use. This article will introduce how to create a rich text editor using PHP and CKEditor. Introduction to CKEditor CKEditor is an open source, cross-platform rich text editor implemented through JavaScript. It provides an intuitive and easy-to-understand toolbar, including font style, formatting, graphics, etc.
 How to implement rich text editor in uniapp
Jul 04, 2023 pm 12:17 PM
How to implement a rich text editor in uniapp In many applications, we often encounter situations where users need to input rich text content, such as editing articles, publishing updates, etc. To meet this requirement, we can use a rich text editor. In uniapp, we can use some open source rich text editor components, such as wangeditor, quill, etc. Below, I will use wangeditor as an example to introduce how to implement rich text editing in uniapp.
 How to use Java to write a rich text editor module for a CMS system
Aug 04, 2023 pm 06:57 PM
How to use Java to write a rich text editor module for a CMS system. In modern website development, the Content Management System (CMS) plays a crucial role. The rich text editor module is an indispensable part, which allows website administrators to easily edit and publish content. This article will introduce how to use Java to write a rich text editor module for a CMS system and provide code examples. 1. Choose the right rich text editor to start with
 How to use PHP to develop a rich text editor in a CMS
Jun 21, 2023 am 11:20 AM
With the development of the Internet, more and more websites are beginning to use CMS (content management system) to manage their content. The rich text editor is an integral part of these CMS, which allows users to easily edit, format and publish content. In this article, we will introduce how to use PHP to develop a rich text editor in a CMS. 1. What is a rich text editor? A rich text editor is a text editor that can render multiple formats, allowing users to use various styles for typesetting operations without having to learn HTML or C
 Rich text editor skills in mall development (29 words)
Jun 30, 2023 pm 09:03 PM
Rich text editor function implementation tips in PHP Developer City With the rapid development of the Internet, more and more malls use online editors to provide rich text editing functions, allowing users to design their own product details pages through simple operations. When developing PHP, how to implement rich text editor functions is a key technical problem. This article will introduce some techniques for implementing rich text editor functions to help PHP developers better complete this task. 1. Choose a suitable rich text editor When choosing a rich text editor, we
 How to use the rich text editor plug-in to implement rich text editing function in uniapp
Oct 20, 2023 am 10:31 AM
Overview of how to use the rich text editor plug-in to implement rich text editing functions in uniapp In modern applications, the rich text editor is a must-have feature because it allows users to create rich and diverse text content in the application, including font styles, Font size, color, insert pictures, etc. As a cross-platform development framework, uniapp also provides a way to use rich text editor plug-ins to achieve this function. This article will introduce how to use the rich text editor plug-in in uniapp and give specific code examples. step import
 Common rich text editor controls in Go language web development framework
Jun 04, 2023 am 09:10 AM
With the popularity of web applications, rich text editors have become an indispensable tool in web development. When using Go language for web development, we also need to choose a suitable rich text editor control to enrich our websites and applications. In this article, we will discuss common rich text editor controls in Go language web development. FroalaEditorFroalaEditor is a popular rich text editor control that is widely used in web development. it has modernity
 How to use the Layui framework to develop a web page editing function that supports rich text editor
Oct 24, 2023 am 08:16 AM
Title: Using the Layui framework to develop web page editing functions that support rich text editors Introduction: In web development, web page editing functions are a common and important module. In order to improve user experience, supporting rich text editors is essential. This article will introduce how to use the rich text editor component in the Layui framework for development and provide specific code examples. 1. Introduction to Layui framework Layui is a front-end UI framework based on HTML5 and CSS3 technology. It is committed to providing simple, easy-to-use components and rich


