This article mainly introduces the installation tutorial of Nginx in Linux in detail, which has certain reference value. Interested friends can refer to
Nginx installation tutorial sharing under Linux. The specific content is as follows
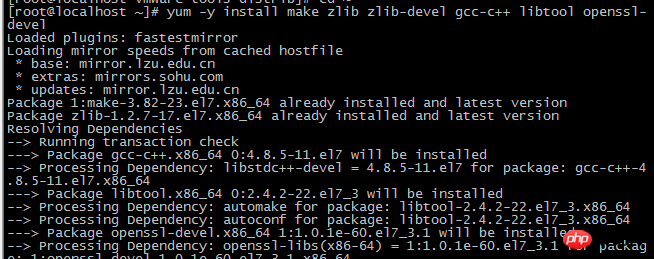
1. Install compiled files and library files
yum -y install make zlib zlib-devel gcc-c++ libtool openssl openssl-devel

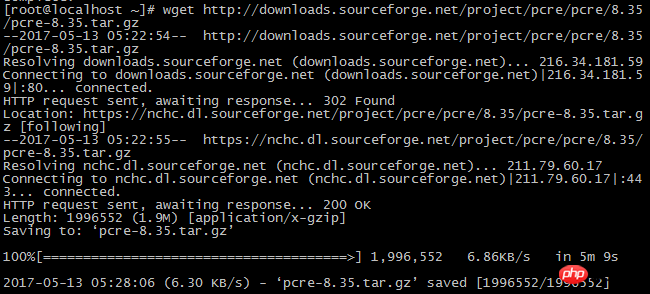
2. Install PCRE. Nginx's rewrite's pseudo-static matching rules need to use regular expressions, and PCRE plays this role.
Download address: downloads.sourceforge.net/project/pcre/pcre/8.35/pcre-8.35.tar.gz
If wget is not installed, you need to install wget first, yum -y install wget. wget is a download tool in Linux environment. For the use of the wget command, see this article

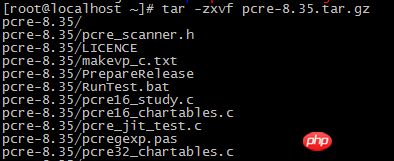
3. Unzip the pcre installation package: tar -zxvf pcre-8.35.tar.gz

4. Enter the installation directory, compile and install
cd pcre-8.35
./configure
make && make install
5. View pcre version
pcre-config --version

6. Download Nginx
wgethttp://nginx.org/download/nginx -1.6.2.tar.gz


 ##10.Nginx configuration
1) Create the user used by Nginx to run
/usr/sbin/groupadd www
/usr/sbin/useradd-g www www 2) Configure nginx.conf and replace /usr/local/webserver/nginx/conf/nginx.conf with the following content
##
user www www;
worker_processes 2; #设置值和CPU核心数一致
error_log /usr/local/webserver/nginx/logs/nginx_error.log crit; #日志位置和日志级别
pid /usr/local/webserver/nginx/nginx.pid;
#Specifies the value for maximum file descriptors that can be opened by this process.
worker_rlimit_nofile 65535;
events
{
 use epoll;
 worker_connections 65535;
}
http
{
 include mime.types;
 default_type application/octet-stream;
 log_format main '$remote_addr - $remote_user [$time_local] "$request" '
  '$status $body_bytes_sent "$http_referer" '
  '"$http_user_agent" $http_x_forwarded_for';

#charset gb2312;

 server_names_hash_bucket_size 128;
 client_header_buffer_size 32k;
 large_client_header_buffers 4 32k;
 client_max_body_size 8m;

 sendfile on;
 tcp_nopush on;
 keepalive_timeout 60;
 tcp_nodelay on;
 fastcgi_connect_timeout 300;
 fastcgi_send_timeout 300;
 fastcgi_read_timeout 300;
 fastcgi_buffer_size 64k;
 fastcgi_buffers 4 64k;
 fastcgi_busy_buffers_size 128k;
 fastcgi_temp_file_write_size 128k;
 gzip on;
 gzip_min_length 1k;
 gzip_buffers 4 16k;
 gzip_http_version 1.0;
 gzip_comp_level 2;
 gzip_types text/plain application/x-javascript text/css application/xml;
 gzip_vary on;

 #limit_zone crawler $binary_remote_addr 10m;
 #下面是server虚拟主机的配置
 server
 {
 listen 80;#监听端口
 server_name localhost;#域名
 index index.html index.htm index.php;
 root /usr/local/webserver/nginx/html;#站点目录
 location ~ .*\.(php|php5)?$
 {
 #fastcgi_pass unix:/tmp/php-cgi.sock;
 fastcgi_pass 127.0.0.1:9000;
 fastcgi_index index.php;
 include fastcgi.conf;
 }
 location ~ .*\.(gif|jpg|jpeg|png|bmp|swf|ico)$
 {
 expires 30d;
 # access_log off;
 }
 location ~ .*\.(js|css)?$
 {
 expires 15d;
 # access_log off;
 }
 access_log off;
 }

} 3) Check the correctness of nginx.conf
configuration file
local/webserver/nginx/sbin/nginx -t
4) For the configuration of the number of Nginx connections, please refer to the URL: Solving the problem of worker connections in Nginx Method
 【Related Recommendations】
Linux Free Video Tutorial
2. Boolean Education Linux Optimization Video tutorial
The above is the detailed content of Teach you how to install Nginx server in Linux. For more information, please follow other related articles on the PHP Chinese website!


