ubuntu16.04
MySQL5.7
Enter in the system terminal: #netstat -tap | grep mysql
If there is no echo, If the installed result is displayed, it is not installed. If it is as shown below, it means it has been installed. 
You can also get the version number through the command #mysql -V
1) Enter #apt in the terminal -get install mysql-server mysql-client
Next we will install MySQL, which I have already installed. 
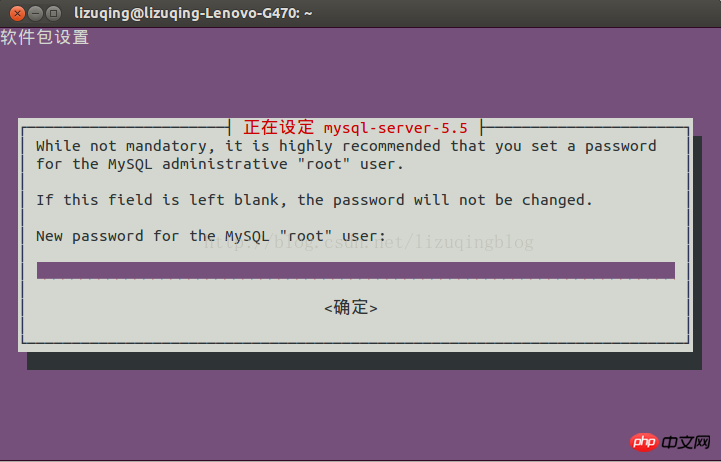
2) During the installation process, we will be asked to enter the password of the root user of the database (stealing other people's pictures here): 
3) Test whether the installation is successful:
Enter #netstat -tap in the terminal | grep mysql
4) Log in to MySQL to test
Enter #mysql -uroot -p
at the terminal. Next, we will be prompted to enter the password. Enter the password to enter the MySQL database. 
1) Stop service#/etc/init.d/mysql stop
2) Start service#/etc /init.d/mysql start
3) Modify the administrator password: #/mysqladmin -u root password newpassword
4) Set up to allow remote access (under normal circumstances, MySQL only occupies port 3306 on IP127.0.0.1 Listening on the computer, access from other IPs is denied (can be viewed through the netstat command). To cancel local monitoring, you need to modify the configuration file my.cnf)
#vim /etc/mysql/my.cnf
Find the following content and comment
bind-address = 127.0.0.1 //Find and comment
Refer to Baidu Encyclopedia
Database storage directory: /var/lib/mysql/
Related configuration file storage directory: /usr/share /mysql
Related command storage directory: /usr/bin (mysqladmin mysqldump and other commands)
Startup script storage directory: /etc/rc.d/init.d/
:
1) Open source: MySQL workbench
2) Commercial: Navicat
1. View Current character set encoding:
$show variables like 'character%';
2. Then make modifications:
1) Behind [client] in the my.cnf file Add a sentence
default-character-set=utf8 (not default_character_set=utf8, this configuration will cause MySQL to fail to start),
2) The key configuration here is to add the following three sentences after [mysqld]:
default-storage-engine=INNODB
character-set-server=utf8
collation-server=utf8_general_ci;
Modification operation: Open /etc/my.cnf, and add the following parameters under the property group mysqld:
[mysqld]
interactive_timeout=28800000
wait_timeout=28800000
Change password:
use mysql;
update user set password=password('new password') where user='root ';
FLUSH PRIVILEGES;
Just log in again.
Mac and Linux are basically the same, but there is only one difference:
There is no configuration file by default under mac. Solution:
Copy/usr Any *.cnf file under /local/MySQL/support-files to /etc/my.cnf;
The above is the detailed content of Detailed explanation of MySql installation under Linux and configuration under Mac (picture). For more information, please follow other related articles on the PHP Chinese website!


