Home > Database > Mysql Tutorial > body text

Detailed introduction to the installation and configuration steps of mysql5.6.21 (pictures and texts)

黄舟
Release: 2017-03-20 13:36:08
Original
2722 people have browsed it

This article mainly introduces mysql5.6.21 installation and configuration The detailed steps of have certain reference value. Interested friends can refer to

1. Overview

MySQL version: 5.6.21

Client tool: NavicatforMySQL

2. MySQL installation

1. The file name of MySQL after downloading is: mysql_installer_community_V5.6.21.1_ setup.1418020972.msi, the diagram is as follows:

Detailed introduction to the installation and configuration steps of mysql5.6.21 (pictures and texts)

2. After double-clicking, the following window will pop up: (If the system prompts, select Allow)

Detailed introduction to the installation and configuration steps of mysql5.6.21 (pictures and texts)

3. Installation start interface

Detailed introduction to the installation and configuration steps of mysql5.6.21 (pictures and texts)

4. Check I accept the license terms, as shown below:

Detailed introduction to the installation and configuration steps of mysql5.6.21 (pictures and texts)

5. Select Next and the following window will pop up:

The options are as follows: install all including development environment, install only sever, only install client, install all but not Including development environment, customization

Detailed introduction to the installation and configuration steps of mysql5.6.21 (pictures and texts)

##The options are:

Server, related management software, connectors in various languages. 6. After selecting the picture above, select the project to be installed, and you can select Advanced Options configuration

##7. Click Next, the diagram is as follows:

Detailed introduction to the installation and configuration steps of mysql5.6.21 (pictures and texts)If When such a prompt appears, you can select the project to see if there is an uninstalled environment

Detailed introduction to the installation and configuration steps of mysql5.6.21 (pictures and texts)#
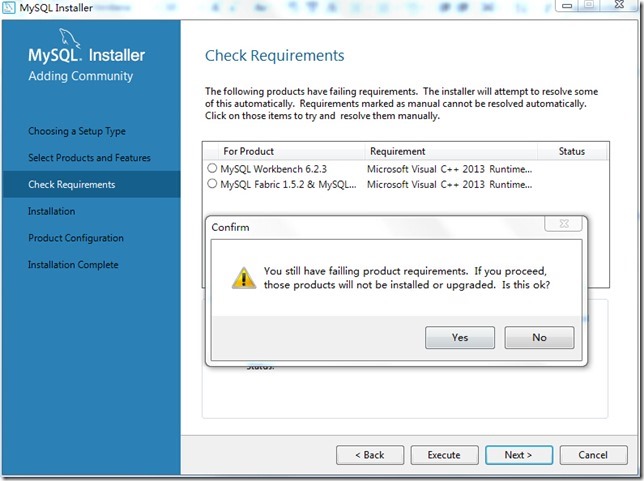
This is where the vc++2013 environment is not installed. .
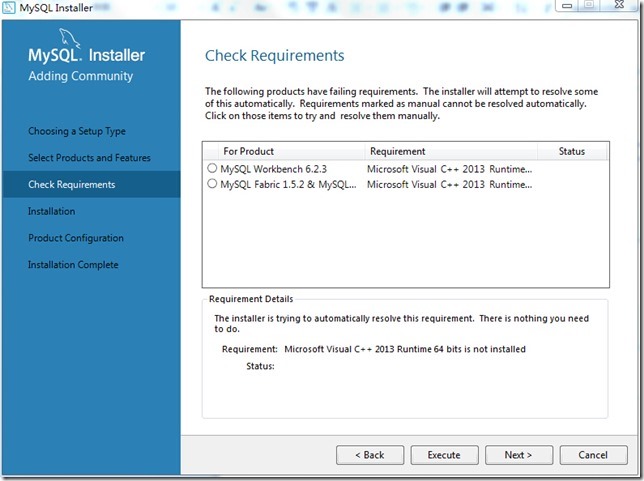
8. After the installation is complete, next stepDetailed introduction to the installation and configuration steps of mysql5.6.21 (pictures and texts)

##9. Click Execute to install

10. Installation progress

Detailed introduction to the installation and configuration steps of mysql5.6.21 (pictures and texts)

11. Installation completed

Detailed introduction to the installation and configuration steps of mysql5.6.21 (pictures and texts)

12. Prepare configuration interface

Detailed introduction to the installation and configuration steps of mysql5.6.21 (pictures and texts)##13 ,

Configure the server

type and port number, the default is

Detailed introduction to the installation and configuration steps of mysql5.6.21 (pictures and texts)

14. Fill in the Root user password, please remember the password

Detailed introduction to the installation and configuration steps of mysql5.6.21 (pictures and texts)
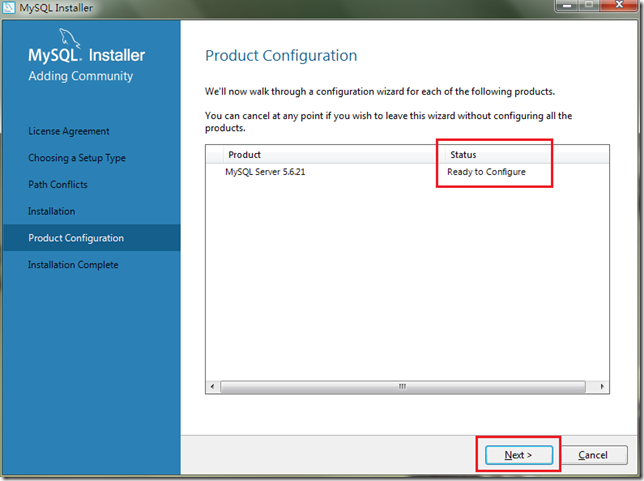
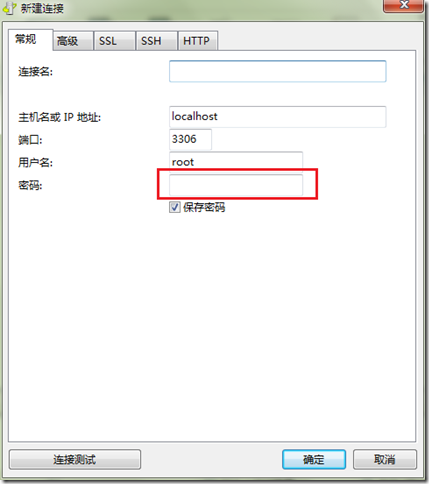
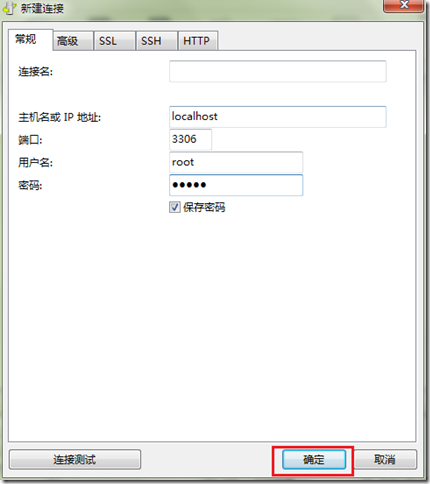
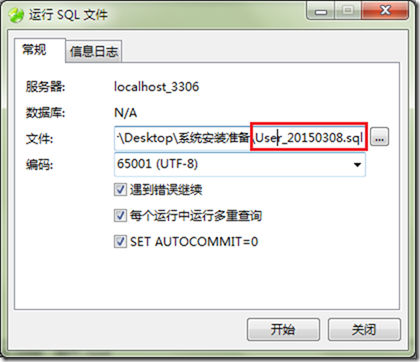
15. Fill in the password

Detailed introduction to the installation and configuration steps of mysql5.6.21 (pictures and texts)
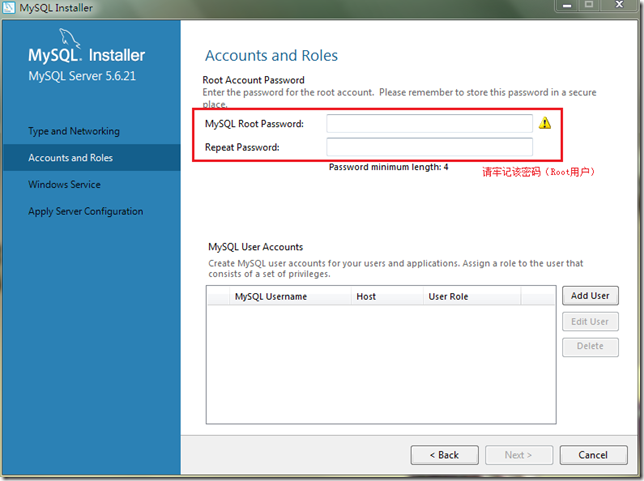
16. Set the user and service to start up. The default is

Detailed introduction to the installation and configuration steps of mysql5.6.21 (pictures and texts)
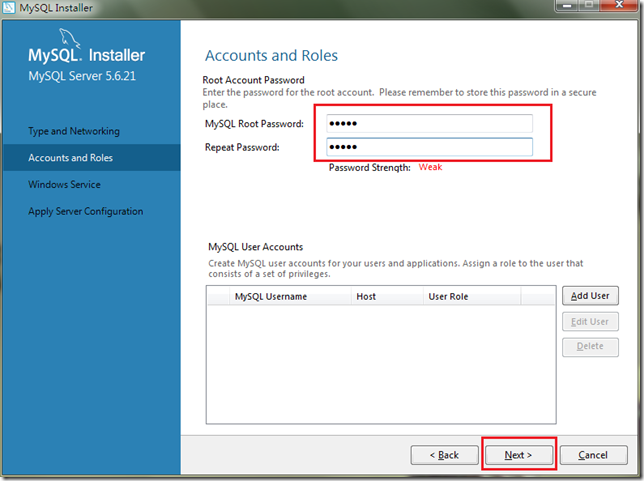
17. Confirm the configuration

Detailed introduction to the installation and configuration steps of mysql5.6.21 (pictures and texts)
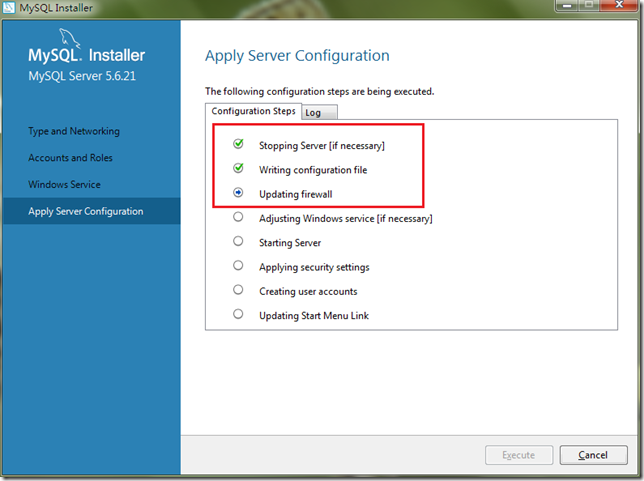
18. During the process of confirming the configuration,
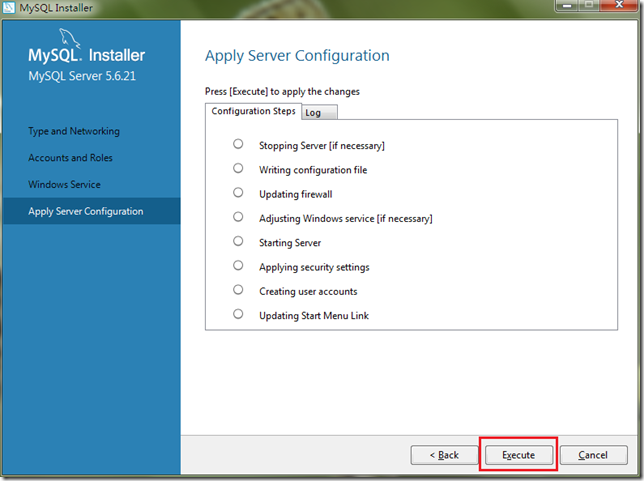
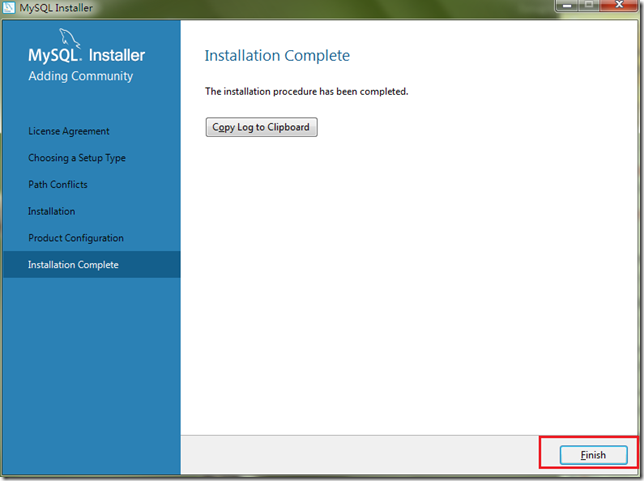
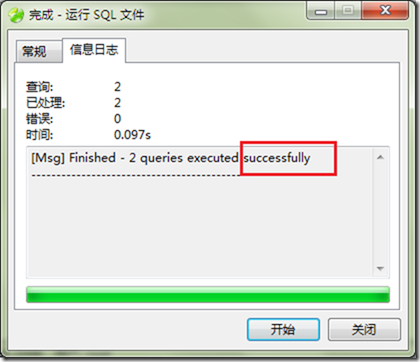
if there is a pop-up window, be sure to allow it

, the diagram is as follows:

Detailed introduction to the installation and configuration steps of mysql5.6.21 (pictures and texts)

19. Complete configuration

Detailed introduction to the installation and configuration steps of mysql5.6.21 (pictures and texts)20.Complete

Detailed introduction to the installation and configuration steps of mysql5.6.21 (pictures and texts)
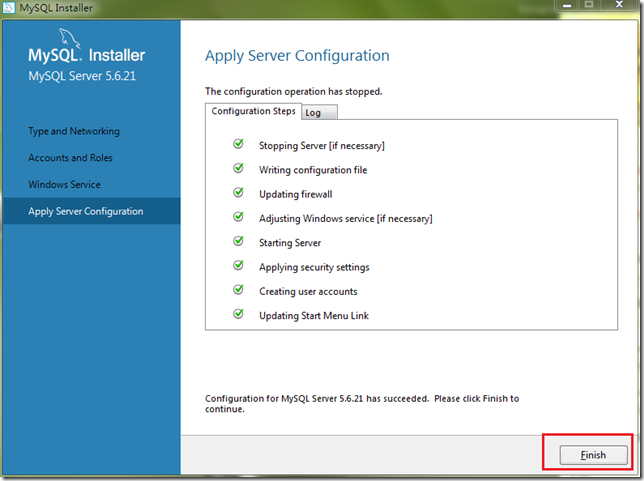
21. Installation completed

Detailed introduction to the installation and configuration steps of mysql5.6.21 (pictures and texts)

3. Verification of successful installation

1. Open the command line windowDetailed introduction to the installation and configuration steps of mysql5.6.21 (pictures and texts)

2. Enter the password

Detailed introduction to the installation and configuration steps of mysql5.6.21 (pictures and texts)
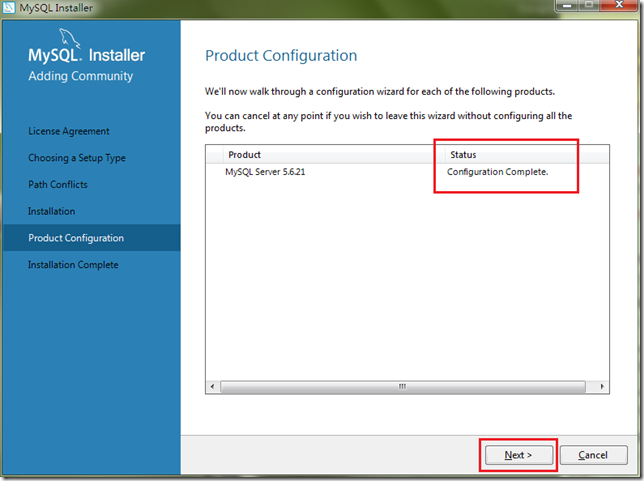
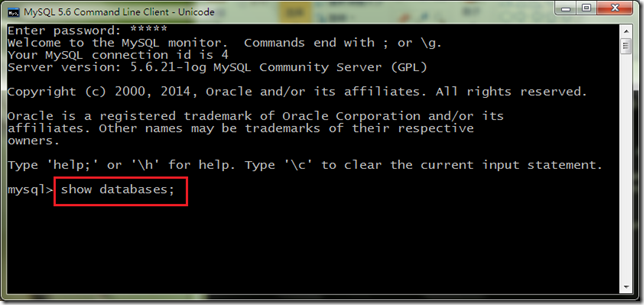
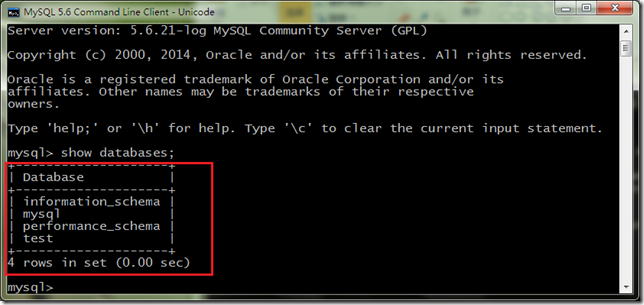
3. Enter the Root password and press Enter

Detailed introduction to the installation and configuration steps of mysql5.6.21 (pictures and texts)
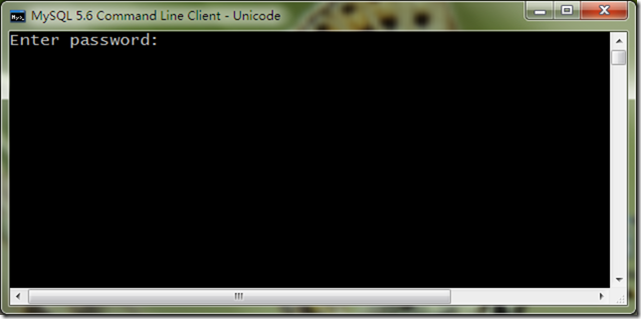
4. Display MySQL>input mark

Detailed introduction to the installation and configuration steps of mysql5.6.21 (pictures and texts)

5. Enter the command to display all databases: show databases; There must be a semicolon and press Enter

Detailed introduction to the installation and configuration steps of mysql5.6.21 (pictures and texts)

6. Display the four default databases of the system

Detailed introduction to the installation and configuration steps of mysql5.6.21 (pictures and texts)

4. Download and use of NavicatforMySQL

1. The downloaded file name is: NavicatforMySQL .zip, the diagram is as follows:

Detailed introduction to the installation and configuration steps of mysql5.6.21 (pictures and texts)

2. Unzip it to the D drive, the diagram is as follows:

Detailed introduction to the installation and configuration steps of mysql5.6.21 (pictures and texts)

3. Execution file Schematic diagram:

Detailed introduction to the installation and configuration steps of mysql5.6.21 (pictures and texts)

4. Double-click to display the main interface

Detailed introduction to the installation and configuration steps of mysql5.6.21 (pictures and texts)

5. Install the input in the downloaded file

Detailed introduction to the installation and configuration steps of mysql5.6.21 (pictures and texts)

6. Main interface

Detailed introduction to the installation and configuration steps of mysql5.6.21 (pictures and texts)

7.Connect to databaseConfiguration

Detailed introduction to the installation and configuration steps of mysql5.6.21 (pictures and texts)

8. Enter the Root password

Detailed introduction to the installation and configuration steps of mysql5.6.21 (pictures and texts)

9. Display the connection

Detailed introduction to the installation and configuration steps of mysql5.6.21 (pictures and texts)

10. All database details

Detailed introduction to the installation and configuration steps of mysql5.6.21 (pictures and texts)

#11. Right-click and select Run SQL file...

Detailed introduction to the installation and configuration steps of mysql5.6.21 (pictures and texts)

12. Select the SQL to run File

Detailed introduction to the installation and configuration steps of mysql5.6.21 (pictures and texts)

#13. The database table execution file selected here is executed after clicking Start.

Detailed introduction to the installation and configuration steps of mysql5.6.21 (pictures and texts)

#14. Display the execution result and close it successfully.

Detailed introduction to the installation and configuration steps of mysql5.6.21 (pictures and texts)

15. Run the user SQL file

Detailed introduction to the installation and configuration steps of mysql5.6.21 (pictures and texts)

Detailed introduction to the installation and configuration steps of mysql5.6.21 (pictures and texts)

##The database configuration is completed.

The above is the detailed content of Detailed introduction to the installation and configuration steps of mysql5.6.21 (pictures and texts). For more information, please follow other related articles on the PHP Chinese website!

Related labels:
source:php.cn
Statement of this Website
The content of this article is voluntarily contributed by netizens, and the copyright belongs to the original author. This site does not assume corresponding legal responsibility. If you find any content suspected of plagiarism or infringement, please contact admin@php.cn
Popular Tutorials
More>
Latest Downloads
More>
Web Effects
Website Source Code
Website Materials
Front End Template
About us Disclaimer Sitemap
php.cn:Public welfare online PHP training,Help PHP learners grow quickly!