 Backend Development
 PHP Tutorial
 Steps and methods to build a PHP environment using the standard version of Eclipse
Steps and methods to build a PHP environment using the standard version of Eclipse
Mar 29, 2018 pm 03:34 PMThis article mainly shares with you the detailed steps for setting up a PHP environment with the standard version of Eclipse. Interested friends can refer to it
1. Download the PHP plug-in for Eclipse
Search phpeclipse on Baidu and see a result with the words SourceForge.net. Click on it and find the Download button. After clicking, wait for 5 seconds and the download will start.


2. Install the Eclipse PHP plug-in
After the plug-in is downloaded, unzip it. Then delete site.xml (most plug-ins do not need to delete this file, but PHPEclipse must delete it), and finally copy the entire folder to the dropins folder of Eclipse and restart Eclipse.


##3. Create a new PHP project and create a new PHP file in Eclipse
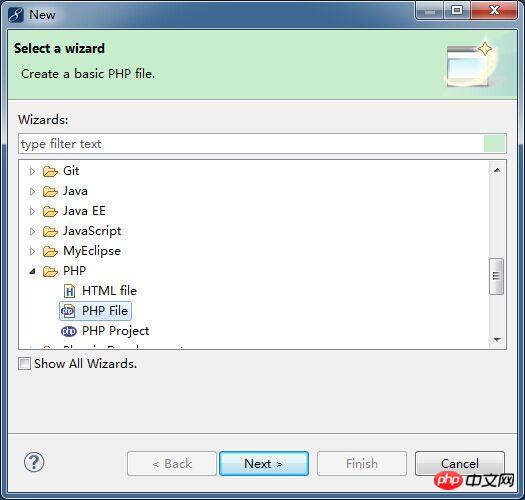
On the premise that the plug-in is installed successfully, you can see PHP related options when creating a new project and file. Then just write a few lines of code in the PHP file.

Baidu search for xampp, on the first result, click on normal download.

Run the installation package. If you see any warnings, you can ignore them and click OK to enter. Next step.
Installation options are simple for beginners, just select them all. These tomcat and mysql are all installed in the xampp directory. You will not be confused with your original tomcat and mysql. Do not use them. That's it.


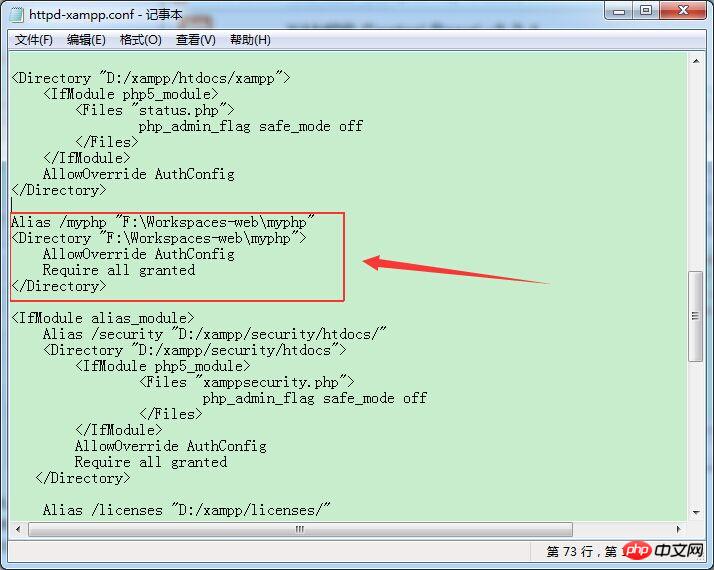
After the installation is successful, run xampp\ xampp-control.exe, in the Apache line, click Config, a drop-down box will pop up, select the third Apache (httpd-xmapp.conf), and then insert a configuration as shown in the picture. The first sentence is to set a configuration for this PHP project The alias is convenient for accessing in the browser's address bar. The following is the location of the designated PHP project. Save it.

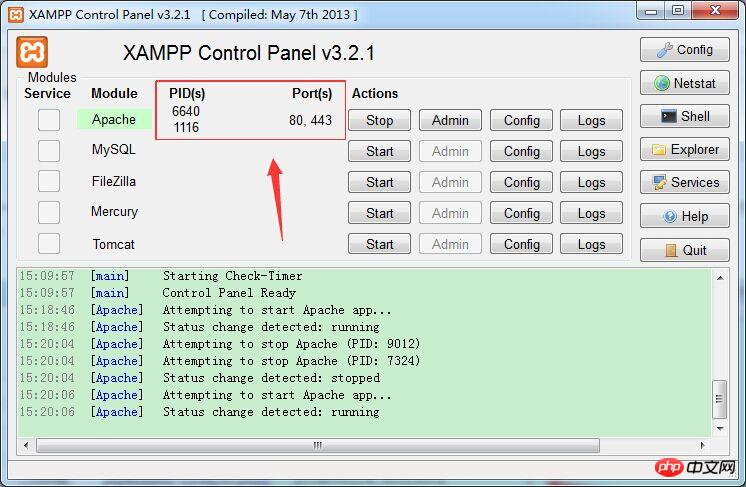
In the Apache line, click Start, and then see When several numbers appear in PID(s) and Port(s), it means the startup is successful.
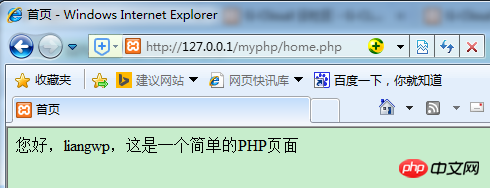
Enter http://127.0.0.1/myphp/home.php in the browser and you can see the page you wrote before.
 The above are the detailed steps for setting up a PHP environment with the standard version of Eclipse. As long as you follow the steps step by step, you will have your own first php page.
Related recommendations:
Centos 65 Build a php environment nginx+mariadb+php7The above is the detailed content of Steps and methods to build a PHP environment using the standard version of Eclipse. For more information, please follow other related articles on the PHP Chinese website!

Hot Article

Hot tools Tags

Hot Article

Hot Article Tags

Notepad++7.3.1
Easy-to-use and free code editor

SublimeText3 Chinese version
Chinese version, very easy to use

Zend Studio 13.0.1
Powerful PHP integrated development environment

Dreamweaver CS6
Visual web development tools

SublimeText3 Mac version
God-level code editing software (SublimeText3)

Hot Topics
 PHP 8.4 Installation and Upgrade guide for Ubuntu and Debian
Dec 24, 2024 pm 04:42 PM
PHP 8.4 Installation and Upgrade guide for Ubuntu and Debian
 How To Set Up Visual Studio Code (VS Code) for PHP Development
Dec 20, 2024 am 11:31 AM
How To Set Up Visual Studio Code (VS Code) for PHP Development


