This time I will bring you a detailed explanation of the steps for testing the API interface locally with PHP. What are the precautions for testing the API interface locally with PHP? The following is a practical case, let’s take a look.
I have been writing API interfaces recently. Every time I write an interface, I need to test it myself first to see if there are any syntax errors and whether the requested data is correct, but many of them are POST requests, so there is no way Open the link directly in the browser for testing, so you must have a simulation tool that can send HTTP requests locally to simulate data requests.
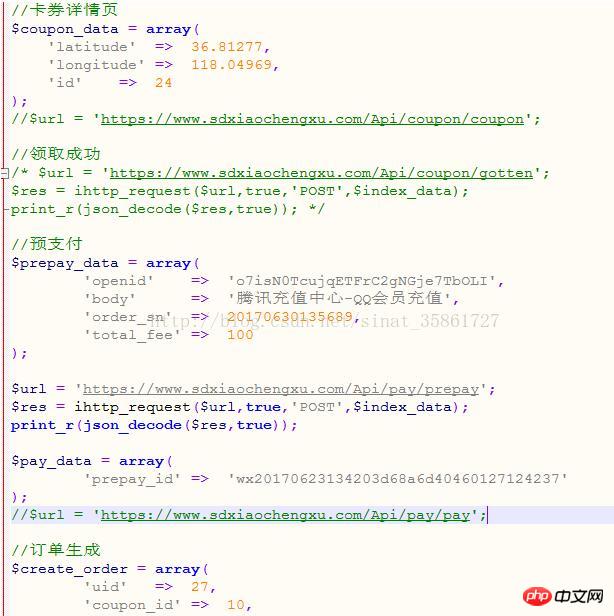
This is what I did at the beginning. I created a file in the local wampserver running directory, wrote Curl requests in it, and conducted simulated request tests, but every time Each interface requires different parameters. I need to constantly modify the requested parameters and API, which is very inconvenient. Later, I couldn’t distinguish the messy data in my request file:

I searched for related tools on the Internet, and there were many online tests. For example: ATOOLOnline Tools, Apizza, etc. I looked at them and they all do a good job. They are very easy to use, the interface is beautiful, and the service is very considerate. But I am considering security issues, and at the same time it gives meThe data returned is the original JSON format, I am used to looking at arrays The format is relatively intuitive.
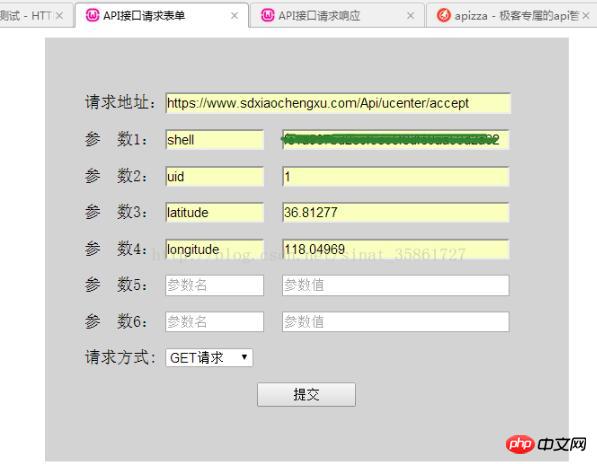
So, in line with the concept of having enough food and clothing by myself, I wrote a simple API test page locally. After submitting the data, I implemented the API request testing function locally. I didn’t have to consider security issues and could evaluate the results. Convert as you like. It only requires two files, one is the page post.html that fills in the data, and the other is the post.php file that receives the data from the post.html page and processes the request to implement the function.
1. The front-end page file post.html

is just a simple page, nothing complicated There are no JS special effects for the layout. Only 6 parameters have been written for the time being. Generally speaking, it is enough. If not, you can add it by yourself. By default, bodyrequest parameters are passed here, and only GET and POST are used for request methods.
<html xmlns="http://blog.csdn.net/sinat_35861727?viewmode=contents">
<head>
	<meta http-equiv = "Content-Type" content = "text/html;charset = utf8">
	<meta name = "description" content = "提交表单">
	<title>API接口请求表单</title>
</head>
	<style type="text/css">
		.key1{
			width:100px;
		}
		.value1{
			width:230px;
			margin:0 0 0 10px;
		}
		.main{
			margin:0 auto;
			width:450px;
			height:auto;
			background:lightgray;
			padding:40px 40px;
		}
		.refer{
			width:100px;
			height:24px;
		}
		.url{
			width:350px;
		}
	</style>
<body>
<p class="main">
	<form method="POST" action="post.php" target="_blank">
		<p>请求地址:<input class="url" type="text" name="curl" placeholder="API接口地址"></p>
		<p>参 数1: <input class="key1" type="text" name="key1" placeholder="参数名">
					 <input class="value1" type="text" name="value1" placeholder="参数值"></p>
		<p>参 数2: <input class="key1" type="text" name="key2" placeholder="参数名">
					 <input class="value1" type="text" name="value2" placeholder="参数值"></p>
		<p>参 数3: <input class="key1" type="text" name="key3" placeholder="参数名">
					 <input class="value1" type="text" name="value3" placeholder="参数值"></p>
		<p>参 数4: <input class="key1" type="text" name="key4" placeholder="参数名">
					 <input class="value1" type="text" name="value4" placeholder="参数值"></p>
		<p>参 数5: <input class="key1" type="text" name="key5" placeholder="参数名">
					 <input class="value1" type="text" name="value5" placeholder="参数值"></p>
		<p>参 数6: <input class="key1" type="text" name="key6" placeholder="参数名">
					 <input class="value1" type="text" name="value6" placeholder="参数值"></p>
		<p>请求方式: <select name="method">
			<option value="POST">POST请求</option>
			<option value="GET">GET请求</option>
		</select></p>
		<p style="text-align:center;"><input class="refer" type="submit" value="提交"></p>
	</form>
</p>
</body>
</html>2. Data Processing file post.php
Receive the data passed by the post.html page, and Send a request and then process the request result. All the body request parameters are passed from the front-end page. If you still need Header parameters, you can add them manually in this file.
<?php
echo '<title>API接口请求响应</title>';
/**
 * 设置网络请求配置
 * @param [string] $curl 请求的URL
 * @param [bool] true || false 是否https请求
 * @param [string] $method 请求方式,默认GET
 * @param [array] $header 请求的header参数
 * @param [object] $data PUT请求的时候发送的数据对象
 * @return [object] 返回请求响应
 */
function ihttp_request($curl,$https=true,$method='GET',$header=array(),$data=null){
	// 创建一个新cURL资源
	$ch = curl_init();

	// 设置URL和相应的选项
	curl_setopt($ch, CURLOPT_URL, $curl); //要访问的网站
	//curl_setopt($ch, CURLOPT_HEADER, false);
	curl_setopt($ch, CURLOPT_HTTPHEADER, $header);
	curl_setopt($ch, CURLOPT_RETURNTRANSFER, true);
	if($https){
		curl_setopt($ch, CURLOPT_SSL_VERIFYPEER, false);
		//curl_setopt($ch, CURLOPT_SSL_VERIFYHOST, true);
	}
	if($method == 'POST'){
		curl_setopt($ch, CURLOPT_POST, true); //发送 POST 请求
		curl_setopt($ch, CURLOPT_POSTFIELDS, $data);
	}


	// 抓取URL并把它传递给浏览器
	$content = curl_exec($ch);
	if ($content === false) {
	 return "网络请求出错: " . curl_error($ch);
	 exit();
	}
	//关闭cURL资源,并且释放系统资源
	curl_close($ch);

	return $content;
}
//检查是否是链接格式
function checkUrl($C_url){
 $str="/^http(s?):\/\/(?:[A-za-z0-9-]+\.)+[A-za-z]{2,4}(?:[\/\?#][\/=\?%\-&~`@[\]\':+!\.#\w]*)?$/";
 if (!preg_match($str,$C_url)){
 return false;
 }else{
		return true;
 }
}
//检查是不是HTTPS
function check_https($url){
	$str="/^https:/";
	if (!preg_match($str,$url)){
 return false;
 }else{
		return true;
 }
}
if($_SERVER['REQUEST_METHOD'] != 'POST') exit('请求方式错误!');
//发送请求
function curl_query(){
	$data = array(
		$_POST['key1'] => $_POST['value1'],
		$_POST['key2'] => $_POST['value2'],
		$_POST['key3'] => $_POST['value3'],
		$_POST['key4'] => $_POST['value4'],
		$_POST['key5'] => $_POST['value5'],
		$_POST['key6'] => $_POST['value6']
	);
	//数组去空
	$data = array_filter($data);					//post请求的参数
	if(empty($data)) exit('请填写参数');

	$url = $_POST['curl'];							//API接口
	if(!checkUrl($url)) exit('链接格式错误');		//检查连接的格式
	$is_https = check_https($url); 				//是否是HTTPS请求
	$method = $_POST['method'];						//请求方式(GET POST)

	$header = array();								//携带header参数
	//$header[] = 'Cache-Control: max-age=0';
	//$header[] = 'Connection: keep-alive';

	if($method == 'POST'){
		$res = ihttp_request($url,$is_https,$method,$header,$data);
		print_r(json_decode($res,true));
	}else if($method == 'GET'){
		$curl = $url.'?'.http_build_query($data);	//GET请求参数拼接
		$res = ihttp_request($curl,$is_https,$method,$header);
		print_r(json_decode($res,true));
	}else{
		exit('error request method');
	}
}
curl_query();
?>The writing is very simple, and the functions are not very comprehensive. The POST and GET requests under normal circumstances can still be satisfied. At least the local test results are no problem. Friends who need it can download the code. , and then modify and improve the functions according to your own needs.
I believe you have mastered the method after reading the case in this article. For more exciting information, please pay attention to other related articles on the php Chinese website!
Recommended reading:
Detailed explanation of the steps for PHP to send JSON format string based on CURL
ThinkPHP connection database operation case analysis
The above is the detailed content of Detailed explanation of the steps for testing the API interface locally with PHP. For more information, please follow other related articles on the PHP Chinese website!


