
This time I will bring you phpStudy2018Installation and configurationDetailed steps, what are the notes for the installation and configuration of phpStudy2018, the following is a practical case, Let’s take a look.
phpStudy 2018 is a very powerful PHP environmentDebugging tool. It can be installed once and can be used without configuration. It is a very convenient and easy-to-use PHP debugging environment. For novices learning PHP, environment configuration under WINDOWS is a very difficult task; for veterans, it is also a cumbersome task. So whether you are a newbie or an experienced user, this package is a good choice.
phpStudy 2018 (PHP running environment one-click installation package) v1.17 The latest official version supports win10
(1), unzip phpStudy


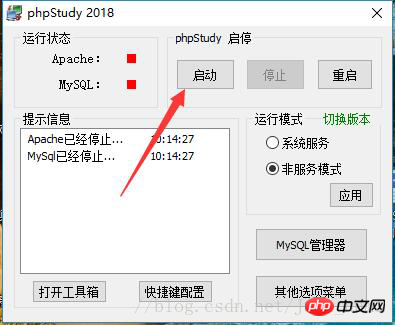
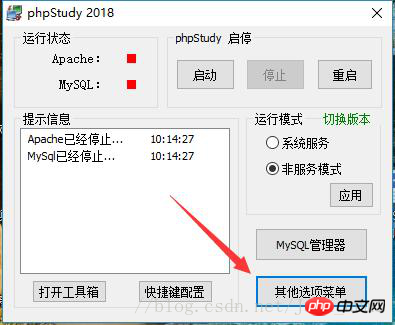 (1) Open the other selection menu
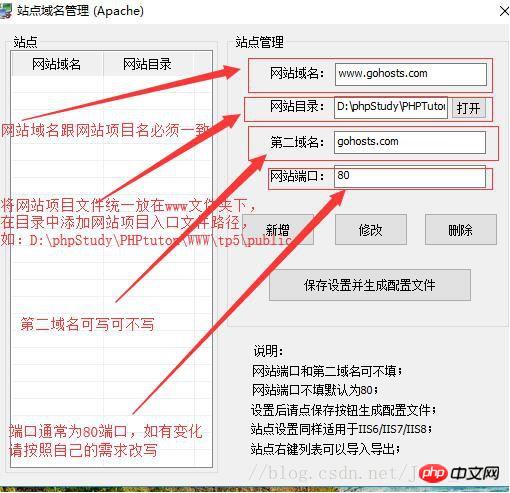
(2) Find ---> ;Site domain name management-->Open
## (3) Configure domain name 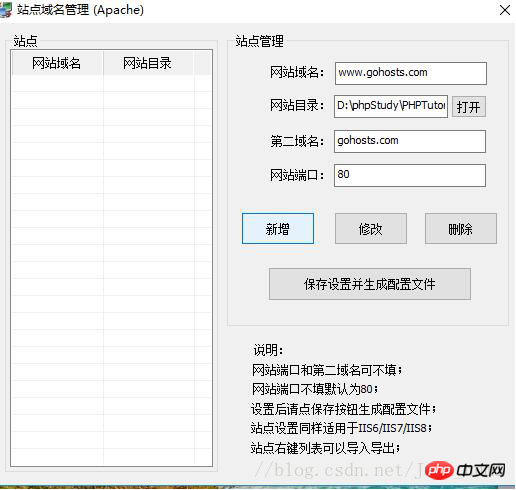
(4) Unify gohosts Change the URL to be consistent, such as: tp5 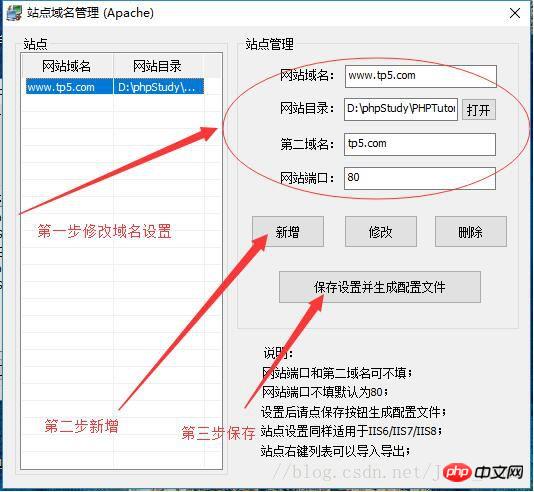
(3) Modify the URL of the corresponding domain name (tip: multiple domain names can be added to multiple projects)
I believe you have mastered the method after reading the case in this article, and more How exciting, please pay attention to other related articles on php Chinese website! 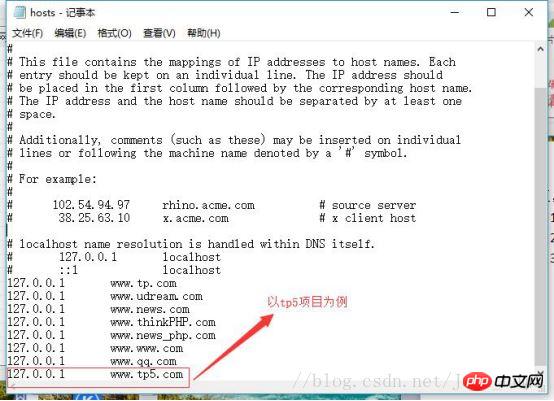
Detailed explanation of the steps to implement one-way hash encryption in PHP
Detailed explanation of the steps to implement single sign-in in PHP
The above is the detailed content of Detailed explanation of phpStudy2018 installation and configuration steps. For more information, please follow other related articles on the PHP Chinese website!


