 Web Front-end
 PS Tutorial
 PS Web Design Tutorial XXI - Creating a Light Texture Web Design in Photoshop
PS Web Design Tutorial XXI - Creating a Light Texture Web Design in Photoshop
As a coder, my art foundation is weak. We can refer to some mature web PS tutorials to improve our design capabilities. To paraphrase a sentence, "If you are familiar with three hundred Tang poems, you can recite them even if you don't know how to compose them."
The tutorials in this series come from online PS tutorials, all from abroad, and all in English. I try to translate these excellent tutorials. Due to limited translation capabilities, the details of the translation still need to be worked out. I hope that netizens will give you some advice.
Convention:
1. The software used in this article is Photoshop CS5 version
2. The screenshots of the original tutorial are in English. I took them again based on the re-production. Chinese version of Figure
3. Some operations in the original text do not give parameters. I measured some parameters through repeated testing, which are shown in red text. For some wrong parameters, the correct parameters are displayed directly in red text
For example: (90, 22, 231, 77) , indicating that the coordinates of the upper left corner of the rectangle are (90, 22) , width 231, height 77
For example: (90,22), indicating that the coordinates of the upper left corner of the rectangle are (90,22), the other two parameters of the rectangle have been specified in the tutorial
4. My own experience will be attached at the end of the tutorial. Some are optimizations of some steps in the tutorial, etc.
In this web design tutorial, we'll be creating a light textured web page layout. I will show you how apply subtle textures in web layouts, how to create a seamless diagonal mosaic pattern and how to create a tabbed content area design for the “Services” section.
In this web design tutorial, we will create a light texture web layout. I'll show you how to add subtle texture to your web layout, how to create a seamless diagonal tiling pattern, and how to create a "Services" section of the tab's content area.
In this tutorial, we will use the 960 Grid System to organize and arrange the elements of our web layout. Before we begin, download it to your computer.
In this tutorial, we will use the 960 grid system to organize and arrange the elements of our web layout. Before you begin, download it to your computer.
Unzip the archived file you downloaded, go to the “templates” folder and then go to the “photoshop” folder. You will find three .PSD files. Each of these files contains a grid with 12, 16 and 24 columns. In this tutorial we will be using the 12 columns grid.
Unzip the downloaded file and click on the photoshop folder under the templates folder. You will find there are 3 .PSD files. They contain 12-column, 16-column, and 24-column grids respectively. In this tutorial we are using a 12 column grid
The .PSD files have some guides already set up, which will be very useful. To activate the guides, go to View > Show > Guides, or use the shortcut Ctrl/Cmd + ;.
. The PSD file already contains some set-up grids, which can be very useful. To activate the grid click: View> Display> Grid, or use the keyboard shortcut, Ctrl/Cmd + ;
During this tutorial you will need to create shapes with specific dimensions. To see the exact size of a shape or selection while you are creating it, open the Info Panel by going to Window > Info. The width and the height of your shapes and selections will be displayed in this panel .
In this tutorial you will need to create a shape with specific dimensions. When you want to see the exact size during creation, click: Window > Information to open the Information panel. The width and height of your shape or selection will be displayed in this panel.
Now that we covered the basics of using the 960 Grid System, we can move on to creating the web layout. Let's get started!
Now, we discussed Using the basics of the 960 grid system, we can move on to creating a network layout. let's start!
Step 1: Creating the Background of the Web Layout
##Step 1: Creating the background of the web layout
Open the "960_grid_12_col.psd" file in Photoshop. Then go to Edit > Canvas Size and set the width to 1200px and the height to 1900px. You can adjust the height later on if you need more space for the web layout.Open the 960_grid_12_col.psd file in PS. Then click:Edit ( should be Image) > Canvas Size, and then set the width to 1200px, The height is 1900px. If the page layout requires more space, you can adjust the page height later.
Since the translation tutorial does not use the 960 layout system, this step is changed to create a new document, size: 1200px*1900px
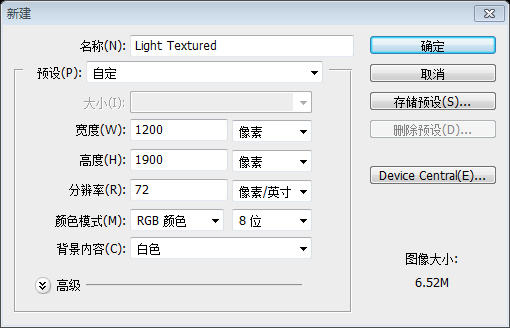
Now we will change the color of the background from white to a light gray. With the "Background" layer selected, click on the little black lock icon from the top of the Layers panel to unlock this layer. Then change the color of the background layer to #ededed.
Now, we are going to change the background color from white to light gray. When the Background layer is selected, click the little black lock icon above the Layers panel to unlock the layer. Then change the color of the background layer to: #ededed
Since this is a new document, double-click the background layer to unlock it
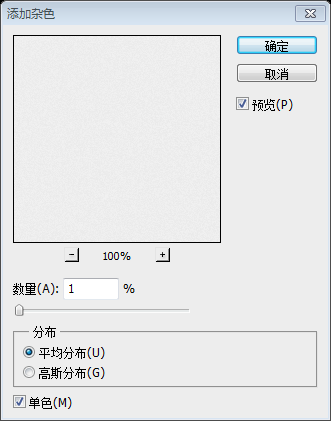
Right-click on this layer and select Convert to Smart Object. Then go to Filter > Noise > Add Noise and set the Amount to 1%, the Distribution to Gaussian and tick the Monochromatic box.
Right-click on the layer and select Convert to Smart Object. Then click: Filter > Noise > Add Noise. Set the amount to 1%, set it to Gaussian distribution, and check "Single Color".
Step 2: Creating the Header
Step 2: Creating the header area
We will create a simple header with the name of the web layout and some social media icons. Create a new group and name it "Header". Then select the Type Tool ( T) and write the name of your layout. I used the font Gotham Bold with the size 42pt and the color #707679. Align this layer with the grid, as you see in the image below.
We will use Create a plain header area with the name of the website and some social media icons. Create a new group Header. Then use Text Tool to write the name of your layout. The font I used: Gotham Bold, size: 42pt, color: #707679. Align your layout as shown below
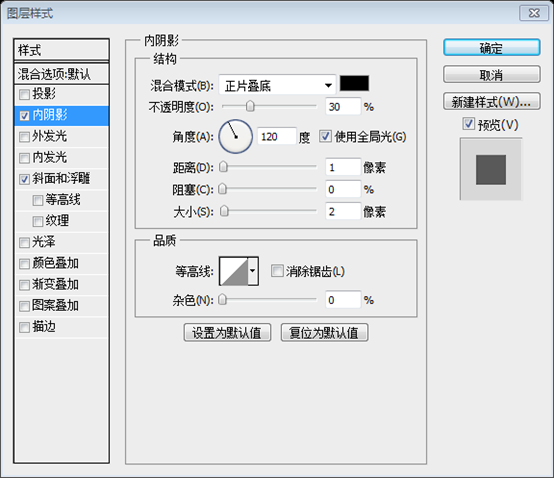
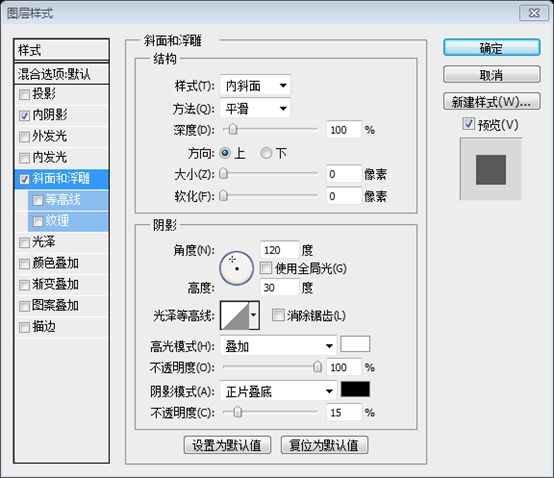
Double-click on your text layer to open the Layer Style window and use the settings from the following image.
Double-click on your text layer to open the Layer Style window and use the settings from the following image. Open the layer style window for the text layer and set the layer style as shown below

##Now we will add the social media icons. Download this set of icons and open the RSS, Twitter and Facebook icons in Photoshop (or any other icons you want to include in your design). Use the Move Tool (V) to move these icons into your web layout document and put them in the right side of the web layout. Leave a distance of 10px between icons.
Move tool to move these icons to your web layout document, and then place them on the right side of the web layout. Keep 10px between each icon
Select all these layers, hit Ctrl/Cmd + G to group them and name the group "social icons". Select the layers of these icons, press Ctrl/Cmd + G to group them, and name the group social icons
Step 3: Creating a Diagonal Stripe Pattern
Step 3: Creating a Diagonal Stripe Pattern
Now we will create a pattern that we will use for the navigation bar and other areas of the web layout. Create a new document (Ctrl/Cmd + N) with the dimensions 5px by 5px. Select the Rectangular Marquee Tool (M ), hold down the Shift key and create five square selections, as you see in the image below.
We are going to create a pattern that will be used for the navigation bar and other parts of the web layout. Create a new document (Ctrl/Cmd + N), size: 5px*5px. Select the Rectangular Marquee Tool, hold down the Shift key to create 5 square selections, as shown below
Create a new layer (Ctrl/Cmd + Shift + N) and fill the selection with black. Then hide the "Background" layer by clicking on its eye icon.
Create a new layer (Ctrl/Cmd + Shift + N) and fill the selection with black. Click the eye icon in front of the Background layer to hide the layer
Suggestion: When creating a new document, select the background color as transparent, and then use the pencil tool to create the following pattern. It is easier
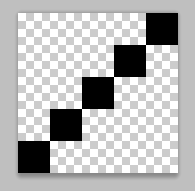
To create the pattern, go to Edit > Define Pattern and click OK. Now you can close this document.
Create the pattern, Click: Edit> Define Pattern, then click OK. Now you can close the document
Step 4: Creating the Navigation Bar
Step 4: Creating the Navigation Bar
Create a new group and name it "Navigation". Select the Rectangle Tool (U) and create a rectangle with the height 50px and the same width as your document. Use the color #b8c0c3 . Right-click on this layer and select Convert to Smart Object.
Create a new group Navigation. Use the Rectangle Tool to create a rectangle (0,111) with a height of 50px and a width the same as the width of the document. Color: #b8c0c3. Right-click on this layer and select Convert to Smart Object
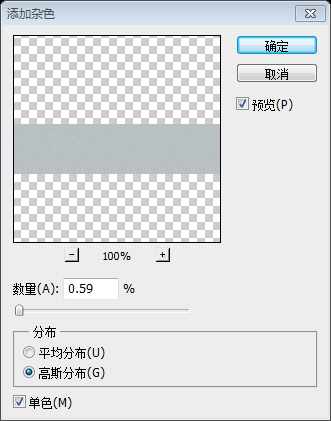
Double-click on this layer to open the Layer Style window and use the settings from the following image. Then go to Filter > Noise > Add Noise and add a 0.59% Gaussian Monochromatic noise.
Double-click the layer to open the layer style window and set the style as shown below. Then click: Filter > Noise > Add Noise. Set the amount to 0.59%, Gaussian distribution, single color.



#Select the Line Tool (U), set the Weight to 1px and create a horizontal line at the top of your navigation bar using the color #cdd3d7. Name this layer "1px line".
Use the Line Tool , set the width to 1px, and create a horizontal line (0,111) at the top of your navigation bar, color: #cdd3d7. Name the layer 1px line
Duplicate this layer (Ctrl/Cmd + J), select the Move Tool (V) and hit the up arrow key on your keyboard to move this layer 1px upwards. Set the color of the new line to #818b91.Duplicate the layer (Ctrl/Cmd + J), use theMove tool and hold down the up arrow key on your keyboard. Move this layer up 1px. Set the color of the new line (0,110): #818b91
Now add two more horizontal lines at the bottom of the navigation bar using the same colors.Now add more horizontal lines at the bottom of the navigation bar, using the same color.The positions of the two straight lines are (0, 161) and (0, 162)

Step 5: Adding the Navigation Menu Items
Step 5: Adding the navigation menu items
Select the Type Tool (T) and write the name for your navigation menu items. I used the font Helvetica Bold with the size 14pt and the color #ffffff.
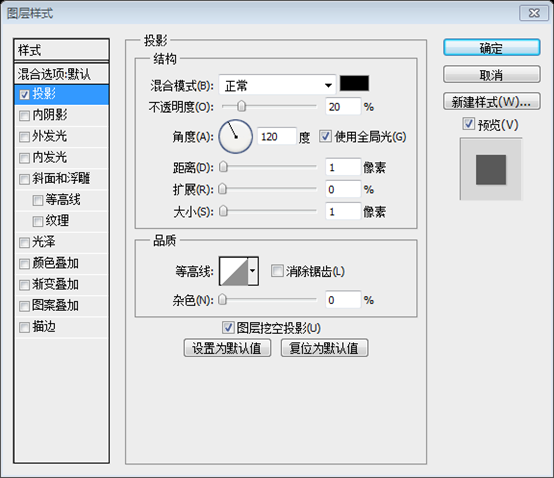
Add a drop shadow effect to these text layers using the settings from the image below.
Use the Text Tool to write the text of your navigation bar menu. The font I used: Helvetica Bold, font size: 41pt, color: #ffffff

##Select the Rounded Rectangle Tool (U), set the Radius to 4px and create a black rounded rectangle with the dimensions 70px by 26px and the color #1d2d34 over the first navigation menu item. Name this layer "active menu item", put it underneath the text layer and set its opacity to 35% .
Rounded Rectangle Tool, set the radius to 4px, and create a black rounded rectangle(130,124)In the first menu of the navigation bar , size: 70px*26px, color: #1d2d34. Name this layer active menu item, place the layer below the text layer, and set the opacity to 35%

Step 6: Creating a Pattern for the Slider
Step 6: Creating a pattern for the sliding bar
Now I will show you a technique for creating a seamless mosaic pattern for the image slider background. Create a new document (Ctrl/Cmd + N) with the dimensions 200px by 200px.Now, I will show you A technique that creates a seamless patchwork pattern for the background of a sliding bar. Create a new document (Ctrl/Cmd + N), size: 200px*200px Hit the "D" key on your keyboard to reset the foreground and background colors to black and white. Create a new layer (Ctrl/Cmd + Shift + N) and go to Filter > Render > Clouds.Press the D key on your keyboard to reset the foreground color to white and the background color to black. Create a new layer (Ctrl/Cmd + Shift + N) and click:Filter> Rendering> Clouds
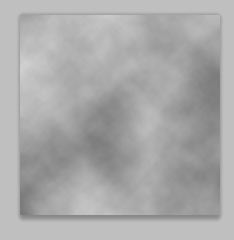
Right-click on the layer and select
. Then click: Filter> Pixelate> Mosaic, set the cell size to 40
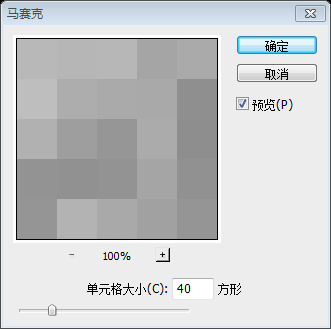 #Duplicate the "Layer 1" layer (Ctrl/Cmd + J). Then go to Filter > Other > High Pass and set the radius to 5px. Set the blend mode of this layer to Hard Light. This will make mosaic effect sharper and add some shadow around the squares .
Duplicate the layer (Ctrl/Cmd + J). Then click:
Filter > Other > High Contrast Retain
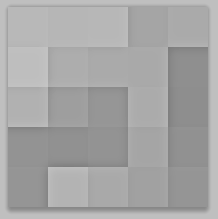
Now we will make the mosaic effect even sharper. Create a new layer above all the other ones (Ctrl/Cmd + Shift + N). Then go to Image > Apply Image and click OK. This will create a rasterized image from all the current layers, but keep all the other layers intact. You can also use the shortcut Ctrl/Cmd + Alt/Option + Shift + E.
Now we will make the mosaic effect clearer. Create a new layer above all other layers (Ctrl/Cmd+Shift+N). Then click: Image > Apply Image, and click "OK" in the dialog box that appears. This will create a rasterized image from all the current layers, but leave all other layers unchanged. You can also use the shortcut Ctrl/Cmd + Alt/Option + Shift + E.
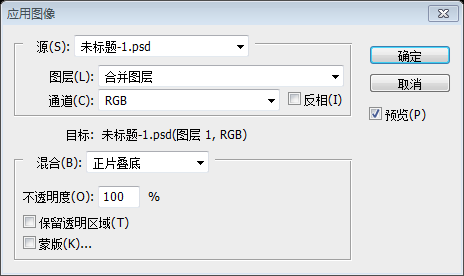
Right-click on the layer that you created and select Convert to Smart Object. I usually like to use Smart Object whenever I can so I know what filters I have previously applied and to play around with the filters.
Right-click on the layer you created and selectConvert to Smart Object. What I usually like using smart objects is because I know what filters have been applied previously.
Now go to Filter > Sharpen > Sharpen. Hit Ctrl/Cmd + F to apply this filter one more time. Two times should be enough for the image to get those nice highlights between squares.
Click: Filter> Sharpen> Sharpen. Press Ctrl/Cmd + F multiple times to apply the filter. To get enough light between the squares, twice is enough
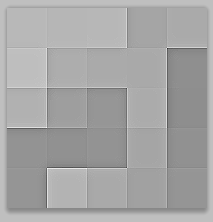
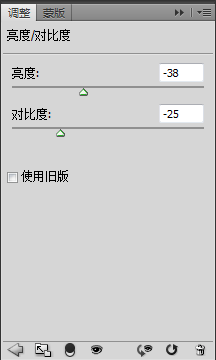
Go to Layer > New Adjustment Layer > Brightness/Contrast and use the settings from the following image. Then create a new layer above all the other ones and go to Image > Apply Image to create a rasterized image of all the layers.
Click:Layer> New Go to Adjustment Layers > Brightness/Contrast and set as shown below. Then create a new layer on top of the other layers and click: Image > Apply Image to create a rasterized image of all layers.
To create the first pattern go to Edit > Define Pattern and click OK. In the next steps I will show you how to use this pattern to create a diagonal mosaic pattern. Do not close this document, we will it later.
To create the first pattern, click:Edit> Define Pattern, and press OK. In the next steps, I'll show you how to use this pattern to create a diagonal mosaic pattern. Do not close this file, we will use it in a later step.
Now comes the tricky part – creating the diagonal mosaic pattern. I tried a few different techniques in order to achieve this, but only one was successful and I will explain it to you in the following steps. I am not sure this is the best way to do it, but it does work.
Now comes the tricky part - creating the diagonal mosaic pattern. To achieve this I tried a few different techniques but only one was successful and I'll explain the next steps. I'm not sure this is the best way, but it does the job well.
Create a new document (Ctrl/Cmd + N) with the dimensions 800px by 800px. Create a new layer (Ctrl/Cmd + Shift + N) and fill it with white. Double -click on this layer to open the Layer Style window and apply the pattern you created at the previous step.
New file (press Ctrl/Cmd+N), size: 800x800px. Create a new layer (Ctrl/Cmd+Shift+N) and fill it with white. Double-click on the layer to open the Layer Styles window and apply the pattern you created in the previous step.

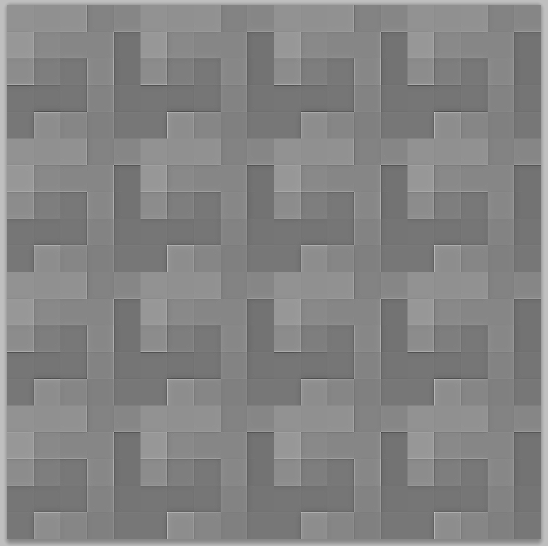
Right-click on the "Layer 1" layer and select Convert to Smart Object. Then go to Edit > Free Transform ( Ctrl/Cmd + T), hold down the Shift key and rotate this layer 45°.
Right-click on the layer and selectConvert to Smart Object. Then click: Edit> Free Transform (Ctrl/Cmd + T), hold down the Shift key to rotate the layer 45 degrees
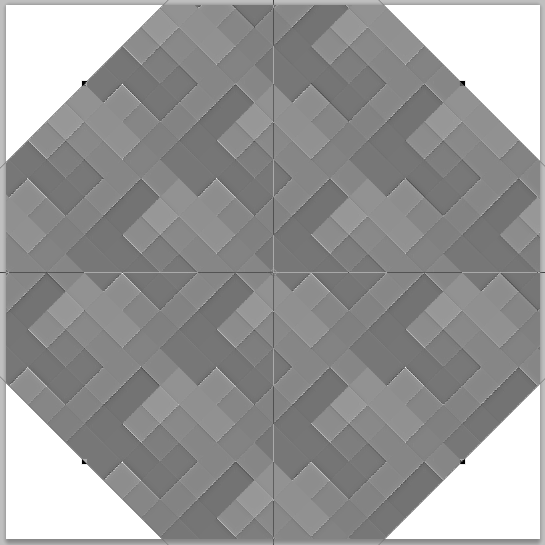
Go back to the document where you created the initial mosaic effect and move the rasterized layer ("Layer 4") into this new document. layer to this document. (You can right-click on the layer and select
, and select the new document as the target)
Right-click on this layer and select Convert to Smart Object. Then use Free Transform (Ctrl/Cmd + T) to rotate this layer 45° as well.
Right-click the layer and select
Convert to Smart Object. Then use Free Transform to rotate 45 degrees
Select the Move Tool (V) and move this layer around to integrate it in the background pattern. I used the darker square from pattern as reference in order to find the right position for this layer. You can also use the arrow keys while having the Move Tool (V) selected in order to move the layer pixel by pixel. In the image below I highlighted the small pattern with red so you can see it.
Select the
Move Tool(V) and move its layer left and right, aligning it to the background pattern. I used the dark square pattern as a reference to find the right location for this layer. You can also use the Move Tool(V) while using the arrow keys to move the layer pixel by pixel. In the image below, I added a red color overlay to the pattern, as you can see.
Tip: to test if the small pattern is integrated in the background pattern, you can make its layer invisible and then visible again. If you don't see any differences in your image, the layer is in the right position.
Tip: Test aligning a small pattern with the background pattern to make this layer hidden and then visible again. If you don't see any difference in the image, the layer is in the correct position.
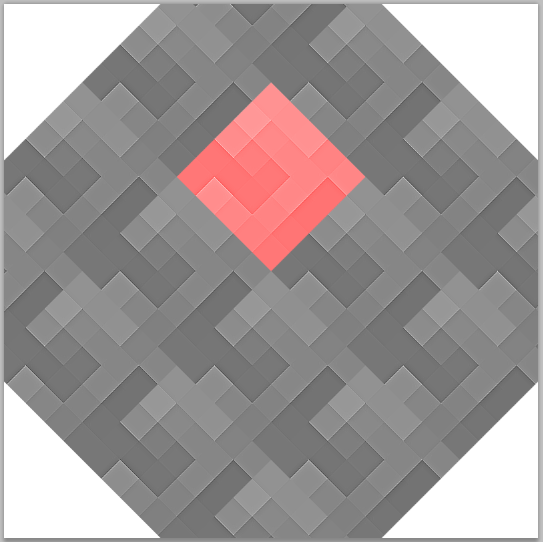
Hold Ctrl/Cmd and click on the layer thumbnail to create a small patterned selection. Then activate the rulers (Ctrl/Cmd + R) and drag some guides from the rulers next to each corner of the selection, as shown below
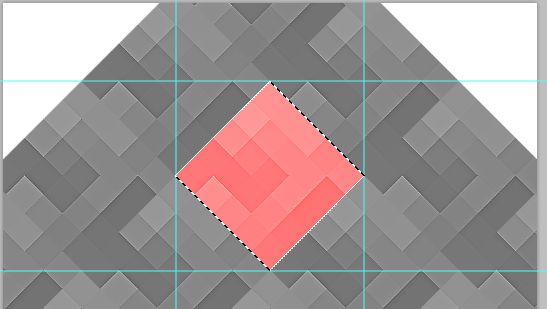
Now Reference The square surrounded by lines will be our new pattern. Press Ctrl/Cmd + D to deselect. Then delete the small pattern layer. We don't need it anymore.
Select the Rectangular Marquee Tool (M) and select the square between guides. square
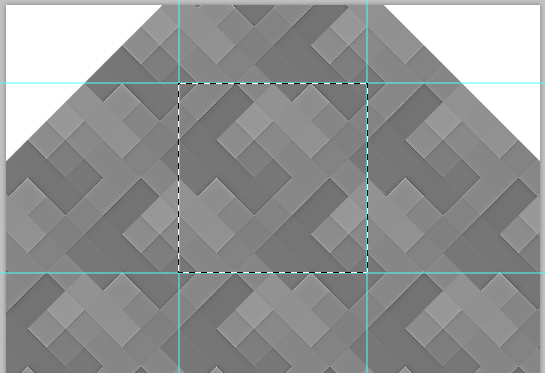
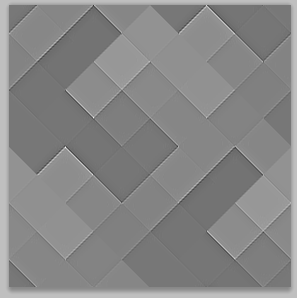
With the "Layer 1" layer selected go to Edit > Copy (Ctrl/Cmd + C). Create a new document (Ctrl/Cmd + N). Photoshop will use the dimensions of the selection you made as dimensions for the new document. Click OK and paste (Ctrl/Cmd + V) the image you selected.
With the layer selected, click:Edit> Copy (Ctrl/Cmd + C). Create a new document (Ctrl/Cmd + N). PS will use the size of your selection as the size of the new document. Click to deactivate and paste (Ctrl/Cmd + V) the image of your choice
Now go to Edit > Define Pattern, give your pattern a name and click OK.
Now click: Edit> Define Pattern, give your pattern a name and click OK
Step 7: Creating the Image Slider Background
Step 7: Creating the background of the image slide bar
Now we will apply the pattern to the image slider background. Create a new group and name it "Image Slider". Select the Rectangle Tool (U) and create a rectangle with the height 410px and the same width as your document. Use the color #81aaba. Name this layer "slider_bg", right-click on it and select Convert to Smart Object.
Now we need to add a background pattern to the image sliding bar. Create a new group Image Slider. Use the Rectangle Tool to create a rectangle (0,163) with a height of 410px and a width consistent with your document. Color: #81aaba. Name the layer slider_bg, right-click and select Convert to Smart Object.
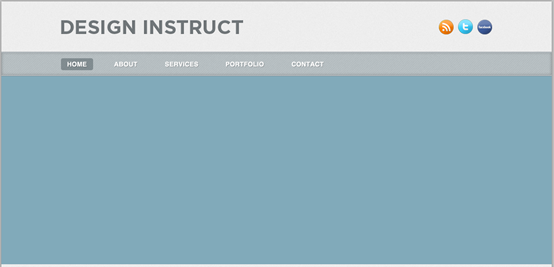
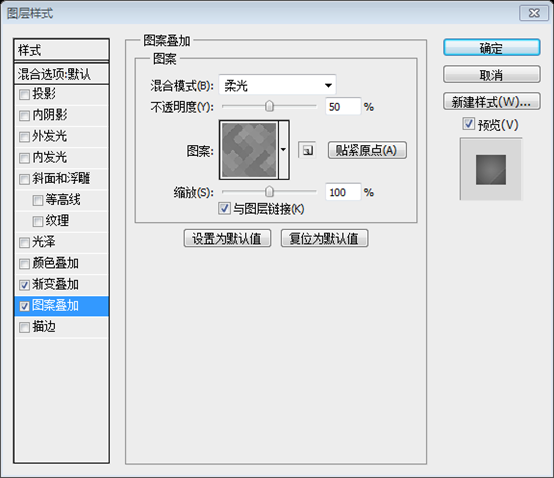
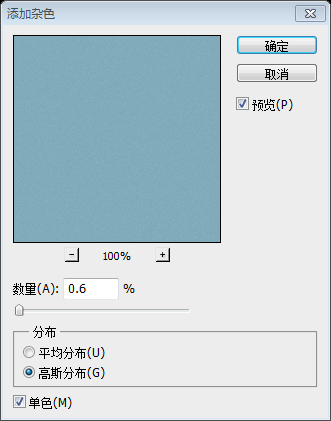
Double-click on this layer to open the Layer Style window and use the settings from the following image. Then go to Filter > Noise > ; Add Noise and add a 0.6 Gaussian Monochromatic noise.
Double-click the layer to open the layer style window and set the style as shown below. Then click: Filter> Noise> Add noise, set the amount to 0.6%, Gaussian distribution, single color

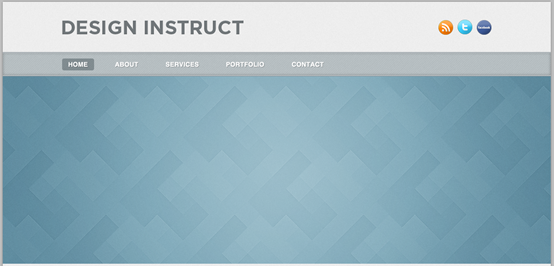
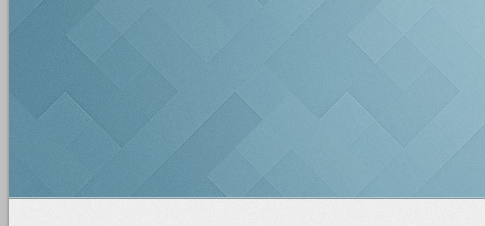
Use the Line Tool (U) to create two horizontal lines with the weight 1px at the bottom of the image slider background. For the first line use the color #b8c8ce and for second one use #849ba4.
Use the straight line tool to create two straight lines with a width of 1px at the bottom of the image slider background. The color of the first straight line (0, 571) : #b8c8ce, the color of the second straight line (0, 572) : #849ba4
Step 8: Creating the Image Slider
Step 8: Create an image sliding bar
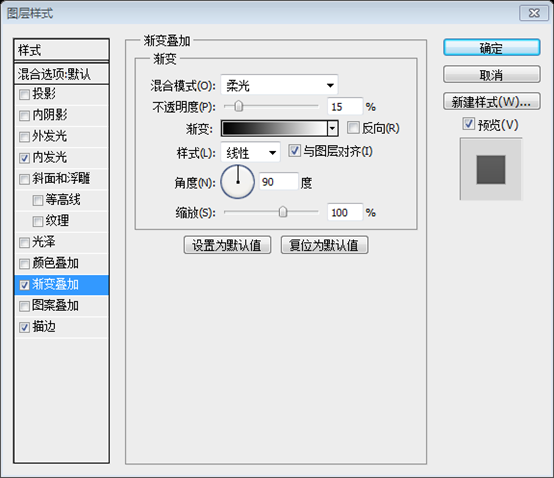
Create a rectangle with the dimensions 620px by 340px and the color #d2dade. Double-click on this layer to open the Layer Style window and use the settings from the following image. For the Stroke effect I used the color #819098.
Create a rectangle(450,185), size: 620px* 340px, color: #d2dade. Double-click the layer to open the layer style window and set the style as shown below. Stroke color: #819098. Name this layer Border


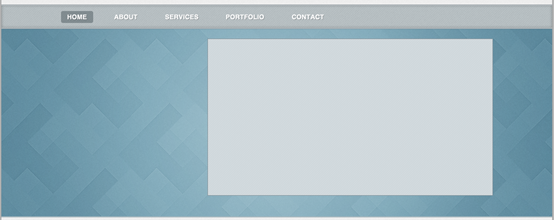
(460,195), size: 600px*320px, and place it in the middle of the previously created rectangle. Name this layer Image_Holder, double-click to open the layer style window, and set the inner glow style as shown below

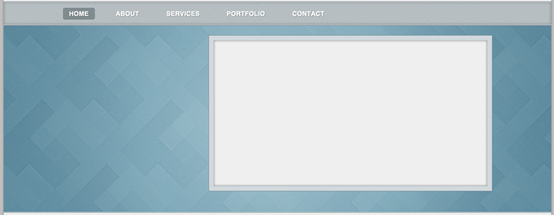
##Open an image in Photoshop that you want to display in your image slider. Use the Move Tool (V) to move it into your initial document and put it over the "image_holder" layer.
In PS Open the image you want to display in the image slider. Use the Move tool to move to your document and place it above the Image_Holder layer
Name this layer "image", right-click on it and select Create Clipping Mask to make it visible only over the area of the "image_holder" layer.
Name this layer Image, right-click on it and select
Create Clipping Mask, so that it only displays on the Image_Holder layer The upper part

Now we want to create a shadow at the bottom of the image slider. Use the
and hold down the Shift key to create a black circle in the middle of the bottom edge of the image sliding bar
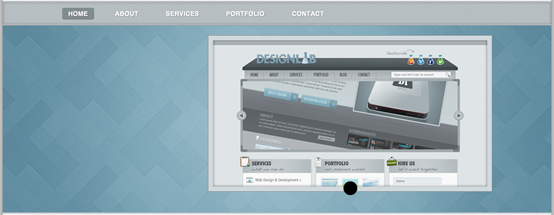
Name this layer "shadow", right-click on it and select Convert to Smart Object. Then go to Filter > Blur > Gaussian Blur and set the Radius to 3px. Then go to Edit > Free Transform, hold down the Alt/Option + Shift keys and drag the right edge of the layer until it reaches the right edge of the image slider. Take a look at the following image for reference (2).
Name this layer shadow, right-click and select Convert to smart object. Then click: Filter > Blur > Gaussian Blur, set the radius to 3px. Then click: Edit > Free Transform, hold down the Alt/Option + Shift keys and drag the right edge to the right side of the picture sliding bar. You can refer to the picture below
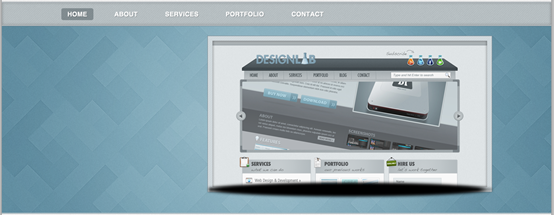
Put this layer underneath the "border" layer and set its opacity to 15% (3, 4).
Move this layer below the Border layer and set the opacity to 15%
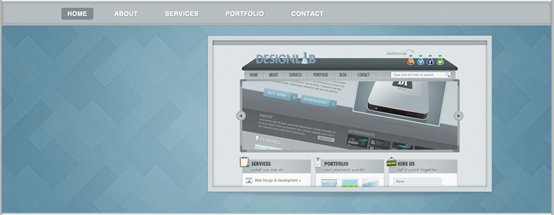
Duplicate this layer (Ctrl/Cmd + J) a few times and arrange your circle shapes as you see in the following image.Duplicate this layer (Ctrl /Cmd + J) a few times and place the circles as shown below Now create another circle in the middle of the first one using the color #8bb2bf and the diameter 6px. Name this layer "active".Create another circle in the middle of the first circle, color: #8bb2bf, diameter: 6px. Name this layer active
Step 9: Creating the Image Slider Arrows
Step 9: Create the arrow of the picture sliding bar
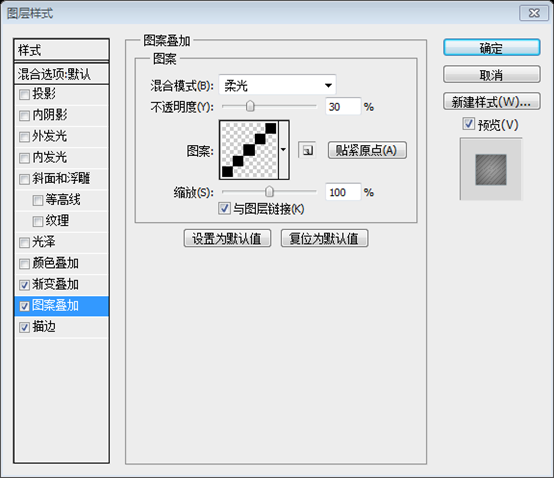
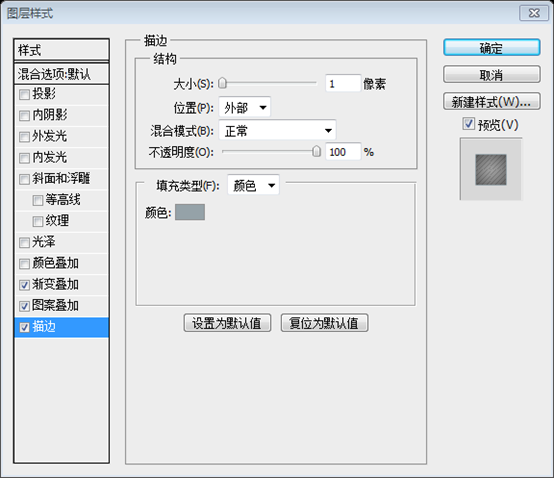
Create a new group and name it "right arrow". Then select the Ellipse Tool (U), hold down the Shift key and create a circle with the color #e7edef and the diameter 45px. Name this layer "circle" and put it in the right side of the image slider. Double-click on this layer to open the Layer Style window and use the settings from the following image.Create new groupright arrow. Then select the Ellipse Tool (U), hold down the Shift key and create a circle, color: #e7edef, diameter: 45px. Name this layer circle and place it to the right of the image slider. Double-click the layer to open the layer style window and set the layer style as shown below.
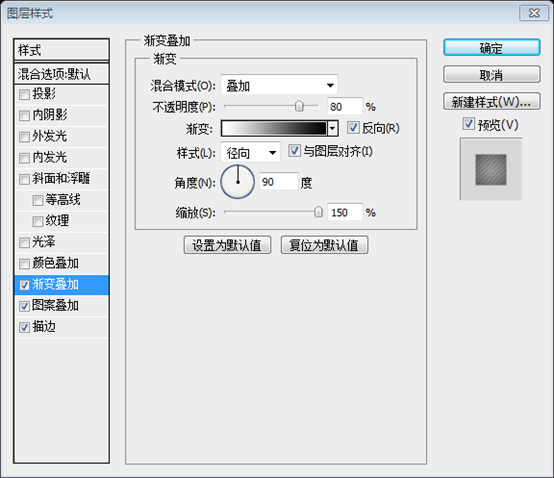 ## Stroke color: #95a2a8
Copy this symbol "»" go back to Photoshop, select the Type Tool (T) and paste it. I used the font Gotham Bold with the size 32pt and the color #727e84. Put this arrow in the middle of the circle.
 Copy Symbol » Go back to PS, select the
(T), and paste it. The font I used: Gotham Bold, size: 32pt, color: #727e84. Place the arrow in the middle of the circle.
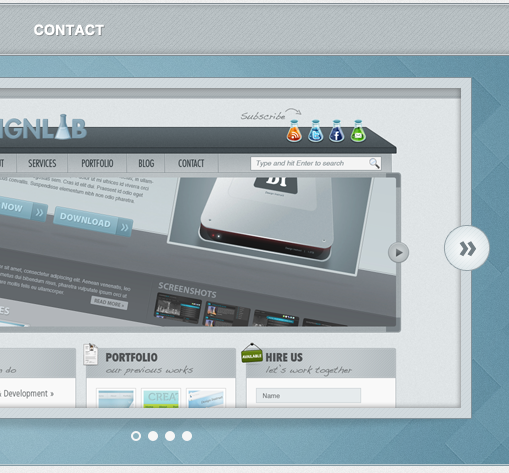
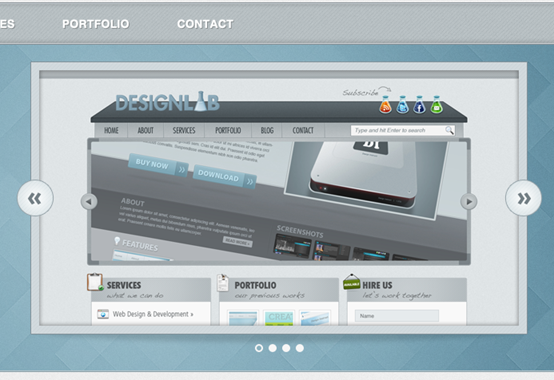
Duplicate the "right arrow" group (right-click on it and select Duplicate Group). Then go to Edit > Transform > Flip Horizontal. Put this new group in the left side of the image slider and name it "left arrow".
Copy the right arrow group (right-click on it and select Copy Group), then click: Edit> ; Transform> Flip Horizontal. Place the new group to the left of the image slider and name it left arrow
Step 10: Adding Content for the Image Slider
Step 10: Add the content of the image sliding bar
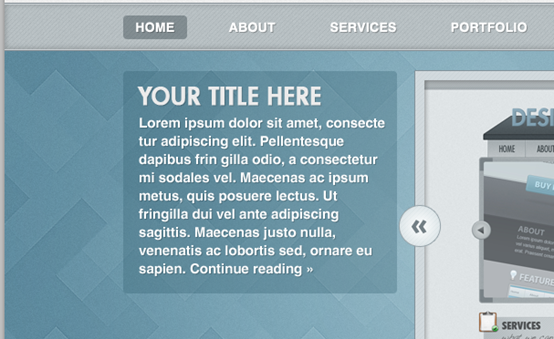
Now we will create an area for the description of the current image presented in the slider. Select the Rounded Rectangle Tool (U) and create a rectangle with the width 300px and the color #2c5a6b. The height depends on how much content you will include in this area. Name this layer "text bg" and set its opacity to 30%.
Now we will create a region to describe the current image slider. Select the Rounded Rectangle Tool (U) to create a rounded rectangle (130, 185) , width: 300px, color: #2c5a6b. The height depends on how much content is included. Name this layer text bg and set its opacity to 30%.
Select the Type Tool (T) and add some content in this area. For the headline I used the font Futura Bold with the size 26pt and the color #ebebeb. For the block of text I used Helvetica Regular with the size 15pt and the color #ffffff. Add a Drop Shadow effect to these text layers using the settings from the image below. Add some content. For the title text, I used font: Futura Bold, size: 26pt, color: #ebebeb. For the text block, use font: Helvetica Regular, font size: 15pt, color: #ffffff, and add a drop shadow layer style to the text as shown below.

 ##Step 11: Create Web Buttons
Step 11: Create a web button
Create a new group and name it "Description". This area can be used for a short bio of the freelancer. Select the Type Tool (T) and add a short paragraph of text. I used the font Helvetica Bold with the size 16pt and the color #555555. I also centered the text and set the leading (the distance between the lines of text) to 25pt from the Character panel (Window > Character).
Create a new group Description. This area can be used for very short instructions for freelancers. Select theText Tool
(T) and add a short text. Use font: Helvetica Bold, size: 16pt, color: #555555. I set the line spacing (the distance between lines of text) to 25pt, from the Character panel (Window > Character).Now we will add some call-to-action buttons underneath the paragraph of text. Create a new group and name it "buttons". Then select the Rounded Rectangle Tool (U), set the Radius to 4px and create a rounded rectangle with the color #bbbbbb, as you see in the image below. Name this layer "button", double-click on it to open the Layer Style window and use the settings from the following image. For the Stroke effect I used the color #a7a7a7.
Now we want to add some command buttons below the text paragraph. Create new group buttons. Then use the Rounded Rectangle Tool (430, 662, 160, 42) , set the radius to 4px, and create a rounded rectangle with color: #bbbbbb, as you can see Same. Name the layer button, double-click it to open the layer style window and set the layer style as shown below. Stroke color: #a7a7a7


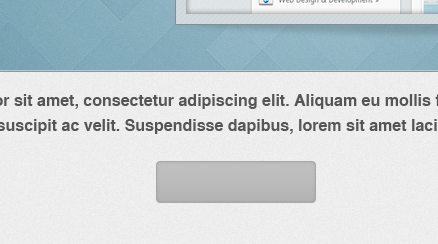
##Select the Type Tool (T) and add some text to your button such as "View Portfolio »". I used the font Helvetica Bold with the size 15pt and the color #fafafa.用
Text ToolAdd View Portfolio » on button. Font: Helvetica Bold, font size: 15pt, color: #fafafa
and add drop shadow style to the text

Create another button using the same settings, but change its color to #7fb6cd and the Stroke effect color to #6799ad.
(610,662),with the same settings, However, the color is changed to #7fb6cd, and the color of the stroke effect is #6799ad

Step 12: Create separator
Create a new group and name it "separator". Select the Line Tool (U), set the Weight to 1px and create a horizontal line with the width 940px and the color #c8c8c8. Name this layer "1px line".
Create a new group separator. Use the straight line tool, set the thickness to 1px, create a horizontal line
(130, 744, 940, 1), width is 940px, color: #c8c8c8, name this layer 1px line
Duplicate this layer (Ctrl/Cmd + J), move it one pixel upwards and change its color to #f2f2f2.
Duplicate this layer (Ctrl/Cmd + J), move it Move up one pixel
(130, 743, 940, 1)and change the color to #f2f2f2


Double-click on the "gradient" layer to open the Layer Style window and use the settings from the following image (2).
Double-click on the "gradient" layer to open the Layer Style window and use the settings from the following image (2). Set layer style
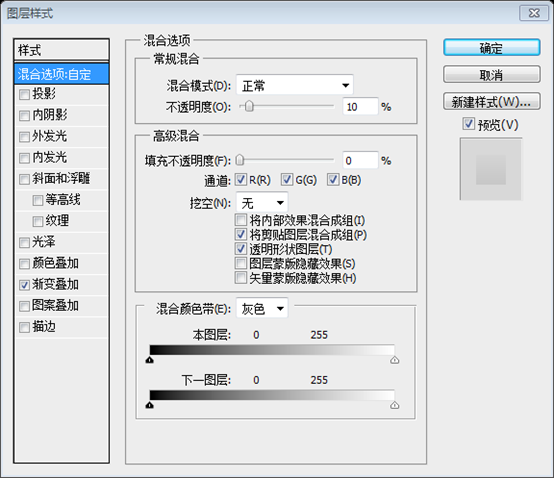
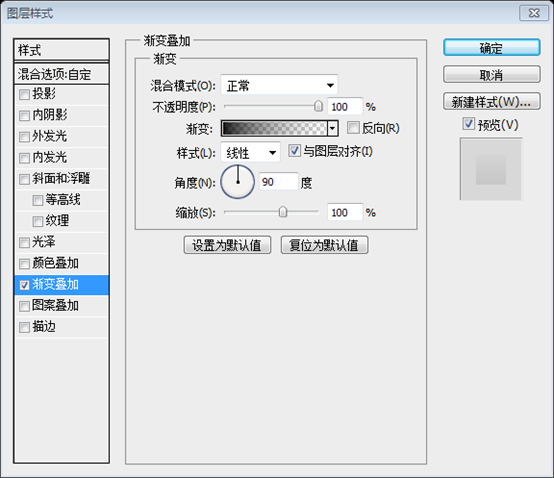

Layer> Layer Mask> Show all ). Then select the Gradient Tool, hold down the Shift key and drag a black-to-transparent gradient to the left of the separator so that it appears to fade out. Do the same to the right of the separator. Take a look at the pictures below for reference.

Convert to smart object
Step 13: Creating the "Services" Area
Step 13: Create Services area
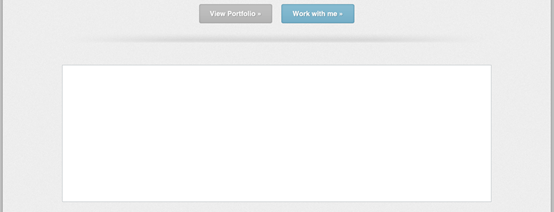
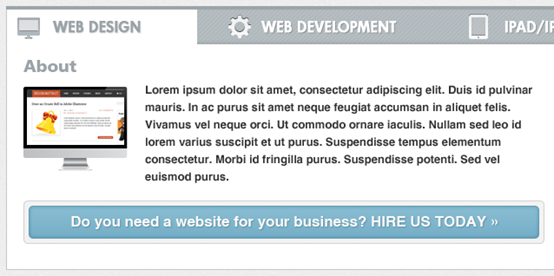
Create a new group and name it "Main Content". We'll design this area using tabs to showcase services that a freelancer might offer to their clients.Create a new group Main Content. We will design this field with tags to showcase the services a freelancer might provide to their clients. Select the Rectangle Tool (U) and create a white rectangle with the dimensions 940px by 300px. Name this layer "main content bg" and add a 1px stroke effect to it using the color #bfc5c8.Use theRectangle Tool to create a white rectangle (130,795), size: 940px*300px. Name this layer main content bg, add a 1px stroke, and the stroke color: #bfc5c8

Create new group tabs. Select the
Create a rectangle (130,795) on top of the white rectangle with a height of 44px and a width of 940px and color: #b5bdc1. Name this layer title bar. Double-click the layer to open the layer style. Set the layer style as shown below

Select the Rectangle Tool (U) again and create a rectangle with the height 4px and the color #9da5a9 at the top of the title bar. Name this layer "top line".
Use the Rectangle Tool againCreate a rectangle (130,791) at the top of the title bar with a height of 4px, a width of 940px, and a color : #9da5a9. Name this layer top line

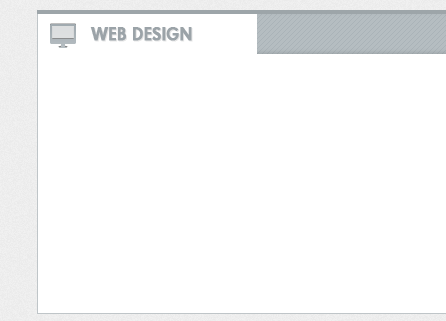
Select the Rectangle Tool (U) and create a white rectangle, as you see in the following image. This will be the active tab. Make sure this rectangle does not go over the "top line" layer and the stroke from the left side of the big white rectangle.
Create a white rectangle with the rectangle tool(131,795,219,40), as you see in the picture below. This will be an active option. Make sure this rectangle does not cover the top line layer and the stroke on the left side of the big white rectangle
Select the Type Tool (T) and add the name of the service you want to display in this area. In my case, I put "Web Design" using the font Futura Bold with the size 17pt and the color #9ba3a8. I also added a Drop Shadow effect to this text layer.
Add you with the text tool the content you want to display in it. For my choice, I used Web Design, font: Futura Bold, font size: 17pt, color: #9ba3a8. I also added a drop shadow effect to the text layer


##Download this set of icons and open the .PSD file in Photoshop . Then move an icon that suits the name of the service into your initial document. I used the iMac icon. Put the icon in front of the service name, double-click on its layer and use the settings from the following image. The gradient that I used is from #b5bdc1 to #a1aab0.
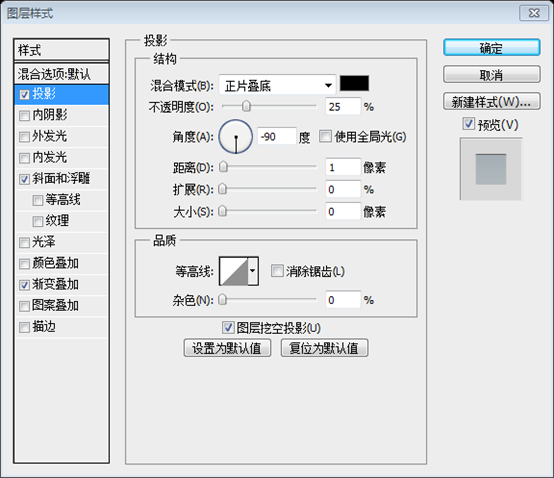
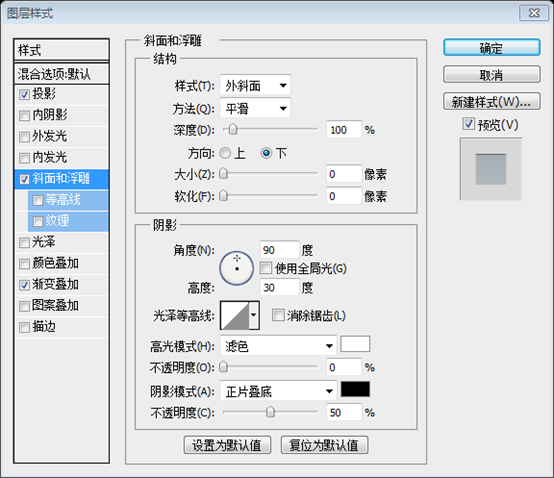
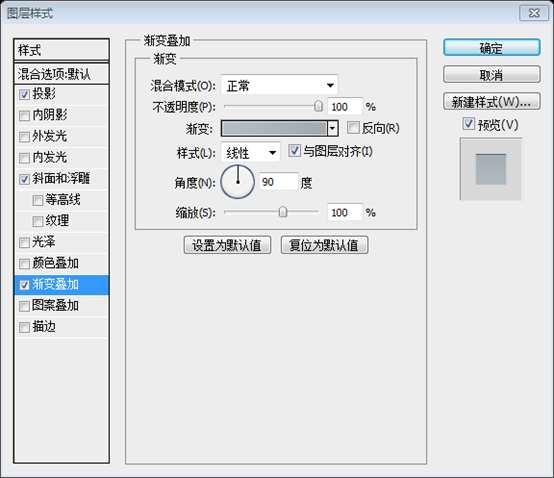
Tip: to select the icon that you want without having to look through all the layers, select the Move Tool (V) and from the drop-down menu from the option bar above your image select 'Layer'. Now hold down the Ctrl/Cmd key and click on the icon that you want to use. The layer of that icon will be automatically selected and you can move it into your web layout document.
Tip: To select the icon you want without flipping through all the layers, select the Move Tool (V) and select "Layers" from the drop-down menu in the options bar above the image. Now hold down the Ctrl/Cmd key and click on the icon layer you want to use, the icon will be automatically selected and you can move it to your web layout file.
Select the Type Tool (T) and add the name of other services to the title bar, such as "web development" or "iPad/iPhone apps". Use the same font that you used for the first service name (in my case Futura Bold), but change the color to white. Then add a Drop Shadow effect to these text layers using the settings from the image below.
用Text ToolAdd the name of other services in the title bar, like web development or iPad/iPhone apps. Use the same font as the first service name (my choice is Futura Bold), but change the color to white. Then add the drop shadow style to these text layers as shown below.

Now add some icons for these services from the icons pack you downloaded earlier. Use the same layer style that you used for the first icon, but change the gradient colors to #f8f8f8 and #f0f0f0.
Now add some icons to these services that you downloaded earlier. Use the same layer style as the first icon, but change the gradient colors to #f8f8f8 and #f0f0f0.

Step 14: Adding the Content to the "Services" Area
Step 14 :Add content to the Services area
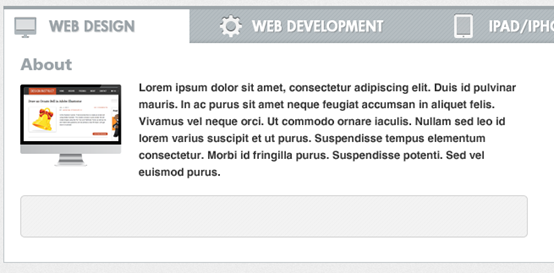
We will split the content for the "web design" service into two columns: "about" and "case studies". Create a new group and name it "column 1". Select the Type Tool (T) and write the word "About". I used the font Futura Book with the size 19pt and the color #9ba3a8.
i put web design service The content is divided into two columns: about and case studies. Create a new group column 1. Use Text Tool to write the text About. The font I used: Futura Book (replaced with Frutiger LT 75 Black), font size 19pt, color: #9ba3a8
Download this iMac vector and open the .AI file in Illustrator. Select the iMac using the Selection Tool (V), copy it (Ctrl/Cmd + C), go back to Photoshop and paste it as smart object (Ctrl/Cmd + V). Name this layer "imac" and use Free Transform (Ctrl/Cmd + T) to change its size. Take a look at the following image for reference.
Download this iMac vector image and open the .AI file in Illustrator. Select the iMac with the Selection Tool, copy it (Ctrl/Cmd + C), go back to PS and paste as Smart Object (Ctrl/Cmd + V). Name this layer iMac and use Free Transform (Ctrl/Cmd + T) to change its size. Take a look at the pictures below for reference.
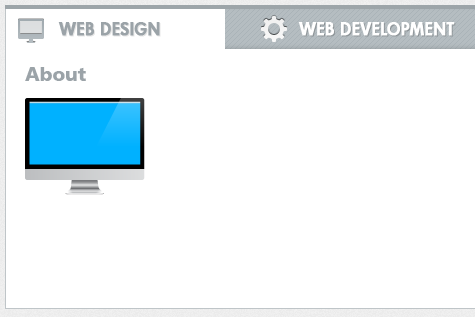
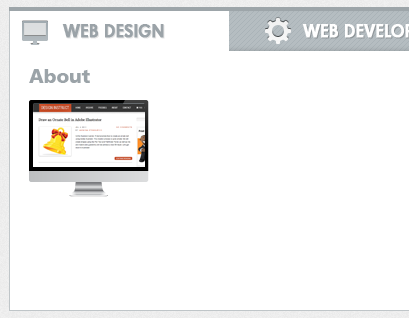
Select the Rectangle Tool (U) and create a rectangle over the computer screen. Name this layer "image_holder". Then open in Photoshop an image that you want to display on the screen and move it into your initial document using the Move Tool (V). Name this layer "image", put it over the screen, right-click on it and select Create Clipping Mask.
Use the Rectangle tool to create a rectangle that covers the screen of your computer image. Name this layer image_holder. Open the image you want to display on the screen in PS and use the Move Tool to move it to your document. Name this layer image, move it to the top of the screen, right-click and select Create Clipping Mask.
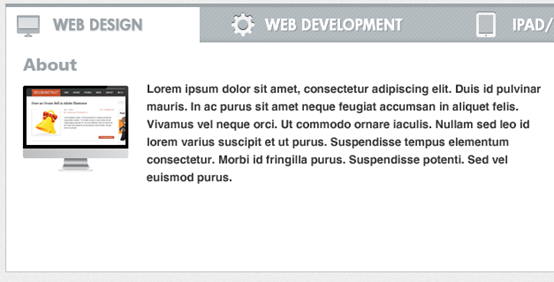
Select the Type Tool (T) and add a paragraph of text next to the image. I used the font Helvetica Regular with the size 13pt and the color # 333333. Set the width of this text layer to 460px. Also, set the leading to 20pt from the Character panel to make the text more readable.
Select the Text Tool(T) and add a text field next to the image. I used font: Helvetica, size: 13pt, color: #333333. Set the width of this text layer to 460 pixels. Also, set the line spacing to 20pt to make the text more readable.
Now we will create a call-to-action button for the "services" area. First, select the Rounded Rectangle Tool (U), set the Radius to 5px and create a rounded rectangle with the dimensions 600px by 50px and the color #f3f3f3. Name this layer "button border", double-click on it to open the Layer Style window and use the settings from the following image. For the Stroke effect I used the color #d1d1d1.
Now I want to create a command button for the Services area. First, select the Rounded Rectangle Tool , set the radius to 5px, and create a rounded rectangle (150, 1015) , size: 600px*50px, color: #f3f3f3. Name this layer button border, double-click the layer to open the layer style window, and set the layer style as shown below. Color used for stroke style: #d1d1d1

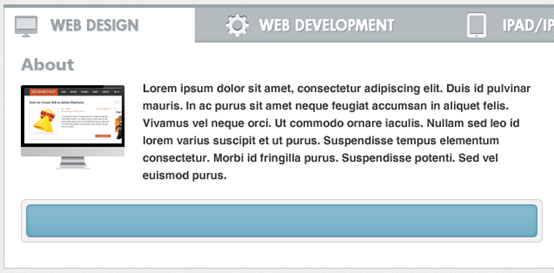
##Select the Rounded Rectangle Tool (U), set the Radius to 4px and create a rounded rectangle with the dimensions 586px by 36px and the color #7fb6cd in the middle of the gray rectangle. Name this layer "button", double-click on it to open the Layer Style window and use the settings from the following image. For the Stroke effect I used the color #6698ad.
Rounded Rectangle Tool, set the radius to 4px, and create a rounded rectangle. Size: 586px*36px, color: #7fb6cd, in the middle of the gray rectangle. Name this layer button, double-click to open the layer style window, set the style as shown below, and use the color for the stroke style: #6698ad
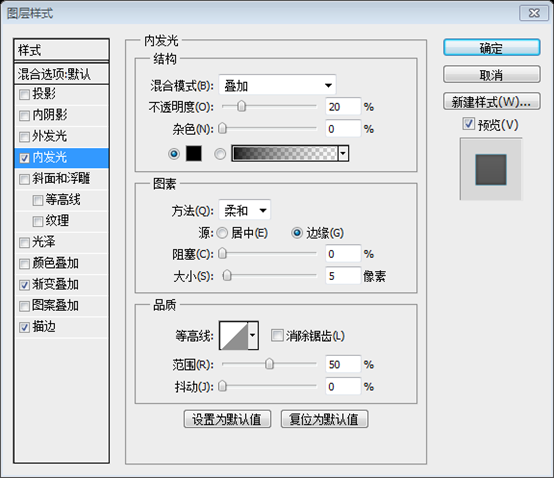
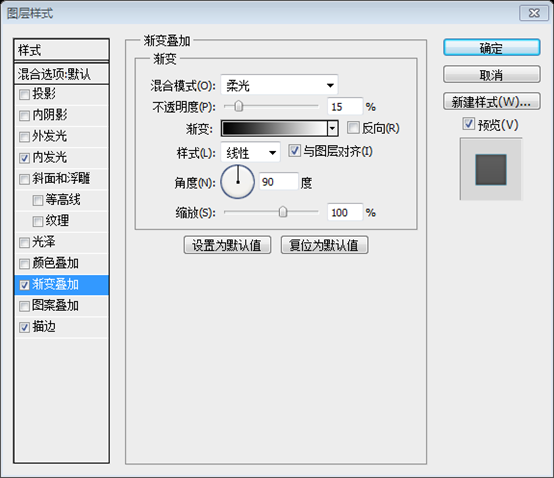

Select the Type Tool (T) and add some text to your button. I used the font Helvetica with the size 17pt and the color #fafafa. Add a Drop Shadow effect to this layer using the settings from the image below.
Text Tool. Font: Helvetica, Size: 17pt, Color: #fafafa. Add the drop shadow layer style as shown below
Step 15: Designing an Area for Case Studies
Step 15: Designing Case Studies area
Create a new group and name it "column 2". Select the Type Tool (T) and write the words "Case Studies". I used the font Futura Book with the size 19pt and the color #9ba3a8.
Create a new group column 2. Use Text Tool to add text Case Studies, the font I used: Futura Book (replaced with Frutiger LT 75 Black) , font size: 19pt, color: #9ba3a8
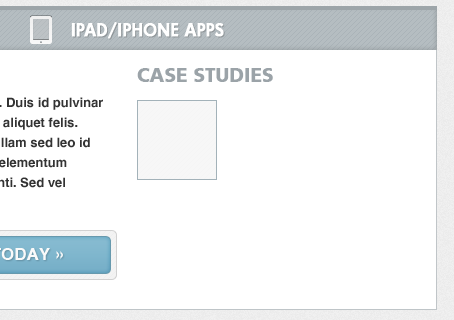
Select the Rectangle Tool (U), hold down the Shift key and create a square with the dimensions 80px by 80px and the color #f7f7f7. Name this layer "border", double-click on it to open the Layer Style window and use the settings from the following image. For the Stroke effect I used the color #a3b2b9.
Use the Rectangle Tool and hold down the Shift key to create a square( 770, 885) , size: 80px*80px, color: #f7f7f7. Name this layer border, double-click to open the layer style window, and set the style as shown below. Stroke color: #a3b2b9


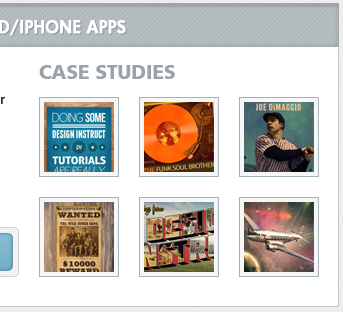
##Create another square with the dimensions 70px by 70px in the middle of the "border" square shape. Name this layer "image_holder". Then open an image in Photoshop that you want to display in this area and move it into your initial document. Name this layer "image", put it over the "image_holder" layer, right-click on it and select Create Clipping Mask.
(775,890), size: 70px*70px . Name this layer image_holder. Then open the image you want to display in PS and move it to your document. Name this layer image, place it above the image_holder layer, right-click and select Create Clipping Mask
Hold down the Ctrl/Cmd key, select the "border", "image_holder" and "image" layers, and duplicate them five times (to duplicate these layers drag them over the "Create a new layer" button from the bottom of the Layers panel). Then arrange all your images as you see in the following image.Hold down the Ctrl/Cmd key, select the border, image_holder and image layers, and duplicate them 5 times (to duplicate these layers, drag them to the bottom of the layers panelCreate new layer button). Place your images as shown below.
The positions of these six blocks are (770,885), (870,885), (970,885), (770,985), (870,985), (970, 985)
Step 16: Creating the "Portfolio" Area
Step 16: Create Portfolio area
Create a new group and name it "Portfolio". Then create a background for this area just like you did for the "services" section. Create a new group Portfolio. Then create a background for this area, just like you created the Services area Make this area 620px wide and 280px high. Copy the colors and layer styles for the background, title bar and top line from the "services" area. Then add a headline for this area and an icon.This area is 620px wide and 280px high. The position of the white rectangle is (130, 1128) . Copy the color and layer style of the Background, title bar, and top line from the Services area. Then add a title and icon for this area

Now we will create a highlight for the title bar. Select the Line Tool (U), set the Weight to 1px and create a horizontal white line at the bottom of the title bar. Leave a distance of 1px between the bottom edge of the title bar and this layer (1).
Now we will create a Big highlight. Select the Line Tool (U), set the thickness to 1px, and create a horizontal white line (130, 1166) at the bottom of the title bar. The distance between the bottom edge of the title bar and this layer is 1px.
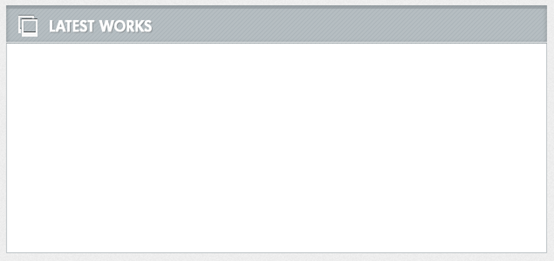
Add a mask to this layer (Layer > Layer Mask > Reveal All). Select the Gradient Tool (G), hold down the Shift key and drag a black to transparent gradient in the left side of the white line to make it fade away. Do the same for the right side of the line. Name this layer "highlight" and set its opacity to 70% (2) .
Add a mask layer (Layer> Layer Mask> Show All). Select the Gradient Tool (G), hold down the Shift key and drag a black to transparent gradient to the left of the white line so that it disappears. Do the same steps on the right side of the line. Name this layer highlight and set its opacity to 70%.

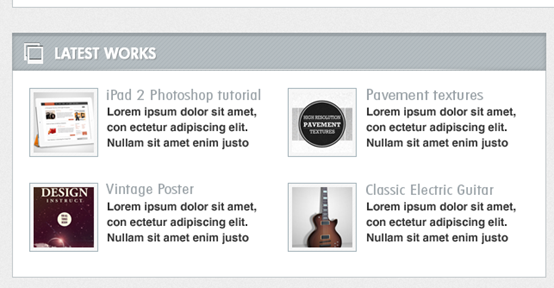
Now we will add some images for the latest projects and a short description of each project. Add an image like the ones you created for the "case studies" area.
Now we will add some pictures of the latest projects and a short description of each project. Add an image like the case studies area you created.
Select the Type Tool (T) and add some text next to it. For the headline I used the font Futura Book with the size 17pt and the color #9ba3a8. For the paragraph of text I used the font Helvetica Regular with the size 13pt and the color #9ba3a8. Also, set the leading for the paragraph to 18pt from the Character panel.
SelectText Tool(T) , and add some text next to it. Title font: Futura Book (replaced with Frutiger LT 75 Black), size: 17pt, color: #9ba3a8. For a paragraph of text, font: Helvetica Regular, size: 13pt, color: #9ba3a8. At the same time, set the line spacing in the Character panel to 18pt.
The width of this project area should be 280px. Put all these layers inside a group (Ctrl/Cmd + G) and name it "project #1". Duplicate this group three times and arrange them as you see in the image below.
The width of this project area is 280px. Group all these layers (Ctrl/Cmd+G) into a group and name it project #1. Repeat this group three times and arrange them as shown below.
The positions of the squares of the four content blocks are (150, 1188), (450, 1188), (150, 1298), (450, 1298)
Step 17: Creating the "Blog" Area
Step 17: Creating the Blog area
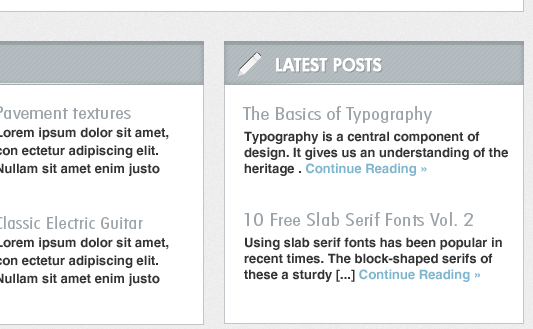
Create a new group and name it "Blog". Then create a content background just like you did for the "portfolio" section. Add a headline in the title bar and a suitable icon from the icons pack you downloaded.
Create a new group Blog. Create a content background, just like you did before for the Portfolio area. Add a header line to the title bar, and the appropriate icon before you download it.
The position of the rectangle with white background in this area is (770, 1128, 300, 280)
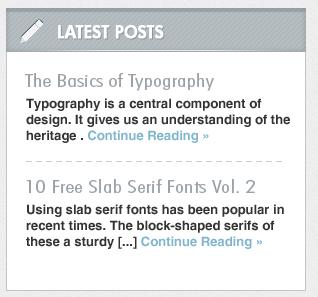
Select the Type Tool (T) and add a couple of posts to this area using the same fonts and colors that you used for the projects in the "portfolio" area. For the "Continue reading »" links I used the color #7fb6cd.
Select the Type Tool (T) and add a pair of blogs, using the same fonts and colors you used previously in the Portfolio area. For Continue reading » Link, color: #7fb6cd.
Now we will create a dashed line pattern which we will use for a horizontal separator. First, create a new document (Ctrl/Cmd + N) with the dimensions 10px by 1px.
Now we will create a dotted pattern that will be used as a horizontal divider. First, create a new file (Ctrl/Cmd+N) with dimensions: 10px*1px.
Create a new layer (Ctrl/Cmd + Shift + N) and use the Rectangular Marquee Tool (M) to create a selection with the dimensions 6px by 1px. Fill this selection with black .
Create a new layer (Ctrl/Cmd+Shift + N), use the Rectangular Marquee Tool(M) to create a selection, size: 6px*1px. Fill the selection with black.

Hide the Background layer and go to Edit > Define Pattern. Give your pattern a name and click OK. Now you can close this document.
Hide the background layer, click: Edit> Define Pattern. Give your pattern a name and click OK. You can now close this file.
Go to your initial web layout document, select the Line Tool (U) and create a horizontal line with the dimensions 260px by 1px. Set the Fill of this layer to 0% and the Opacity to 20%.
Go to your web layout document, select the Line tool (U) to create a horizontal line (790, 1277) , size: 260px* 1px. Set this layer's Fill to 0% and Opacity to 20%.
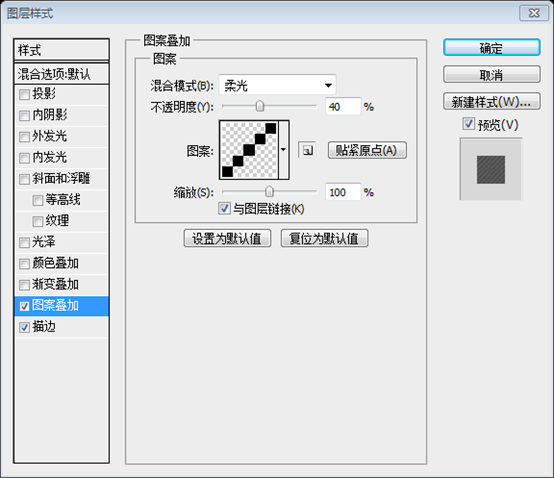
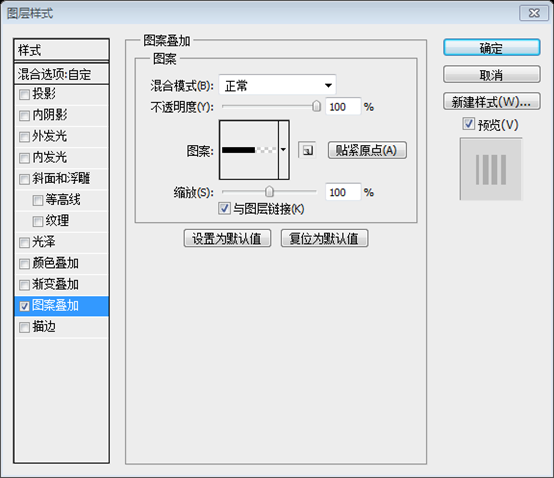
Double-click on this layer to open the Layer Style window and use the settings from the following image for Pattern Overlay.
Double-click on this layer to open the Layer Style window, And set the pattern overlay style as shown below.
##Step 18: Creating the Footer
Step 18: Create footer
Create a new group and name it "Footer". Then duplicate the "separator" layer from the "Description" group and move it to the "Footer" group. Use the Move Tool (V) to move this layer underneath the "portfolio" and "blog" areas.Create a new group Footer. Then copy the separator layer in the Description group and move it to the Footer group. Use the move tool to move this layer below the portfolio and blog areas
Now we will create an area for the Twitter feed. Create a new group and name it "recent tweets".
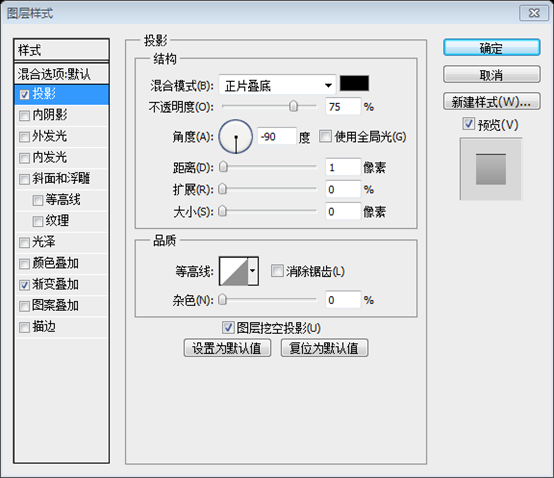
Clear Layer Style. Then double-click to open the layer style window and set the style as shown below. The colors used for gradient fill are: #8b8b8b and #c7c7c7

Select the Type Tool (T) and write "Recent Tweets" next to the icon. I used the font Futura Bold with the size 15pt and the color #585858.
Use the Text Tool to write Recent Tweets to the right of the icon. Font: Futura Bold, Font Size: 15pt, Color: #585858

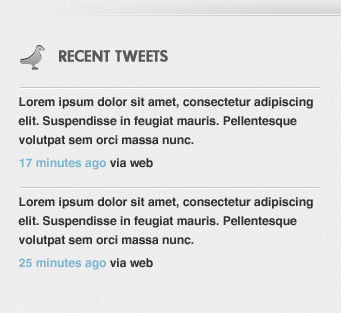
##Select the Type Tool (T) and add a couple of tweets to this area. Make sure that the width of the text is 300px. I used the font Helvetica Regular with the size 12pt and the color #333333. For the links I used the color #7fb6cd.
Text Tool Add a pair of tweets in this area. Make sure the text is 300px wide. The font I used: Helvetica Regular, size: 12pt, color: #333333; link color: #7fb6cd
I also added separators for the tweets using the Line Tool (U). I created two lines for each separator using the colors #c8c8c8 and #fefefe.I also used theLine tool to add separators to tweets. I created two straight lines for each separator, the colors are #c8c8c8 and #fefefe
, a total of four straight lines, namely (130, 1515, 300, 1), (130, 1516, 300 , 1), (130, 1615, 300, 1), (130, 1616, 300, 1)
Add a button
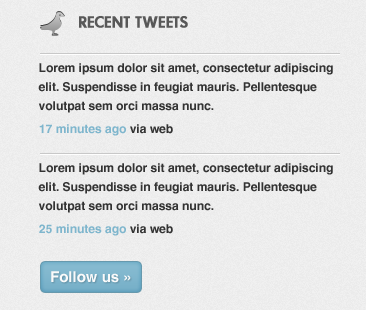
Underneath the tweets, the text Follow us ». The style of this button is like the Work with me button in the Description area
Step 19: Create About area
Create a new group and name it "about". Then add an icon from the icons pack you downloaded. Copy the layer style from the "bird icon" layer and paste it to this layer.
Create a new groupAbout. Add an icon from the previously downloaded icon set, copy the layer style of the bird icon layer, and paste it into this layer style
Select the Type Tool (T) and write "About " next to the icon using the same font and color that you used for "Recent Tweets" headline. Font and color
Now add a paragraph of text that is 300px wide.Now add a paragraph of text, the width is 300px
Step 20: Creating a Contact Form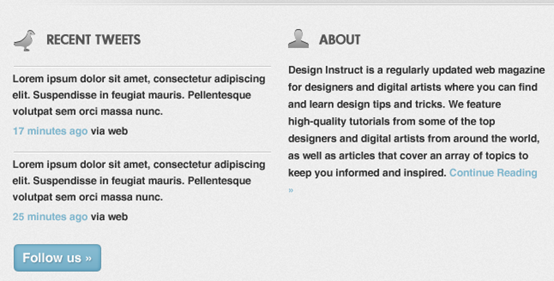
Create a new group and name it "contact". Then add the envelope icon from the icons pack you downloaded. Copy the layer style from the "bird icon" layer and paste it to this layer.Create a new group contact. Add the mail icon from the previously downloaded icon set, copy the layer style of the bird icon layer, and paste it into this layer style
Select the Type Tool (T) and write "Contact" next to the icon using the same font and color that you used for "Recent Tweets" and "About" headlines. Tool
Write Contact to the right of the icon, using the same font and color as Recent Tweets and AboutSelect the Rectangle Tool (U) and create the rectangles of the contact form using the color #f7f7f7. Add a 1px Stroke effect to these layers using the color #8c9295. Then select the Type Tool (T) and write inside each box what it represents. I used the font Helvetica Regular with the size 13pt and the color #676f73.Use the Rectangle Tool to create some rectangles for the contact form, color: #f7f7f7. Add a 1px stroke style, color: #8c9295. Then use the type tool to write what each rectangle represents. The font I use: Helvetica Regular, font size: 13pt, color: #676f73
The rectangle corresponding to Name is (770, 1514, 220, 36), and the rectangle corresponding to Email is (770, 1560, 220, 36), the rectangle corresponding to Subject is (770, 1606, 220, 36), and the rectangle corresponding to Message is (770, 1652, 299, 130)
Create a "Send" button underneath the contact form just like you created the "Follow us" button from the "Recent tweets" area. , 30)
, just like your Follow us button in the Recent Tweets area
Step 21: Adding Copyright Information 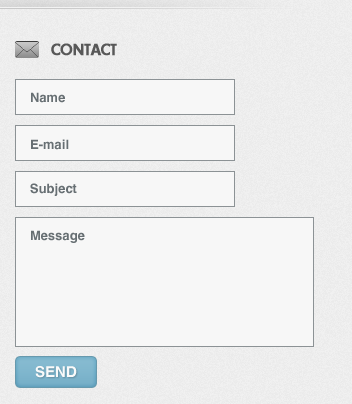
Create a new group and name it "Copyright". Duplicate the "separator" layer from the "Footer" group and move it into the "Copyright" group.Create a new group Copyright. Copy the separator layer from the Footer group and move it to the Copyright group
Flip this layer vertically by going to Edit > Transform > Flip Vertical. Use the Move Tool (V) to move this layer underneath the footer area.
Flip this layer vertically, click:
Edit> Transform> Flip Vertical. Use the Move Tool to move the layer below the Footer area
Select the Type Tool (T) and write a copyright statement. I used the font Helvetica Regular with the size 12pt and the color #5a5a5a.Use
Text Toolto add some copyright information. Font: Helvetica Regular, font size: 12pt, color: #5a5a5a
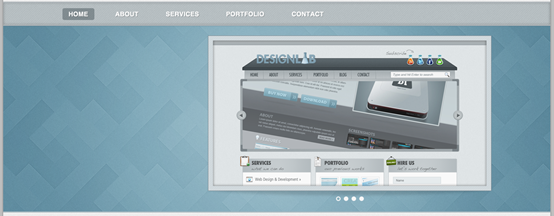
##Finally completed work

Postscript:
This tutorial is a very detailed tutorial. There are two main features, one is the production of twill patterns, and the other is the production of tabs, which are not common in other tutorials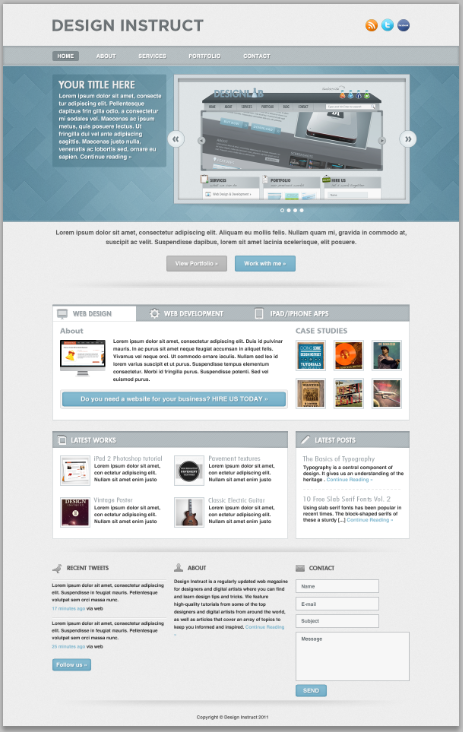

Hot AI Tools

Undresser.AI Undress
AI-powered app for creating realistic nude photos

AI Clothes Remover
Online AI tool for removing clothes from photos.

Undress AI Tool
Undress images for free

Clothoff.io
AI clothes remover

Video Face Swap
Swap faces in any video effortlessly with our completely free AI face swap tool!

Hot Article

Hot Tools

Notepad++7.3.1
Easy-to-use and free code editor

SublimeText3 Chinese version
Chinese version, very easy to use

Zend Studio 13.0.1
Powerful PHP integrated development environment

Dreamweaver CS6
Visual web development tools

SublimeText3 Mac version
God-level code editing software (SublimeText3)

Hot Topics
 1672
1672
 14
14
 1428
1428
 52
52
 1333
1333
 25
25
 1277
1277
 29
29
 1257
1257
 24
24
 Advanced Photoshop Tutorial: Master Retouching & Compositing
Apr 17, 2025 am 12:10 AM
Photoshop's advanced photo editing and synthesis technologies include: 1. Use layers, masks and adjustment layers for basic operations; 2. Use image pixel values to achieve photo editing effects; 3. Use multiple layers and masks for complex synthesis; 4. Use "liquefaction" tools to adjust facial features; 5. Use "frequency separation" technology to perform delicate photo editing, these technologies can improve image processing level and achieve professional-level effects.
 Photoshop's Key Features: A Deep Dive
Apr 19, 2025 am 12:08 AM
Key features of Photoshop include layers and masks, adjustment tools, filters and effects. 1. Layers and masks allow independent editing of image parts. 2. Adjust tools such as brightness/contrast can modify image tone and brightness. 3. Filters and effects can quickly add visual effects. Mastering these features can help creative professionals achieve their creative vision.
 Using Photoshop: Creative Possibilities and Practical Uses
Apr 22, 2025 am 12:09 AM
Photoshop is very practical and creative in practical applications. 1) It provides basic editing, repairing and synthesis functions, suitable for beginners and professionals. 2) Advanced features such as content recognition fill and layer style can improve image effects. 3) Mastering shortcut keys and optimizing layer structure can improve work efficiency.
 Photoshop and Digital Art: Painting, Illustration, and Compositing
Apr 18, 2025 am 12:01 AM
Photoshop's applications in digital art include painting, illustration and image synthesis. 1) Painting: Using brushes, pencils and mixing tools, the artist can create realistic effects. 2) Illustration: With vector and shape tools, artists can accurately draw complex graphics and add effects. 3) Synthesis: Using mask and layer blending mode, artists can seamlessly blend different image elements.
 Using Photoshop for Graphic Design: Branding and More
Apr 16, 2025 am 12:02 AM
The steps to using Photoshop for brand design include: 1. Use the Pen tool to draw basic shapes, 2. Add shadows and highlights through layer styles, 3. Adjust colors and details, 4. Use smart objects and actions to automatically generate different versions of the design. Photoshop helps designers create and optimize brand elements with the flexibility of layers and masks, ensuring consistency and professionalism of designs, from simple logos to complex branding guides.
 Photoshop for Photographers: Enhancing and Retouching Images
Apr 25, 2025 am 12:01 AM
Enhance and retouching photos in Photoshop can be achieved by adjusting brightness and contrast, using the Repair Brush Tool. 1) Adjust brightness and contrast: Increase brightness and contrast to improve underexposed photos through the Image->Adjustments->Brightness/Contrast menu. 2) Use the Repair Brush Tool: Select HealingBrushTool in the toolbar and apply to remove miscellaneous points or scars in the image.
 What Photoshop Does Best: Common Tasks and Projects
Apr 23, 2025 am 12:06 AM
Photoshop is specialized in image editing, layering and masking, digital painting and a variety of design applications. 1) Image editing and repair: remove defects and adjust color and brightness. 2) Layers and masks: non-destructive editing and creation. 3) Digital paintings and illustrations: create art works. 4) Practical applications: graphic design, web design and digital art creation.
 Photoshop's Subscription Model: What You Get for Your Money
Apr 15, 2025 am 12:17 AM
Photoshop's subscription model is worth buying. 1) Users can access the latest version and use across devices at any time. 2) The subscription fee is low, and continuous updates and technical support are provided. 3) Advanced functions such as neural filters can be used for complex image processing. Despite the high long-term costs, its convenience and feature updates are valuable to professional users.


