
 Web Front-end
PS Tutorial
What should I do if I cut out too many pictures in PS? Remedies for cutting out too many pictures in PS
Web Front-end
PS Tutorial
What should I do if I cut out too many pictures in PS? Remedies for cutting out too many pictures in PS
What should I do if I cut out too many pictures in PS? Remedies for cutting out too many pictures in PS

We can cut out pictures quickly using photoshop, but cutting out pictures is a matter of patience. Sometimes, because of our carelessness, the effect of cutting out pictures will become less good or we will cut out too much. , so what should you do if you cut out too many photos in PS? The editor below will introduce to you the remedies for cutting out too many photos. Let’s take a look.
PS cutout is a very popular function, even if you have never been exposed to it. People who have experience in graphic design will also have heard of PS cutouts. One problem that easily occurs with PS cutouts is that there are too many cutouts, which means that the selection created is relatively large and exceeds the scope we expected. At this time, the usual approach is not to re-cut the image, but to remedy it, because the process of cutting out the image is very troublesome, and sometimes re-cutting the image will waste a lot of time, so it is more time-saving to remediate the image.
Method 1: Repair the excess part with the lasso tool
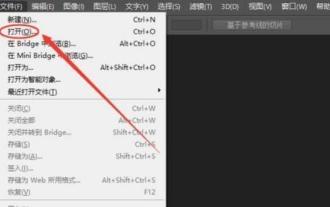
First open ps, then press ctrl+o, select a picture, and then Click [Open]
First select the Magnetic Lasso tool in the toolbar. We use this tool to deduct the little girl’s toothbrush
Due to an unexpected operation, we see Add an extra piece to the selection, as shown in the picture.
Then we click the [Minus Selection] tool in the property bar
Use the magnetic lasso tool to draw a selection in the drawing. This selection should cover how many The part of the lips that comes out should not be surrounded by the toothbrush. As shown in the picture, the red curve is the selection I drew.
This is the effect after we subtract the excess parts.
Method 2: How to repair the pen tool
As shown in the picture, we select the pen tool on the toolbar, and then click on the property bar [Path]
When you use a pen to remove the toothbrush, an extra part will appear, as shown in the picture
Next, we select [ in the toolbar Delete Anchor Point Tool】
Click on the extra anchor point, as shown in the picture, you can delete the anchor point
This is the effect after deleting the anchor point. After deleting, we then select the pen tool to select.
Another way to fix it is if the path drawn by our pen tool has more parts in the middle, as shown in the figure, deleting the anchor point will cause greater damage. The only way is to move the anchor. Clicked.
Select [Add Anchor Point Tool] on the toolbar
Drag the anchor point with the mouse and drag it to the edge of the toothbrush
As shown in the picture After dragging, you can re-create the selection.
Method 3: Use the eraser tool to erase the excess part
This method is suitable for images that have been drawn out and the selection cannot be modified. , only the cut out pictures can be modified.
Use the pen tool to select the excess part
Right-click the part and select Create Selection
In the pop-up dialog box, we set the feather radius to 1. Then click OK
After creating the selection, press the delete key to delete the excess part, and then click the eraser tool on the toolbar to erase the edges that cannot be deleted
This This is the final rendering.
The above is an introduction to the remedy for over-cutting out photos in PS. The operation is very simple. You can just follow the steps above. I hope this article can be helpful to you!
For more relevant articles, please pay attention to the PHP Chinese website!

Hot AI Tools

Undresser.AI Undress
AI-powered app for creating realistic nude photos

AI Clothes Remover
Online AI tool for removing clothes from photos.

Undress AI Tool
Undress images for free

Clothoff.io
AI clothes remover

Video Face Swap
Swap faces in any video effortlessly with our completely free AI face swap tool!

Hot Article
Hot Tools

Notepad++7.3.1
Easy-to-use and free code editor

SublimeText3 Chinese version
Chinese version, very easy to use

Zend Studio 13.0.1
Powerful PHP integrated development environment

Dreamweaver CS6
Visual web development tools

SublimeText3 Mac version
God-level code editing software (SublimeText3)
Hot Topics
 1672
1672
 14
1428
52
1333
25
1277
29
1257
24
14
1428
52
1333
25
1277
29
1257
24

 How do you cut out a picture and put it in another picture in Meitu Xiuxiu? Meitu Xiu Xiu's tutorial on placing the cut picture on another picture!
Mar 15, 2024 pm 11:00 PM
How do you cut out a picture and put it in another picture in Meitu Xiuxiu? Meitu Xiu Xiu's tutorial on placing the cut picture on another picture!
Mar 15, 2024 pm 11:00 PM
1. How to cut out the beautiful picture Xiu Xiu and put it in another picture? Meitu Xiu Xiu’s tutorial on placing the cut picture on another picture! 1. Open the MeituXiuXiu app and click on the picture beautification function. 2. Open the photo album and select the picture you want to cut out. 3. Click the cutout button in the bottom navigation bar. 4. Select the area to cut out. 5. After cutting out the image, click the replace background icon. 6. Finally, click to import another picture, and the cut out picture can be placed on another picture.
 How to put the cut out picture onto another picture in Xingtu? How to put the cut out picture on another picture!
Mar 15, 2024 pm 06:52 PM
How to put the cut out picture onto another picture in Xingtu? How to put the cut out picture on another picture!
Mar 15, 2024 pm 06:52 PM
1. How to put the cut out picture on another picture? How to put the cut out picture on another picture! 1. Open the Xingtu app, click Import, and import the picture you want to change. 2. Then click Import Picture under the picture and select the picture you want to cut out. 3. Then you can select an area to cut out, and you can also choose smart cutout for characters. 4. Adjust the size and position of the cut out picture. 5. Finally, click Merge Layers in the upper right corner to put the cut out picture on another picture.
 How to cut out a picture onto another photo using MeituXiuXiu APP
Mar 19, 2024 pm 03:43 PM
How to cut out a picture onto another photo using MeituXiuXiu APP
Mar 19, 2024 pm 03:43 PM
How to cut out a picture and place it on another picture in the mobile version of MeituXiuXiu? Meitu Xiuxiu is a photo editing software used by many people. This application has a lot of image processing tools and the operation method is also very simple. Below, I will introduce a simple tutorial on cutting out pictures. I hope it will be helpful to everyone. helped. 1. Install and open the Meitu Xiu Xiu APP, select the [Picture Beautification] function, and go to the photo editing page; 2. Then click on a picture that needs to be processed, and then select the [Picture Cutout] tool under the picture; 3. Users You can manually modify the cutout area, as shown in the figure below; 4. After completing the cutout, click the [Background Replacement] function below; 5. Finally, you can import it into another picture.
 How to correctly use MeituXiuXiu mobile version for image cutout and synthesis
Jan 15, 2024 pm 06:00 PM
How to correctly use MeituXiuXiu mobile version for image cutout and synthesis
Jan 15, 2024 pm 06:00 PM
Almost every girl who likes to take pictures and retouch pictures will have the Meitu Xiu Xiu app installed on her mobile phone. This photo retouching software is very powerful. It can easily cut out pictures or beautify your face, and it can also edit videos. As for how to use MeituXiuXiu to cut out a picture and place it on another picture, the method is actually very simple. We only need to use the basic functions provided by Meitu Xiuxiu to achieve this operation. Below, I will explain in detail the steps to achieve this operation. Cutting out a picture and pasting it onto another picture is a very simple operation using MeituXiuXiu mobile version. First, open the mobile version of MeituXiuXiu and select the picture you want to cut out. Then, use the Cutout tool in the toolbar, tap on the area you want to cut out, and make sure it's fully selected
 How to cut out pictures in ps - tutorial on cutting out pictures in ps
Mar 04, 2024 pm 12:07 PM
How to cut out pictures in ps - tutorial on cutting out pictures in ps
Mar 04, 2024 pm 12:07 PM
Many friends still don’t know how to cut out pictures in PS, so the editor below explains the tutorial on cutting out pictures in PS. If you are in need, please take a look. I believe it will be helpful to everyone. 1. First, open the picture that needs to be cut out in PS (as shown in the picture). After opening the software, click the Magic Wand tool in the left toolbar. Then, use the mouse to click on the background area of the image and press the inverse selection shortcut key [Ctrl+shift+I] to select the main part of the image. 3. After selecting the subject, press the shortcut key [Ctrl+J] to copy the next layer; then close the background layer and the picture will be cut out (as shown in the picture). The above is all the tutorials on how to cut out pictures in PS brought by the editor. I hope it will be helpful to you.
 How to cut out part of a picture in PS and place it in another picture
Mar 12, 2024 pm 02:06 PM
How to cut out part of a picture in PS and place it in another picture
Mar 12, 2024 pm 02:06 PM
1. Open the target image and the source image, and use the selection tool on the source image to select the part you want to embed. 2. After selecting, press Ctrl+C to copy the selected part, go to the target picture, and press Ctrl+V to paste the copied part. 3. The newly pasted image will automatically create a new layer. Use the [Move Tool] to adjust the position of this layer. 4. Select [Free Transform] in the edit menu to adjust the size and angle of the new layer. 5. Hold down the Shift key to maintain the image proportions, and hold down Alt to zoom from the center point. 6. If necessary, you can use
 How to cut out a picture in PS How to cut out a pattern in PS
Feb 22, 2024 pm 03:25 PM
How to cut out a picture in PS How to cut out a pattern in PS
Feb 22, 2024 pm 03:25 PM
After importing the image into PS, use the magic wand tool to select and delete the background area. Tutorial Applicable Model: Lenovo AIO520C System: Windows 10 Professional Edition: Adobe Photoshop 2022 Analysis 1 After selecting the file in PS, click Open. 2Then double-click the lock icon on the right side of the page. 3Click the OK button in the pop-up window. 4. Click the magic wand tool in the left function bar and select the background area in the picture. 5. After clicking the delete button, the background area just selected can be deleted. 6 Right-click the background area and click Cancel selection in the menu bar. 7Click File at the top, then click Save As. 8After setting the format to PNG in the pop-up window, click Save. Supplement: Remove edge noise after ps cutout 11
 How to implement image cutout and cover generation in Vue?
Aug 25, 2023 pm 09:00 PM
How to implement image cutout and cover generation in Vue?
Aug 25, 2023 pm 09:00 PM
How to implement image cutout and cover generation in Vue? Foreword: In the process of front-end development, we often encounter the need to cut out pictures and generate corresponding covers. As a popular front-end framework, Vue provides a wealth of tools and technologies to achieve this function. This article will introduce how to use Vue to implement the functions of image cutout and cover generation. 1. Use canvas to cut out pictures. In Vue, you can use canvas to cut out pictures. First, in the vue template, add a
