

Photoshop制作从水底腾出的透明水马

水马制作分两个大的部分:第一部分是水马的制作,用滤镜,调色工具,图层叠加等把实物马转为水马;第二部分是水面特效的制作,用一些水花,喷溅素材给水马增加水花和水纹等动感效果。
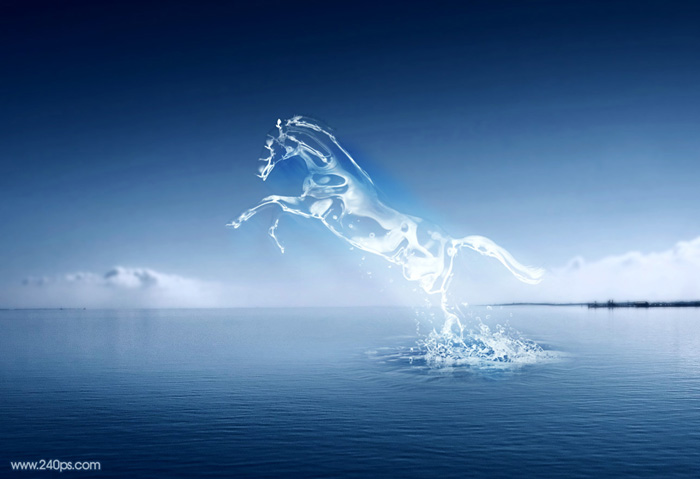
最终效果
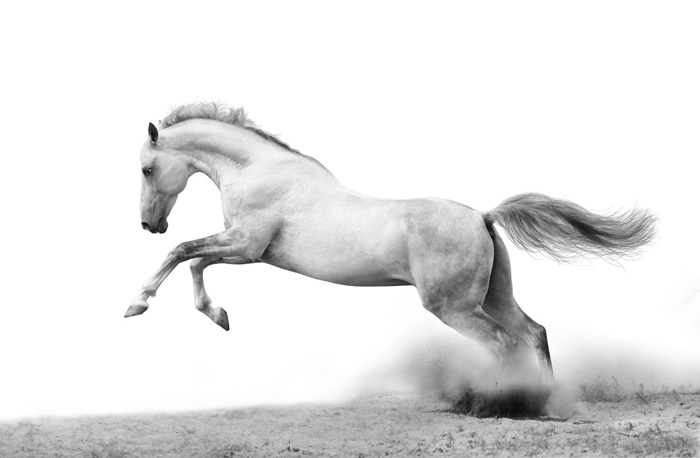
1、点击下图打开马素材大图,然后右键选择“图片另存为”保存到本机,打开PS,再打开保存的马素材图片,如图1。

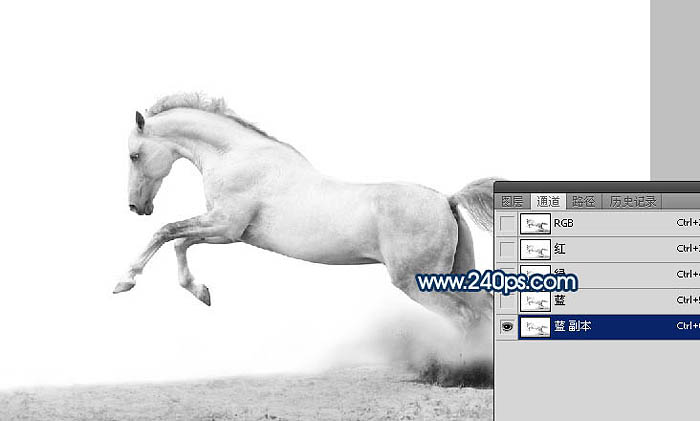
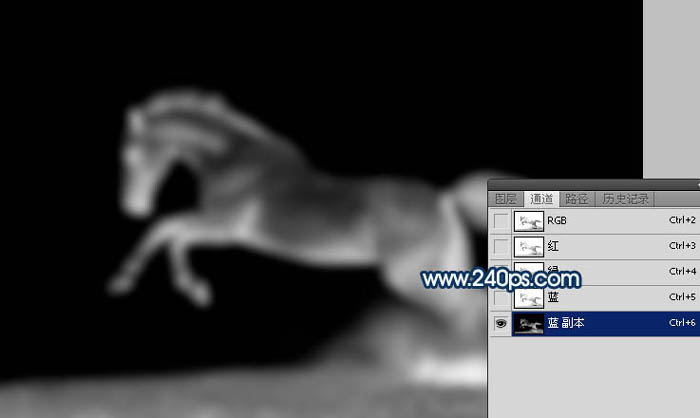
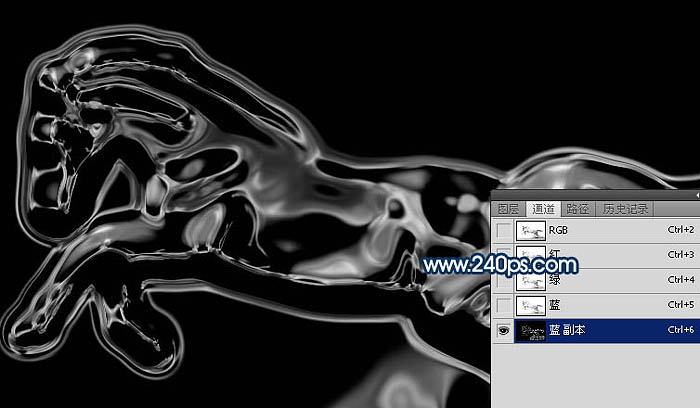
2、进入通道面板,把蓝色通道复制一份,得到蓝副本通道,如下图。
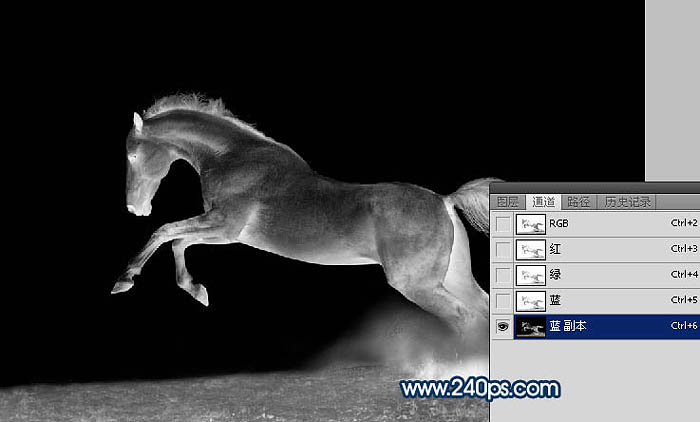
3、按Ctrl + I 把蓝副本通道反相,得到下图所示的效果。
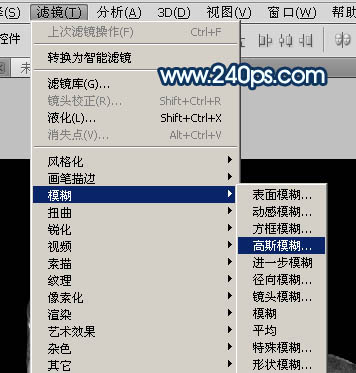
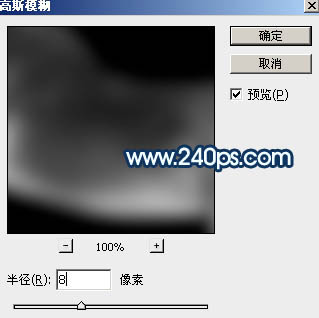
4、选择菜单:滤镜 > 模糊 > 高斯模糊,数值为8,效果如图6。
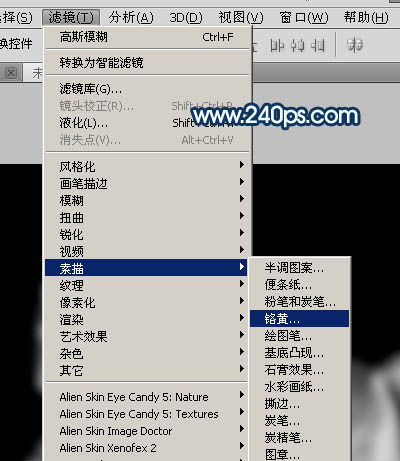
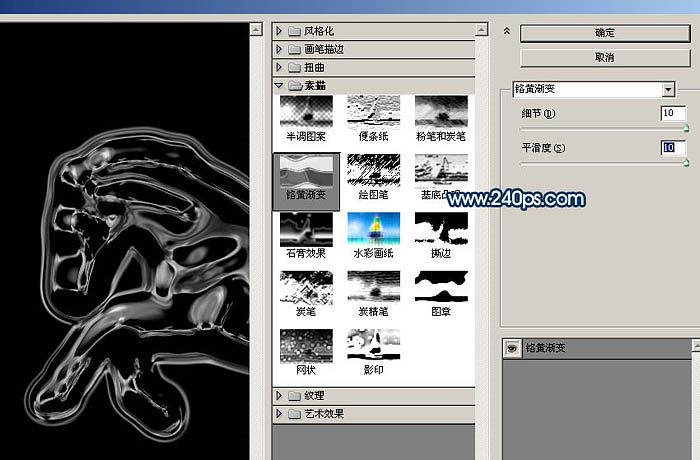
5、选择菜单:滤镜 > 素描 > 铬黄,然后设置参数,把细节和平滑度都设置到最大,如图8,确定后得到图9所示的效果。
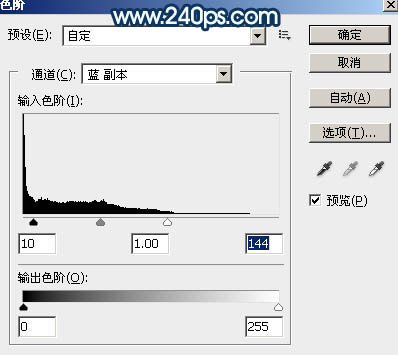
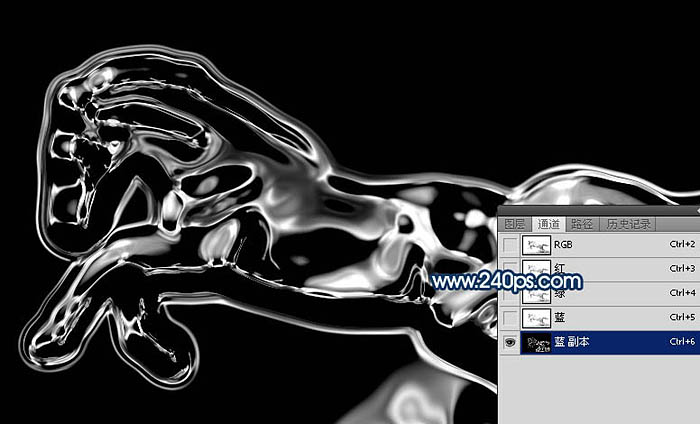
6、按Ctrl + L 调整色阶,把蓝副本通道调亮一点,参数及效果如下图。
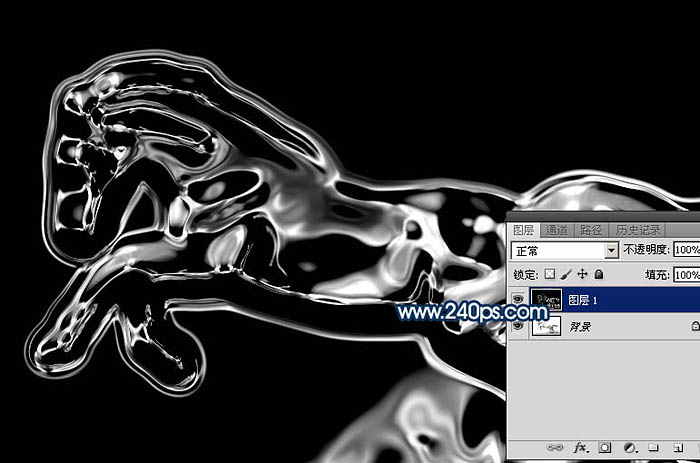
7、按Ctrl + A 把蓝副本通道全选,按Ctrl + C 复制,点RGB通道后,返回图层面板;新建一个图层,按Ctrl + V 把蓝副本通道粘贴进来,效果如下图。
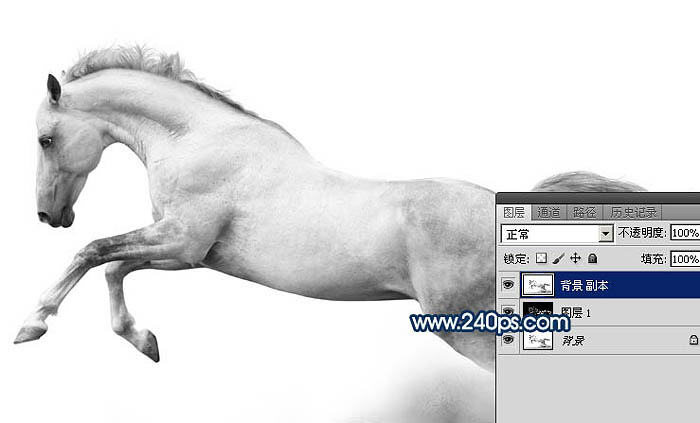
8、把背景图层复制一层,按Ctrl + Shift + ] 置顶,如下图。
9、按Ctrl + I 把背景副本图层反相,效果如下图。
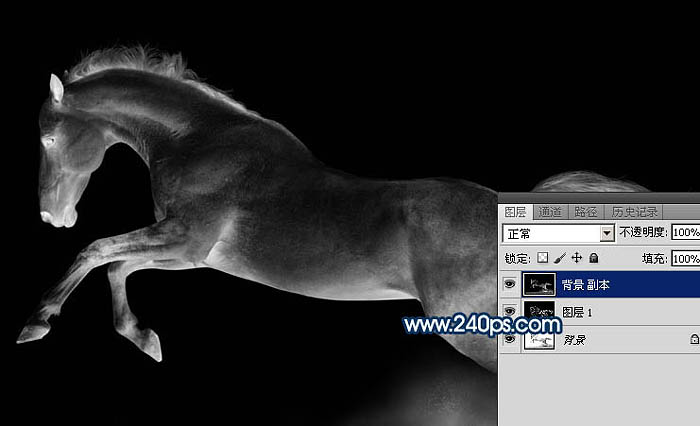
10、把混合模式改为“正片叠底”,效果如下图。

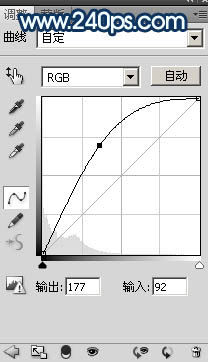
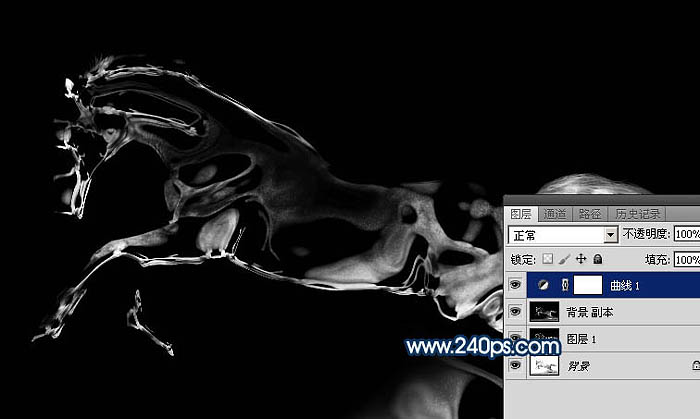
11、创建曲线调整图层,把RGB通道调亮一点,参数及效果如下图。
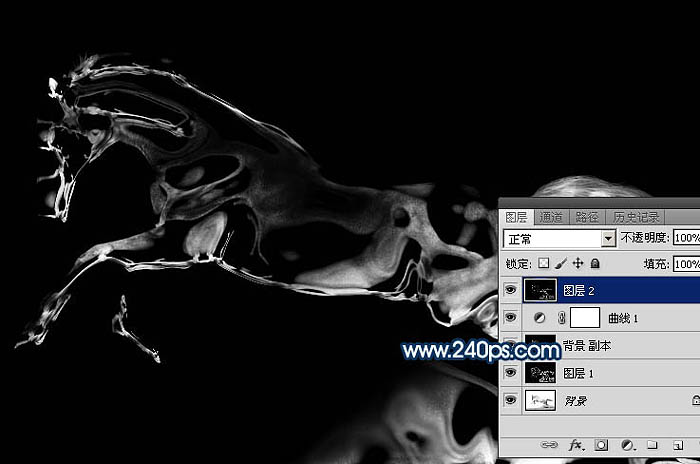
12、新建一个图层,按Ctrl + Alt + Shift + E 盖印图层,如下图。
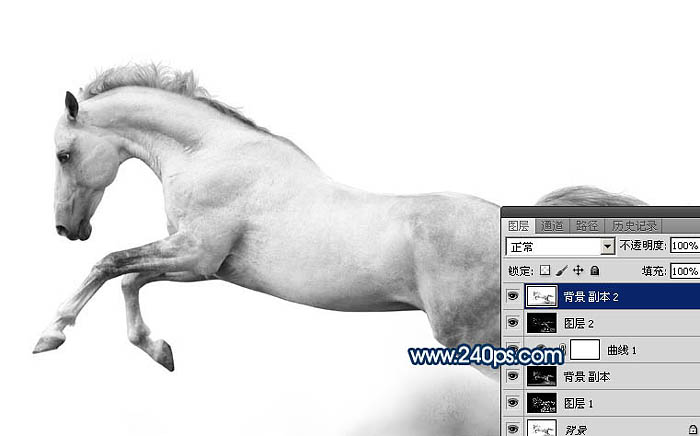
13、把背景图层复制一层,得到背景副本2图层,按Ctrl + Shift + ] 置顶,如下图。
14、进入通道面板,用通道把马抠出来,如下图。然后载入马的选区。
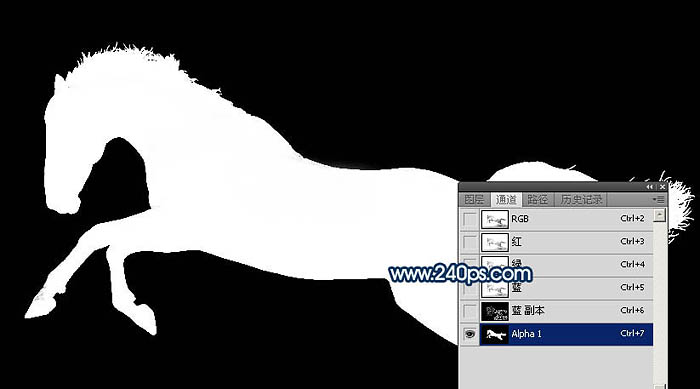
15、回到图层面板,把背景副本2图层隐藏,选择盖印图层,保持选区,按Ctrl + C 复制。

16、点击下图打开背景素材大图,然后右键选择图片另存为,保持到本机,再用PS打开。

17、打开背景素材后,新建一个图层,按Ctrl + V 粘贴,然后把混合模式改为“滤色”。按Ctrl + L 稍微调亮一点,确定后按Ctrl + T 调整一下角度,效果如下图。

18、打开水花素材大图,保存到本机,用PS打开,按Ctrl + U 去色,再按Ctrl + I 反相,然后用曲线调整一下明暗。 用移动工具把处理好的水花素材拖进来,放到背景图层上面,并调整好大小,如下图。


19、给当前图层添加图层蒙版,用柔边黑色画笔擦掉边缘一些不需要的部分,效果如下图。

20、把当前图层复制一层,选择原水花图层,混合模式改为“叠加”,然后用黑色画笔在蒙版上擦掉一些过暗的区域,如下图

21、打开喷溅水珠素材大图,去色,再反相,然后选取局部复制进来,把混合模式改为“滤色”,效果如图26。


22、把背景图层复制一层,用椭圆选框工具拉出下图所示的椭圆选区。

23、Shift + F6把选区羽化45个像素。

24、保持选区,选择菜单:滤镜 > 扭曲 > 水波,参数设置如图30,然后确定。


25、保持选区,按Ctrl + J 把做好水波的图像复制到新的图层,按Ctrl + T 稍微压扁一点,确定后添加图层蒙版,用透明度较低的柔边黑色画笔把边缘过渡涂好,效果如图32。


26、基本效果出来了,下面我们来调色。在图层的最上面创建色彩平衡调整图层,对阴影,高光进行调整,参数及效果如下图。


27、创建曲线调整图层,把整体稍微调暗一点,参数及效果如下图。


28、新建一个图层,盖印图层。选择菜单:滤镜 > 模糊 > 动感模糊,角度设置为-45度,距离设置为90,确定后把混合模式改为“柔光”,按住ALt键添加图层蒙版,用柔边白色画笔把下图选区部分涂亮一点。

最后用模糊工具把远处的背景模糊处理,再微调一下细节,完成最终效果。


Hot AI Tools

Undresser.AI Undress
AI-powered app for creating realistic nude photos

AI Clothes Remover
Online AI tool for removing clothes from photos.

Undress AI Tool
Undress images for free

Clothoff.io
AI clothes remover

AI Hentai Generator
Generate AI Hentai for free.

Hot Article
Hot Tools

Notepad++7.3.1
Easy-to-use and free code editor

SublimeText3 Chinese version
Chinese version, very easy to use

Zend Studio 13.0.1
Powerful PHP integrated development environment

Dreamweaver CS6
Visual web development tools

SublimeText3 Mac version
God-level code editing software (SublimeText3)
Hot Topics
 1381
1381
 52
52

 What are the permanently free photoshopcs5 serial numbers?
Jul 06, 2023 am 10:00 AM
What are the permanently free photoshopcs5 serial numbers?
Jul 06, 2023 am 10:00 AM
The permanently free photoshopcs5 serial numbers are: 1. 1330-1440-1602-3671-9749-7897; 2. 1330-1191-2998-6712-2520-5424; 3. 1330-1367-4285-4928-0630-3107; 4. 1330-1570-9599-9499-8092-8237; 5. 1330-1028-1662-3206-1688-5114, etc.
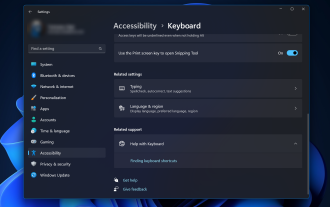 Solution: Fix keyboard shortcuts not working in Photoshop
Sep 22, 2023 pm 03:17 PM
Solution: Fix keyboard shortcuts not working in Photoshop
Sep 22, 2023 pm 03:17 PM
Adobe Photoshop is the industry standard for digital design, loved and used every day by the online community. However, when keyboard shortcuts stutter or fail entirely, it can significantly slow down any project or your overall productivity on Windows 11. Whether you're an experienced designer or just dabbling in photo editing, these glitches are more than just minor annoyances in Photoshop and Photoshop CC. First, let's look at the common reasons why custom or default shortcuts stop working. Why don't my shortcuts work in Photoshop? Customize workspace settings: Sometimes, adjusting or switching between workspace settings can reset keyboard shortcuts. Sticky Keys: This accessibility feature
 Specific method to create film movement effect in PPT
Mar 26, 2024 pm 04:00 PM
Specific method to create film movement effect in PPT
Mar 26, 2024 pm 04:00 PM
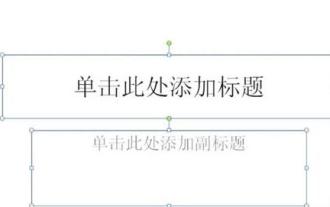
1. Start PPT, create a new blank document, select all text boxes and delete them. 2. Execute the Insert-Shape command, drag a rectangle in the document, and fill the shape with black. 3. Drag the rectangle to elongate it, execute the Insert-Shape command, drag out the small square, and set the fill color to white. 4. Copy and paste the small squares one by one so that the top and bottom are evenly distributed on both sides of the film. After selecting them all with ctrl+a, right-click and select Group. 5. Execute the Insert-Picture command, find the picture to be inserted in the pop-up dialog box, click to open, and adjust the size and position of the picture. 6. Repeat step 5 to insert and set the remaining pictures in order to form a film picture. 7. Select the film, execute animation-add animation command
 How to make a tomato novel cover
Feb 23, 2024 pm 01:55 PM
How to make a tomato novel cover
Feb 23, 2024 pm 01:55 PM
How to make the cover of Tomato novel? You can make exclusive novel cover in Tomato novel, but most friends don’t know how to make the cover of Tomato novel. Next is the picture of how to make the cover of Tomato novel brought by the editor to the players. Tutorial, interested players come and take a look! Tomato Novel usage tutorial How to make a Tomato Novel cover 1. First open the Tomato Novel APP, enter the work management page to create a new book, and select the [Cover Template] as shown by the arrow below; 2. Then enter the cover template page and select your favorite cover Template; 3. After finally selecting the cover, click [Confirm] in the upper right corner.
 Operation guide for creating mobile Excel tables
Feb 18, 2024 pm 02:41 PM
Operation guide for creating mobile Excel tables
Feb 18, 2024 pm 02:41 PM
Mobile Excel table creation tutorial With the popularity of mobile devices and the continuous advancement of technology, mobile phones have become one of the indispensable tools in our daily life and work. Using Excel spreadsheets on your mobile phone can easily record, calculate and analyze data and improve work efficiency. This article will share with you the basic operations and techniques for creating mobile Excel tables. 1. Choose the right application. There are many mobile Excel applications on the market to choose from, such as GoogleSheets, Micro
 Let me teach you! How to create animation effects in PPT!
Mar 20, 2024 pm 06:40 PM
Let me teach you! How to create animation effects in PPT!
Mar 20, 2024 pm 06:40 PM
When making PPT, using some animation effects will make it more lively and cute than without using animation effects. With the addition of animation effects, people may like to watch this PPT, so we must learn how to create animation effects for PPT. Next, I will introduce in detail how to add animation effects to PPT. Please continue reading and study these steps carefully. I believe they will be helpful to you! First, open the PPT we made ourselves. You will notice that this PPT currently does not have any animation effects (as shown by the red arrow in the picture below). 2. Then, we need to add animation effects to the picture. We first select the picture, and then click the [Animation] button on the menu bar (as shown in the red circle in the figure below). 3. Next, we click inside the animation
 How to use CSS to create a countdown effect
Oct 26, 2023 am 10:36 AM
How to use CSS to create a countdown effect
Oct 26, 2023 am 10:36 AM
How to use CSS to create a countdown effect. The countdown effect is a common function in web development. It can provide users with a dynamic effect of countdown and give people a sense of urgency and expectation. This article will introduce how to use CSS to achieve the countdown effect, and give detailed implementation steps and code examples. The implementation steps are as follows: Step 1: HTML structure construction First, create a div container in HTML to wrap the countdown content. For example: <divclass="countd
 How to make a word cover
Mar 19, 2024 pm 06:50 PM
How to make a word cover
Mar 19, 2024 pm 06:50 PM
A graduation thesis must have a cover, a table of contents, an end, etc. Only then can the thesis be complete. In the last issue, the editor has shared with friends how to make a table of contents in Word. In this issue, I will share with you how to make a word cover. If you don’t know how to make it, hurry up! 1. First, we open the word document we want to make a cover, as shown in the figure below: 2. Then, we click the [Chapter] button on the menu bar and select the cover page. This function is equivalent to a cover library, in which you can Choose a suitable and beautiful cover by yourself, as shown in the red circle in the picture below: 3. After clicking, you can see various types of covers, such as business type, suitable for company contracts and documents; resume type, suitable for job hunting and submission of resumes Friends, wait, okay?
