Home > Web Front-end > PS Tutorial > 教你用PS为校花美眉玉照做创意照片处理的方法教程

教你用PS为校花美眉玉照做创意照片处理的方法教程

PHP中文网
Release: 2016-06-01 14:26:44
Original
1782 people have browsed it

本文教大家如何把一张普通的照片处理的有创意有新意.让校花更校花 今天我们用Photoshop为校花美眉的玉照做一些创意照片处理。
  先来看看照片处理前后的对比。
  原图: 

教你用PS为校花美眉玉照做创意照片处理的方法教程

  最终效果:

教你用PS为校花美眉玉照做创意照片处理的方法教程


  加边框后:

教你用PS为校花美眉玉照做创意照片处理的方法教程


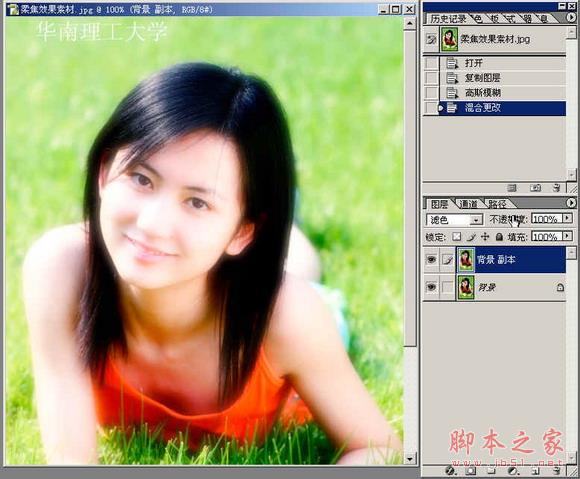
  1、打开素材图,复制背景层为背景副本层,执行高斯模糊7个像素,再改背景副本层的图层模式为滤色.如图:
教你用PS为校花美眉玉照做创意照片处理的方法教程


  2、激活背景层,执行滤镜->扭曲->扩散亮光,如图:

教你用PS为校花美眉玉照做创意照片处理的方法教程


  3、按y键,切换到历史记录画笔工具,按图设好历史画笔的源,然后在背景层涂抹.如图:

教你用PS为校花美眉玉照做创意照片处理的方法教程


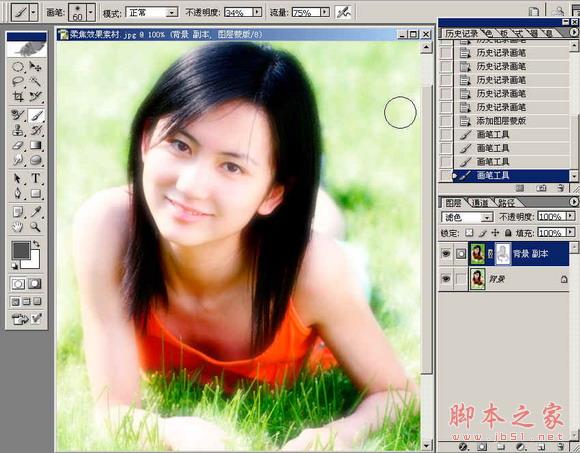
  4、激活背景副本层,在背景副本层上建一个图层蒙板,然后用画笔选适合的不透明度来涂抹.如图:
教你用PS为校花美眉玉照做创意照片处理的方法教程
Related labels:
source:php.cn
Statement of this Website
The content of this article is voluntarily contributed by netizens, and the copyright belongs to the original author. This site does not assume corresponding legal responsibility. If you find any content suspected of plagiarism or infringement, please contact admin@php.cn
Latest Articles by Author
Popular Tutorials
More>
Latest Downloads
More>
Web Effects
Website Source Code
Website Materials
Front End Template