

PS教你设计有范儿的个人作品时间轴网页

PS教你设计有范儿的个人作品时间轴网页,制作出来很有范儿,喜欢的朋友可以一起来学习
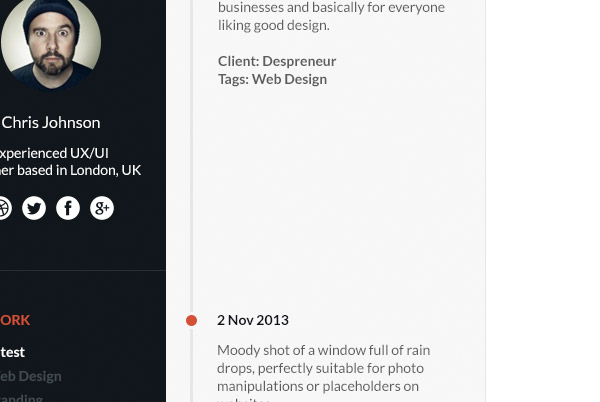
先上效果图:
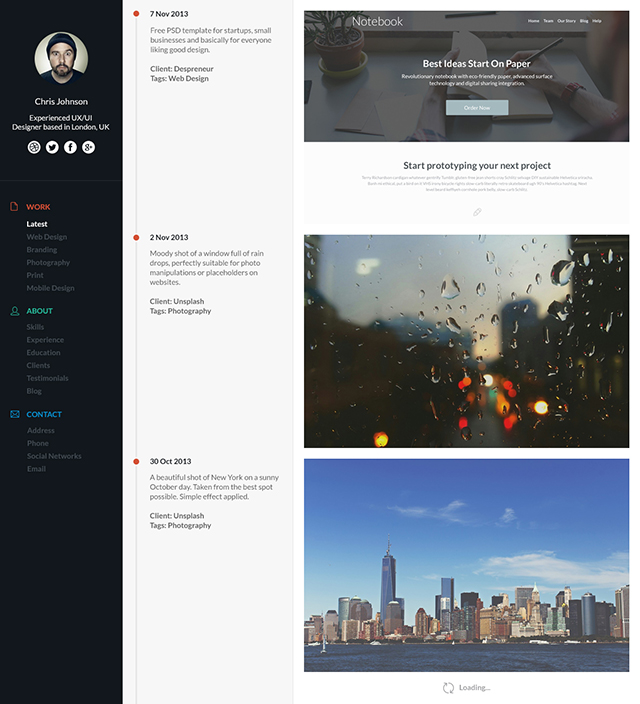
很有范儿是不是,恩啦,现在开始吧。
Step 1
创建新文件,参数如图:

Step 2
新建参考线,以便平衡视觉。位置:水平 60px,垂直分别是 20px,,50px,115px,230px,550px,570px,875px和1180px,这里推荐同学们使用神器「GuideGuide」,具体使用有劳移步:PS 参考线插件GUIDEGUIDE下载及使用说明,非常方便。

Step 3
为了保证我们的设计有序专业,我们先新建3个图层组,分别命名为:左侧栏、简介、作品。平常没关注规范的同学,优设哥特别向您和您所在的团队推荐《PS礼仪手册》!网页设计师必须修炼的内功技法,更是不可或缺的WEB设计指南。


准备工作就此完毕咯。
Step 4
侧边栏为我们展示联系方式、作导航,让我们来建设它吧。
选择矩形工具,前景色改为 #11171c,在左侧栏的图层组里画一个大小230x1320px的矩形,移到左侧边缘,紧贴着第四条参考线就对咯,如图:

Step 5
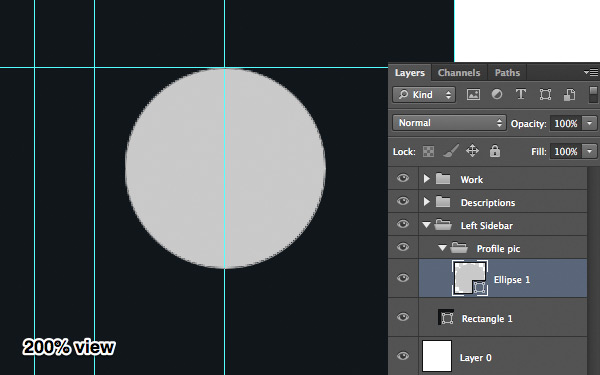
在左侧栏的图层组新建一个图层组,位置在矩形上边,命名为轮廓图。
然后利用椭圆工具,摁住Shift,绘制大小100x100px的圆形,移到左数第三条参考线的中间,上边紧贴水平参考线,如图:
Step 6
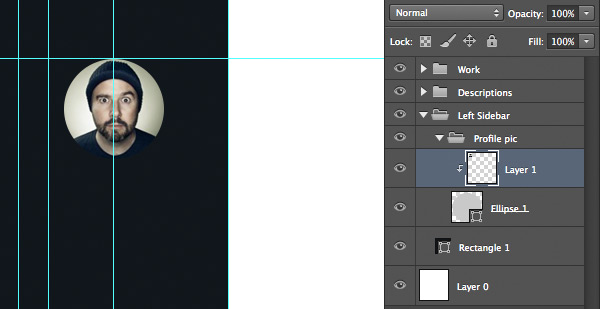
现在,请听指挥 ^_^ ,把电脑里最帅气最漂酿的头像找出来,拖进去,摁住Alt,单击圆形,作为剪切蒙版,然后移动调整到合适(看得到脸)的位置。
Step 7
改变前景色为 #FFFFFF,选择文字工具,选择安装好的字体,大小16pt,写上你的英文名,移动到距头像下25px的位置,确保在第三条参考线的中间。

Step 8
现在为自己添加点个人介绍吧,作者使用的字体大小14pt,距名字20px,这样界面看起来有呼吸感。

Step 9
棒极了,现在继续在左侧栏的图层组下新建一个图层组,命名为社交媒体。把素材里的图标拖进组里,双击图层,颜色叠加——选择白色。将图层样式复制到其他图标上。

图标间距调整为10px,整个图标的图层组距离 简介 20px

Step 10
选择直线工具,前景色为白色,大小1px,在图标下方50px处画一条直线,长度:从边缘到第四条参考线

为了视觉微妙点,将图层不透明度调整到10%
Step 11
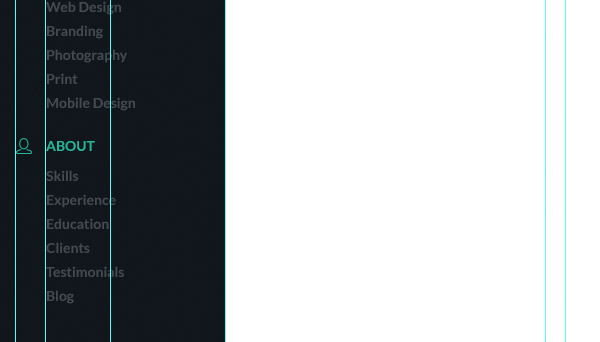
继续新建一个图层组,命名为导航。把素材的矢量图标拖进来,大小调整为13*16px,将这个图标命名为作品。
双击图层,颜色叠加:#d35136,位置:直线下方40px,紧贴第一条垂直参考线。

Step 12
使用 14pt 大小的文字,写上作品,或者Work,位置:第二条参考线处,水平方向与图标对齐。
前景色改成#424a51,继续文字工具打字,内容随喜,大小14pt,行距设置成24pt,完成后将这个目录图层移到距「作品」下方24px处

Step 13
当点击时,我们需要使链接变亮,所以改变Lastest的文字颜色为白色。

Step 14
把联系人的图标拖进来,转成智能对象,大小调整成16x16px,颜色叠加#27b599,位置在目录30px下,紧贴第一条参考线。

Step 15
重复上次步骤。唯一不同的是,「关于」的文本颜色改为#424a51
Step 16
最后创建联系方式。图标拖进来,大小调整成16x13px,颜色叠加#088ecc,其他同上,不同的就是「联系」字样颜色为#424a51
Step 17
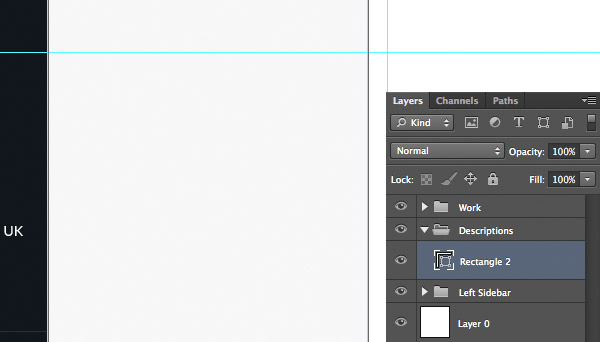
现在做简介页面,回到简介图层组。
前景色改成 #f7f7f7,创建一个大小320x1320px的矩形,紧贴左侧栏和第五条参考线。
Step 18
前景色改成#e7e7e8,创建一条直线,大小1px,放在底部,长度到第五条参考线处,见图:
Step 19
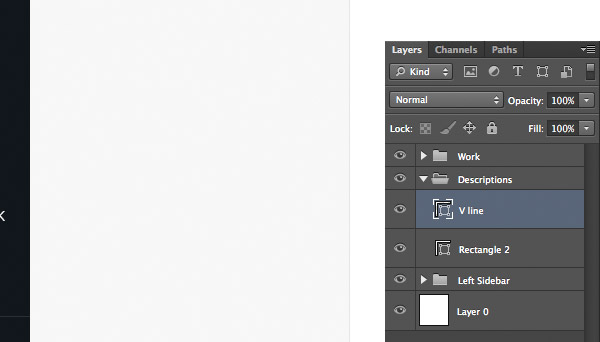
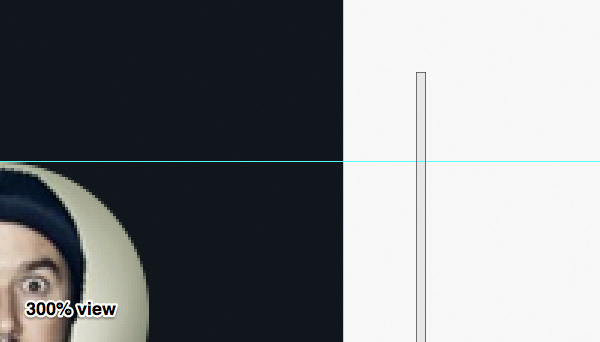
现在创建时间轴,利用直线工具,画一条竖线,大小为3px,命名为时间轴,位置:距左侧栏24px,顶部30px
Step 20
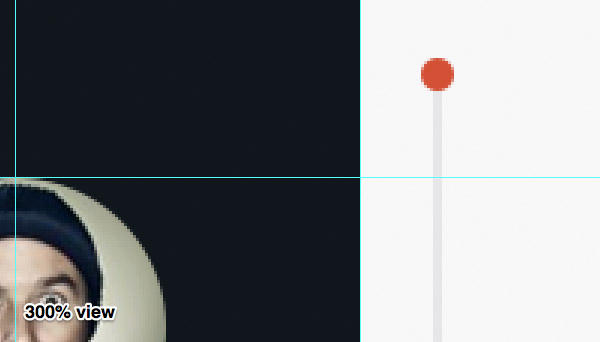
前景色改成#d35136,画一个圆形,大小11x11px,位置:距左侧栏跟顶部都是20px,见图:
Step 21
为圆形图层添加样式,参数如下:


Step 22
前景色改成#11171c,打字,随喜,按照作者的例子也行。大小14pt,加粗,位置:距圆形和顶部都是20px。
恩,到这个时候你可能注意到整个设计的节奏感了,如何去平衡页面的各个元素非常重要,这也是这个教程的目的。

Step 23
前景色改成#5e5e5e,颜色的减淡使页面有层次感,阅读更加容易。
文字改成正常,不加粗,打出简介的内容,间距18pt。
回车两次,介绍客户,贴上标签,加粗文字,以便突出,间距同上,如图:

Step 24
复制圆形,重复步骤,圆形的位置取决于后面内容的篇幅。
Step 25
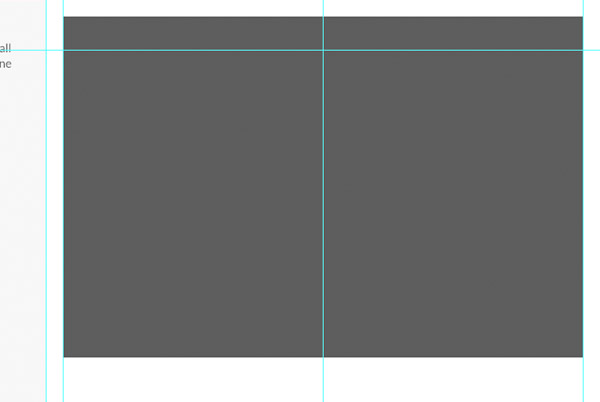
最后一个区域了,回到作品图层组
创建610x400px大小的矩形,颜色可以先搁下,位置:紧贴第六条参考线与第八条,距顶部20px
Step 26
将素材的笔记本PSD拖进来,同样转成矩形的剪切模板,调整到合适大小。

Step 27
复制矩形,移动到离第一个矩形20px处,以此类推,再加上素材里的图片,重复蒙版的步骤。

Step 28
重复简介部分的操作,记得对齐。

Step 29
把矢量素材的刷新图标拖进来,颜色叠加#a0a2a4,大小20x20px,位置:距图片下方20px,

Step 30
最后一步咯
打字,大小14pt,加粗,输入Loading…移动到距图标10px处,水平对齐。然后一起移动两个图层,直到在参考线的中间。

现在一个作品集时间轴的效果图已经完成了,你随时可以交给网页设计师,在浏览器上实现它。

Hot AI Tools

Undresser.AI Undress
AI-powered app for creating realistic nude photos

AI Clothes Remover
Online AI tool for removing clothes from photos.

Undress AI Tool
Undress images for free

Clothoff.io
AI clothes remover

Video Face Swap
Swap faces in any video effortlessly with our completely free AI face swap tool!

Hot Article
Hot Tools

Notepad++7.3.1
Easy-to-use and free code editor

SublimeText3 Chinese version
Chinese version, very easy to use

Zend Studio 13.0.1
Powerful PHP integrated development environment

Dreamweaver CS6
Visual web development tools

SublimeText3 Mac version
God-level code editing software (SublimeText3)
Hot Topics


 How to send web pages to desktop as shortcut in Edge browser?
Mar 14, 2024 pm 05:22 PM
How to send web pages to desktop as shortcut in Edge browser?
Mar 14, 2024 pm 05:22 PM
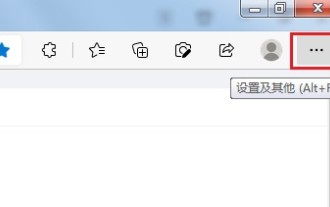
How to send web pages to the desktop as a shortcut in Edge browser? Many of our users want to display frequently used web pages on the desktop as shortcuts for the convenience of directly opening access pages, but they don’t know how to do it. In response to this problem, the editor of this issue will share the solution with the majority of users. , let’s take a look at the content shared in today’s software tutorial. The shortcut method of sending web pages to the desktop in Edge browser: 1. Open the software and click the "..." button on the page. 2. Select "Install this site as an application" in "Application" from the drop-down menu option. 3. Finally, click it in the pop-up window
 Develop web voting system using JavaScript
Aug 09, 2023 pm 01:30 PM
Develop web voting system using JavaScript
Aug 09, 2023 pm 01:30 PM
Using JavaScript to develop a web voting system Abstract: With the rapid development of the Internet, online voting has become a convenient and fast way to collect public opinions and make decisions. This article will introduce the use of JavaScript to develop a simple web voting system, which enables users to select options and submit votes. Introduction: A web voting system is a program that displays multiple options on a web page and allows users to choose. It can be used in many scenarios, such as election voting, product surveys, opinion collection, etc. This article
 What should I do if the images on the webpage cannot be loaded? 6 solutions
Mar 15, 2024 am 10:30 AM
What should I do if the images on the webpage cannot be loaded? 6 solutions
Mar 15, 2024 am 10:30 AM
Some netizens found that when they opened the browser web page, the pictures on the web page could not be loaded for a long time. What happened? I checked that the network is normal, so where is the problem? The editor below will introduce to you six solutions to the problem that web page images cannot be loaded. Web page images cannot be loaded: 1. Internet speed problem The web page cannot display images. It may be because the computer's Internet speed is relatively slow and there are more softwares opened on the computer. And the images we access are relatively large, which may be due to loading timeout. As a result, the picture cannot be displayed. You can turn off the software that consumes more network speed. You can go to the task manager to check. 2. Too many visitors. If the webpage cannot display pictures, it may be because the webpages we visited were visited at the same time.
 How to set up web page automatic refresh
Oct 26, 2023 am 10:52 AM
How to set up web page automatic refresh
Oct 26, 2023 am 10:52 AM
To set the automatic refresh of a web page, you can use the HTML "meta" tag, the JavaScript "setTimeout" function, the "setInterval" function or the HTTP "Refresh" header. Detailed introduction: 1. Use the "meta" tag of HTML. In the "<head>" tag of the HTML document, you can use the "meta" tag to set the automatic refresh of the web page; 2. The "setTimeout" function of JavaScript, etc.
 What to do if the web page cannot be accessed
Sep 06, 2023 am 09:36 AM
What to do if the web page cannot be accessed
Sep 06, 2023 am 09:36 AM
Solutions to inaccessible web pages include checking the network connection, clearing the browser cache, checking the web page address, trying to use other browsers, checking the server status, checking the domain name resolution, checking the firewall and security settings and contacting the website administrator. Detailed introduction: 1. Check the network connection to ensure that the network connection is normal. You can try to open other web pages or use other devices to access to determine whether it is a network connection problem. If other web pages can be accessed normally, it may be a problem with the web page; 2. Clear the browser cache. The browser cache may cause the web page to fail to load, etc.
 Possible reasons why the network connection is normal but the browser cannot access the web page
Feb 19, 2024 pm 03:45 PM
Possible reasons why the network connection is normal but the browser cannot access the web page
Feb 19, 2024 pm 03:45 PM
The browser cannot open the web page but the network is normal. There are many possible reasons. When this problem occurs, we need to investigate step by step to determine the specific cause and solve the problem. First, determine whether the webpage cannot be opened is limited to a specific browser or whether all browsers cannot open the webpage. If only one browser cannot open the web page, you can try to use other browsers, such as Google Chrome, Firefox, etc., for testing. If other browsers are able to open the page correctly, the problem is most likely with that specific browser, possibly
 What to do if the webpage cannot be opened
Feb 21, 2024 am 10:24 AM
What to do if the webpage cannot be opened
Feb 21, 2024 am 10:24 AM
How to solve the problem of web pages not opening With the rapid development of the Internet, people increasingly rely on the Internet to obtain information, communicate and entertain. However, sometimes we encounter the problem that the web page cannot be opened, which brings us a lot of trouble. This article will introduce you to some common methods to help solve the problem of web pages not opening. First, we need to determine why the web page cannot be opened. Possible reasons include network problems, server problems, browser settings problems, etc. Here are some solutions: Check network connection: First, we need
 How to open php on the web page
Mar 22, 2024 pm 03:20 PM
How to open php on the web page
Mar 22, 2024 pm 03:20 PM
Executing PHP code in a web page requires ensuring that the web server supports PHP and is properly configured. PHP can be opened in three ways: * **Server environment:** Place the PHP file in the server root directory and access it through the browser. * **Integrated Development Environment: **Place PHP files in the specified web root directory and access them through the browser. * **Remote Server:** Access PHP files hosted on a remote server via the URL address provided by the server.
