

photoshopCS5制作红色的圣诞壁纸效果

圣诞节快到了,今天学习如何用photoshop制作一个漂漂的圣诞壁纸,我是用CS5中文版制作的这个教程,其它版本也可以,本ps教程难度不大,就是步骤多,麻烦,主要用到了自定义形状工具和图层样式和蒙版等,截图的参数请参考我提供的PSD文件。 先看效果图

首先新建文档1900x1200像素,背景填充#462500。

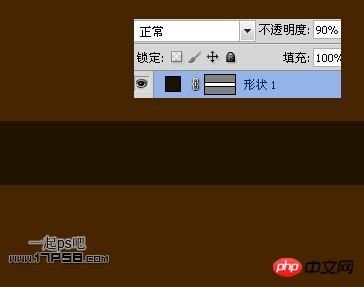
新建层,画一矩形,颜色#1C1200。

把不透明度改为90%。
建新层,画一白色正圆。

添加图层样式 。

效果如下。

复制一层,缩小些,为了看清,图层样式暂时隐藏。

修改图层样式,参数我不给出了,具体的请参考我提供的PSD文件。

再复制一层,缩小些。

修改图层样式,把渐变中心挪到右上角。

再复制一层,缩小些,左上角挪动一定距离。

修改样式,渐变中心挪到左上角。

新建图层,减法模式画2个椭圆,得到月牙形状,颜色黑色。

添加图层样式。


渐变中心挪到左下角,效果如下。

新建层,同样方法减法模式画3个椭圆,得到下图所示的白色形状。

图层不透明度改为13%,这是反光区域。

同样方法画2个白色月牙,在2个图层中。

新建图层画一个白色椭圆。

添加图层样式,渐变中心往左下角挪。

新建图层,用钢笔做如下选区,填充白色。

添加图层样式。

底部新建图层1,用钢笔做如下选区,填充白色。

添加图层样式。

底部新建图层,画一个白色椭圆,添加图层样式,具体参考psd设置。

新建图层,减法模式画下图所示圆环,颜色白色。

添加图层样式。

同样方法做出吊线,把所有的饰物群组。

复制2个缩小,效果如下。

输入文字,尺寸175点,字体Exmouth,添加一些样式。

下面我们修饰背景,底部新建层,用柔角笔刷前景色#190f00涂抹底部,添加蒙版去除多余部分,使底部暗一些。

新建图层6,前景色#f91d00画笔涂抹。

添加蒙版涂抹掉一些区域,图层不透明度42%。

新建图层2,前景色#b31808笔刷涂抹,图层模式滤色,不透明度48%。

建新层用星光笔刷添加一些星星。

建新层,画一个黑色正圆。

添加渐变叠加样式。

复制几个,缩放位移,并设置不同的不透明度,类似下图效果,那些黑色的正圆把图层样式取消即可,然后把他们群组。

同样方法制作底部的装饰球。

新建图层,柔角笔刷前景色白色在装饰球上面点几下。

图层模式叠加,不需要的部分可添加蒙版去除。

同样方法让场景亮堂一些,主要是装饰球。

顶部添加曲线调整层。

处理不和谐的地方,本ps教程结束,最终效果如下。

Hot AI Tools

Undresser.AI Undress
AI-powered app for creating realistic nude photos

AI Clothes Remover
Online AI tool for removing clothes from photos.

Undress AI Tool
Undress images for free

Clothoff.io
AI clothes remover

AI Hentai Generator
Generate AI Hentai for free.

Hot Article
Hot Tools

Notepad++7.3.1
Easy-to-use and free code editor

SublimeText3 Chinese version
Chinese version, very easy to use

Zend Studio 13.0.1
Powerful PHP integrated development environment

Dreamweaver CS6
Visual web development tools

SublimeText3 Mac version
God-level code editing software (SublimeText3)
Hot Topics
 1384
1384
 52
52

 How do I use Photoshop for creating social media graphics?
Mar 18, 2025 pm 01:41 PM
How do I use Photoshop for creating social media graphics?
Mar 18, 2025 pm 01:41 PM
The article details using Photoshop for social media graphics, covering setup, design tools, and optimization techniques. It emphasizes efficiency and quality in graphic creation.
 What is the reason why PS keeps showing loading?
Apr 06, 2025 pm 06:39 PM
What is the reason why PS keeps showing loading?
Apr 06, 2025 pm 06:39 PM
PS "Loading" problems are caused by resource access or processing problems: hard disk reading speed is slow or bad: Use CrystalDiskInfo to check the hard disk health and replace the problematic hard disk. Insufficient memory: Upgrade memory to meet PS's needs for high-resolution images and complex layer processing. Graphics card drivers are outdated or corrupted: Update the drivers to optimize communication between the PS and the graphics card. File paths are too long or file names have special characters: use short paths and avoid special characters. PS's own problem: Reinstall or repair the PS installer.
 How do I prepare images for web using Photoshop (optimize file size, resolution)?
Mar 18, 2025 pm 01:35 PM
How do I prepare images for web using Photoshop (optimize file size, resolution)?
Mar 18, 2025 pm 01:35 PM
Article discusses optimizing images for web using Photoshop, focusing on file size and resolution. Main issue is balancing quality and load times.
 How do I prepare images for print using Photoshop (resolution, color profiles)?
Mar 18, 2025 pm 01:36 PM
How do I prepare images for print using Photoshop (resolution, color profiles)?
Mar 18, 2025 pm 01:36 PM
The article guides on preparing images for print in Photoshop, focusing on resolution, color profiles, and sharpness. It argues that 300 PPI and CMYK profiles are essential for quality prints.
 What are the common questions about exporting PDF on PS
Apr 06, 2025 pm 04:51 PM
What are the common questions about exporting PDF on PS
Apr 06, 2025 pm 04:51 PM
Frequently Asked Questions and Solutions when Exporting PS as PDF: Font Embedding Problems: Check the "Font" option, select "Embed" or convert the font into a curve (path). Color deviation problem: convert the file into CMYK mode and adjust the color; directly exporting it with RGB requires psychological preparation for preview and color deviation. Resolution and file size issues: Choose resolution according to actual conditions, or use the compression option to optimize file size. Special effects issue: Merge (flatten) layers before exporting, or weigh the pros and cons.
 How to solve the problem of loading when PS is always showing that it is loading?
Apr 06, 2025 pm 06:30 PM
How to solve the problem of loading when PS is always showing that it is loading?
Apr 06, 2025 pm 06:30 PM
PS card is "Loading"? Solutions include: checking the computer configuration (memory, hard disk, processor), cleaning hard disk fragmentation, updating the graphics card driver, adjusting PS settings, reinstalling PS, and developing good programming habits.
 How do I use Photoshop's video editing capabilities?
Mar 18, 2025 pm 01:37 PM
How do I use Photoshop's video editing capabilities?
Mar 18, 2025 pm 01:37 PM
The article explains how to use Photoshop for video editing, detailing steps to import, edit, and export videos, and highlighting key features like the Timeline panel, video layers, and effects.
 How to set password protection for export PDF on PS
Apr 06, 2025 pm 04:45 PM
How to set password protection for export PDF on PS
Apr 06, 2025 pm 04:45 PM
Export password-protected PDF in Photoshop: Open the image file. Click "File"> "Export"> "Export as PDF". Set the "Security" option and enter the same password twice. Click "Export" to generate a PDF file.
