


一、sphinx的使用原理
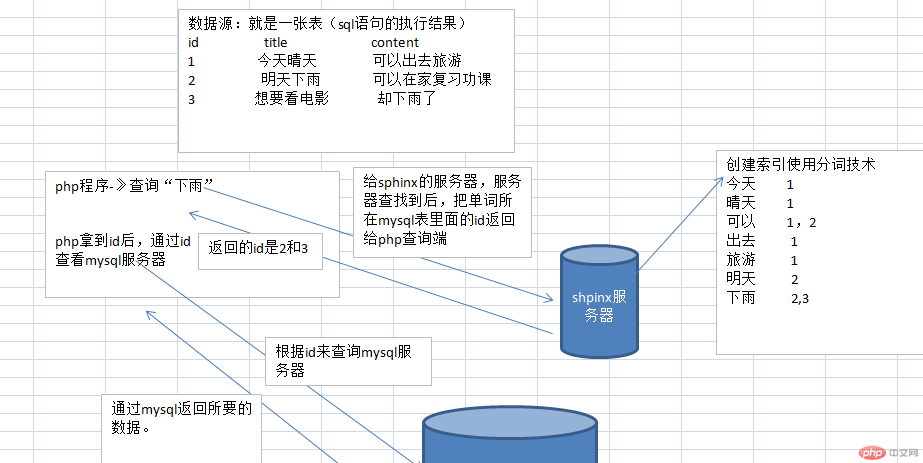
(1)先创建数据源。
(2)根据数据源创建索引,使用分词技术
(3)php把查询的关键词给Sphinx服务器,Sphinx根据关键词查找到关键字在mysql表里面的记录的id.Sphinx把id返回给php查询端。
(4)php根据返回的id,查询mysql服务器。
二、从spinx官网下载最新版的sphinx 解压
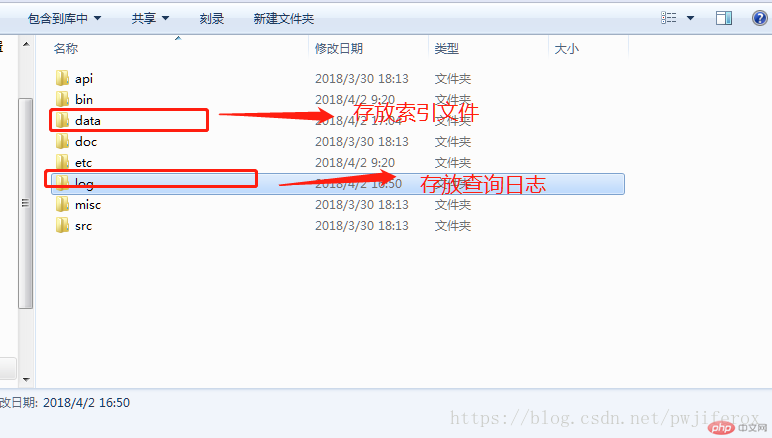
三、在解压的根目录下新建data 和 log 目录,data目录存储生成的索引文件,log目录存放日志文件
四、在bin目录下新建sphinx.conf文件,这个是sphinx的配置文件,配置信息可参考下面内容,也可自行搜索,把MySQL信息配置及相应的路径配置成自己的即可。
source doc
{
    type           = mysql
    sql_host        = localhost
    sql_user        = root
    sql_pass        = 123
    sql_db          = test
    sql_port        = 3306
    sql_query_pre        = SET NAMES utf8
    sql_query        = SELECT id, group_id, UNIX_TIMESTAMP(date_added) AS date_added, title, content FROM documents
    sql_attr_uint      = group_id
    sql_attr_timestamp    = date_added
}


index testindex
{
    source          = doc
    path           = E:/wamp64/www/sphinx/data/testindex
    mlock         = 0
    min_word_len  = 2
    min_prefix_len = 0
    min_infix_len = 1
    ngram_len     = 1
    ngram_chars = U+4E00..U+9FBB, U+3400..U+4DB5, U+20000..U+2A6D6, U+FA0E, U+FA0F, U+FA11, U+FA13, U+FA14, U+FA1F, U+FA21, U+FA23, U+FA24, U+FA27, U+FA28, U+FA29, U+3105..U+312C, U+31A0..U+31B7, U+3041, U+3043, U+3045, U+3047, U+3049, U+304B, U+304D, U+304F, U+3051, U+3053, U+3055, U+3057, U+3059, U+305B, U+305D, U+305F, U+3061, U+3063, U+3066, U+3068, U+306A..U+306F, U+3072, U+3075, U+3078, U+307B, U+307E..U+3083, U+3085, U+3087, U+3089..U+308E, U+3090..U+3093, U+30A1, U+30A3, U+30A5, U+30A7, U+30A9, U+30AD, U+30AF, U+30B3, U+30B5, U+30BB, U+30BD, U+30BF, U+30C1, U+30C3, U+30C4, U+30C6, U+30CA, U+30CB, U+30CD, U+30CE, U+30DE, U+30DF, U+30E1, U+30E2, U+30E3, U+30E5, U+30E7, U+30EE, U+30F0..U+30F3, U+30F5, U+30F6, U+31F0, U+31F1, U+31F2, U+31F3, U+31F4, U+31F5, U+31F6, U+31F7, U+31F8, U+31F9, U+31FA, U+31FB, U+31FC, U+31FD, U+31FE, U+31FF, U+AC00..U+D7A3, U+1100..U+1159, U+1161..U+11A2, U+11A8..U+11F9, U+A000..U+A48C, U+A492..U+A4C6
}

indexer
{
    mem_limit       = 128M
}


searchd
{
    listen          = 9312
    listen          = 9306:mysql41
    log         = E:/wamp64/www/sphinx/log/searchd.log
    query_log       = E:/wamp64/www/sphinx/log/query.log
    read_timeout        = 5
    max_children        = 30
    pid_file        = E:/wamp64/www/sphinx/log/searchd.pid
    seamless_rotate     = 1
    preopen_indexes     = 1
    unlink_old      = 1
    workers         = threads # for RT to work
    binlog_path     = E:/wamp64/www/sphinx/data
}点击 "运行实例" 按钮查看在线实例
五、生成索引文件
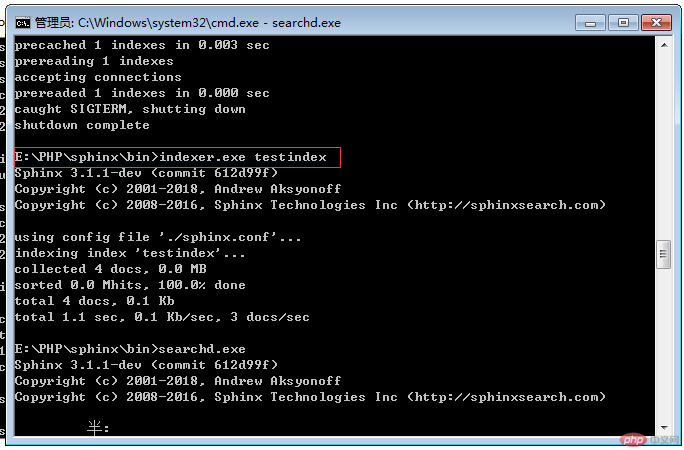
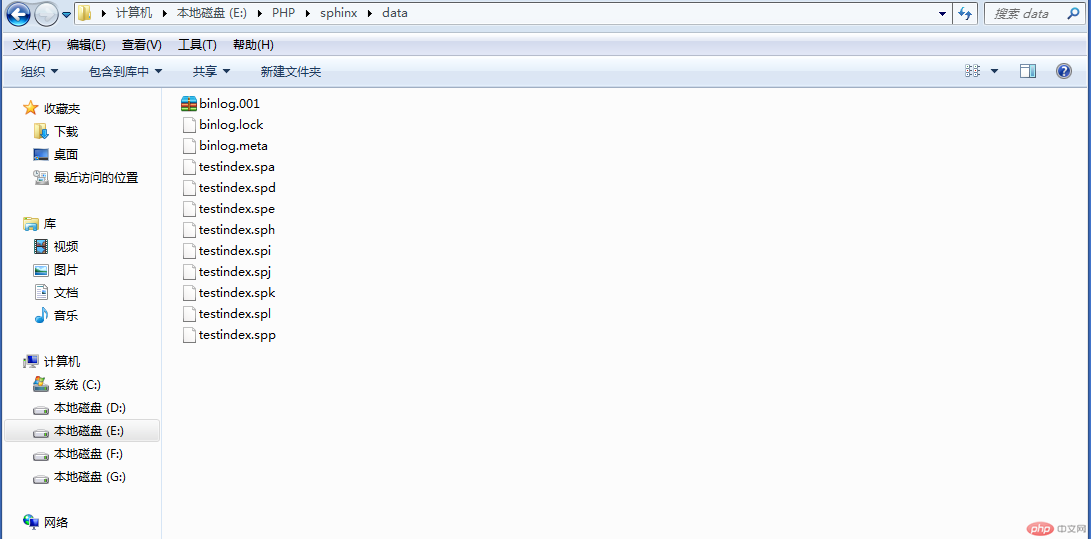
直接执行indexer.exe这个文件,后面是配置文件里面的索引名称。成功后会在data目录下生成文件
六、启动search服务
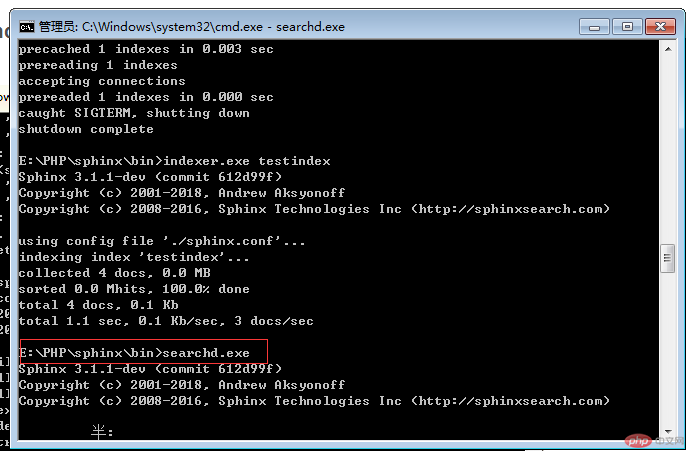
七、可以使用api实现全文索引,返回的是符合查询记录的id
<?php
require ( "sphinxapi.php" );
$cl = new SphinxClient ();
$q = "学习"; //模拟关键字
$sql = "";
$host = "127.0.0.1";
$port = 9312;
$index = "*";
$cl->SetServer ( $host, $port );
$cl->SetConnectTimeout(10);
$cl->SetArrayResult(true);

$res = $cl->Query ( $q, $index );
var_dump($res['matches']);
点击 "运行实例" 按钮查看在线实例
特别提醒:1、可以修改官方提供的sql记录。添加上中文信息,可以进行中文检索。
2、每次只要修改了MySQL数据库信息,都要从新生成索引文件,也即是执行indexer.exe这个可执行文件从新生成。