

精通CSS 首先要熟悉选择器的使用,才能好的利用选择器,才能设置到你想设置的属性。
双飞翼布局是常用布局之一,熟记双飞翼DOM结构 CSS结构技巧。
一.常用选择器及代码
/* 标签选择器 */
ul {
    border: 1px dashed red;
    margin-top: 0px;
    margin-bottom: 0;
    padding-left: 0px;
}

/* 层级选择器 */
ul li{
    list-style-type: none;
    width:40px;
    height: 40px;
    /* background-color: #ccc; */
    float:left;
    border-radius: 50%;
    line-height: 40px;
    text-align: center;
    /* 阴影设置要注意 */
    box-shadow: 2px 2px 1px red;
    margin-left: 10px;

}

/* id选择器 */
#bg-blue {
    background-color: blue;
}

/* 属性选择器 */
li[id="bg-blue"]{
    border: 2px solid lightgreen;
}

群组选择器
#bg-blue, .bg-green {
    border: 2px solid blue;
}

/* 兄弟选择器 */
#bg-blue~*{
    background-color: #fff;
}

/* 相邻选择器 */
#bg-green +* {
    background-color: #fff;

}

/* 伪类选择器 */

    /* 根据位置选择 */
    /* 选中ul下的第一个元素 */
ul :first-child {
    background-color: red;
}

    /* 选中ul下的最后一个元素 */
ul :last-child {
    background-color: blue;
}

    /* 选中ul下的第4个元素 */
ul :nth-child(4) {
    background-color: pink;
}

    /* 选中 ul中倒数第2个 */
ul :nth-last-child(2) {
    background:pink;
}

    /* 伪类:类型选择器 */
 /* 根据类型选择 */
ul li:last-of-type {
    background-color: coral;
}

ul li:first-of-type {
    background-color: coral;
}

/* 表单选择器 */
    /* 选择所有 */
form :enabled {
    background-color: red;

}
    /* 选中 checked后面一个元素 */
form :checked+* {
    background-color: #ccc;
}

    /* 获取焦点 */
form :focus {
    background-color:pink;
}

/* 鼠标经过 */
button:hover {
    width: 56px;
    height: 30px;
    background-color: black;
}

/* 错误文本 */
form :invalid{
    color:red;
}
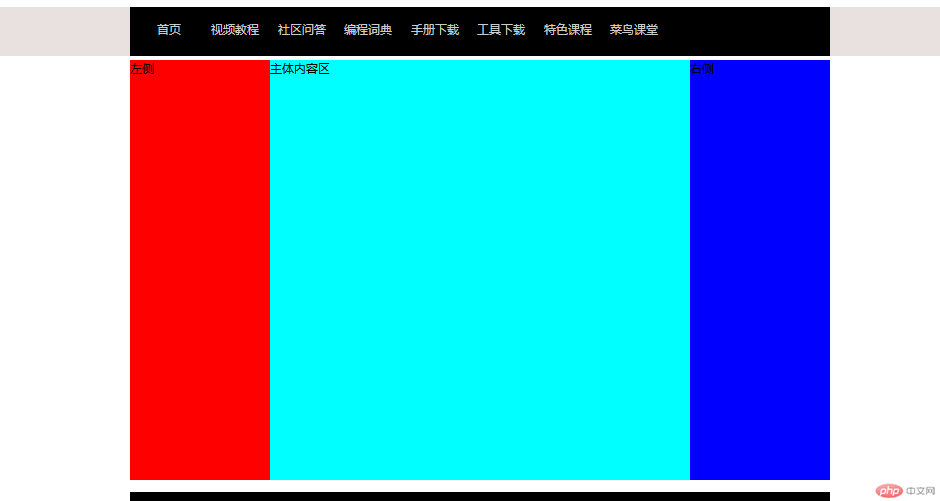
二.双飞翼布局
双飞翼布局是常见的布局方式,可以修改成左 右版
效果图

<!DOCTYPE html>
<html lang="en">
<head>
    <meta charset="UTF-8">
    <link rel="stylesheet" href="css/style04.css">
    <title>通用头部双飞翼布局</title>
</head>
<body>
    <!-- 头部 导航 -->
    <div class="header">
        <div class="content">
            <div class="nav">
                <ul>
                    <li class="item"><a href="#">首页</a></li>
                    <li class="item"><a href="#">视频教程</a></li>
                    <li class="item"><a href="#">社区问答</a></li>
                    <li class="item"><a href="#">编程词典</a></li>
                    <li class="item"><a href="#">手册下载</a></li>
                    <li class="item"><a href="#">工具下载</a></li>
                    <li class="item"><a href="#">特色课程</a></li>
                    <li class="item"><a href="#">菜鸟课堂</a></li>
                </ul>
            </div>
        </div>
    </div>

    <!-- 中间主体部分 -->
    <!-- 双飞翼DOM结构 -->
    <div class="container">
    <!-- 先创建中间块 优先渲染 -->
        <div class="wrap">
            <div class="main">主体内容区</div>
        </div>
        <div class="left">左侧</div>
        <div class="right">右侧</div>


    </div>
    <!-- 底部部分 -->
    <div class="footer">
        <div class="content">
            <p>
                <a href="">PHP中文网版权所有</a>
                <a href="">***xxxx-xxxxxxx</a>
            </p>
        </div>
    </div>

</body>
</html>
*{
    margin:0;
    padding:0;
}


.header {
    width:100%;
    background-color: rgb(233, 224, 224);
}

.header .content{
    width:1000px;
    height:70px;
    background-color: black;
    margin:auto;
}

.header .content .nav .item {
    list-style-type: none;

}

/* 浮动要添加到a标签 */
.header .content .nav .item a {
    float: left;
    margin-left: 15px;
    min-width: 80px;
    min-height: 60px;
    text-decoration-line: none;
    line-height: 66px;
    text-align: center;
    color:#ccc;
}

.header .content .nav .item a:hover {
    border-bottom:4px solid orange;
    color:#eee;
    background-color: rgba(192, 155, 155, 0.6);
}
/* 中间区块 */

/* 双飞翼布局开始 */
.container {
    width:1000px;
    min-height: 600px;
    background-color: #ccc;
    margin:5px auto;
}

.wrap {
    /* 继承父高度 */
    width:inherit;
    min-height: inherit;
    background-color: cyan;

}

.left {
    width: 200px;
    min-height: 600px;
    background-color: red;
    margin-left: -100%;
}

.right {
    width: 200px;
    min-height: 600px;
    background-color: blue;
    margin-left: -200px;
}

.main {
    padding-left:200px;
    padding-right:200px;

}

.wrap, .left, .right {
    float: left;
}
/* 双飞翼布局结束 */


/* 下部区块 */
.footer {
    width:1000px;
    height: 60px;
    background-color: black;
    margin:auto;
    line-height: 60px;
}
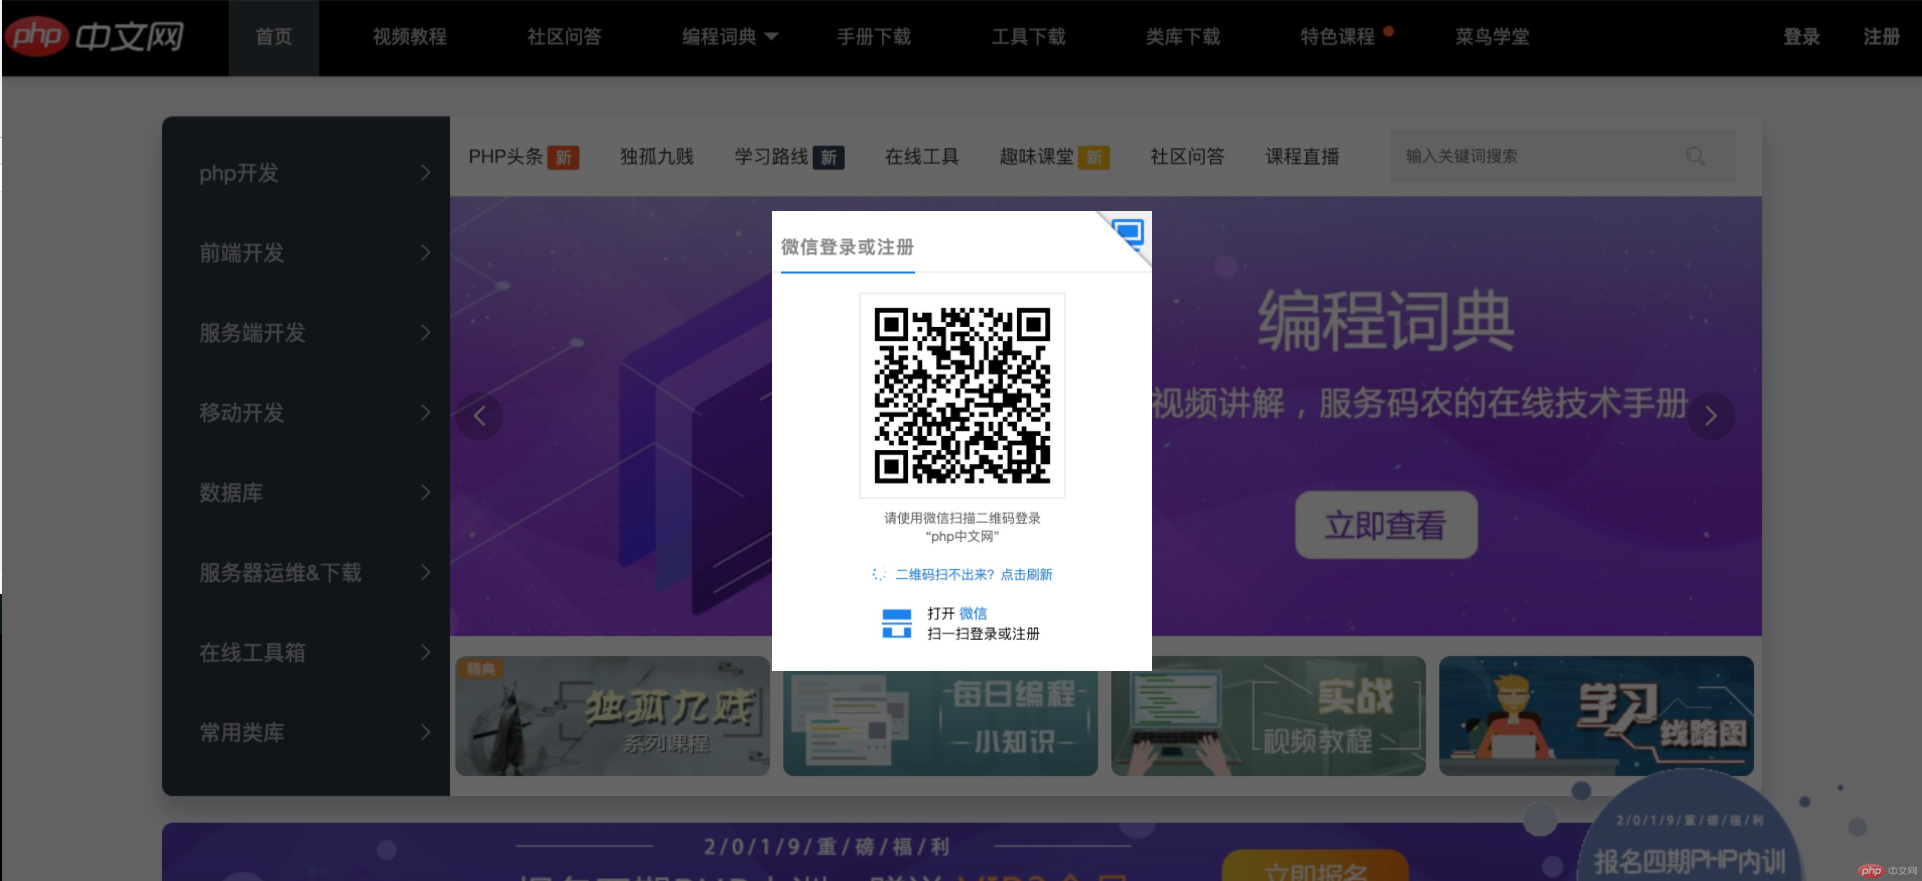
三.绝对定位实现遮罩
效果图

<!DOCTYPE html>
<html lang="en">
<head>
    <meta charset="UTF-8">
    <link rel="stylesheet" href="css/style02.css">
    <title>绝对定位之遮罩</title>
</head>
<body>
    <div class="shade"></div>
    <div class="login"><img src="static/images/login.jpg" alt=""></div>

</body>
</html>
body{
    margin:0;
    padding:0;
    background-image: url(../static/images/php.jpg);
    /* 是否平铺 */
    background-repeat: no-repeat;
    /* 背景大小 */
    background-size: cover;

}

.shade {
    width: 100%;
    height: 100%;
    background-color: black;
    /* 透明度设置 */
    opacity: 0.6;
    position: absolute;
    left:0;
    top:0;
}

/* 绝对定位到浏览器中心 */
.login {
    position: absolute;
    /* 定位高度宽度50% */
    top:50%;
    left: 50%;
    /* 左 上边距移动图片的一半 */
    margin-left:-190px;
    margin-top: -230px;
}

.login img {
    width: 380px;
    height:460px;
}
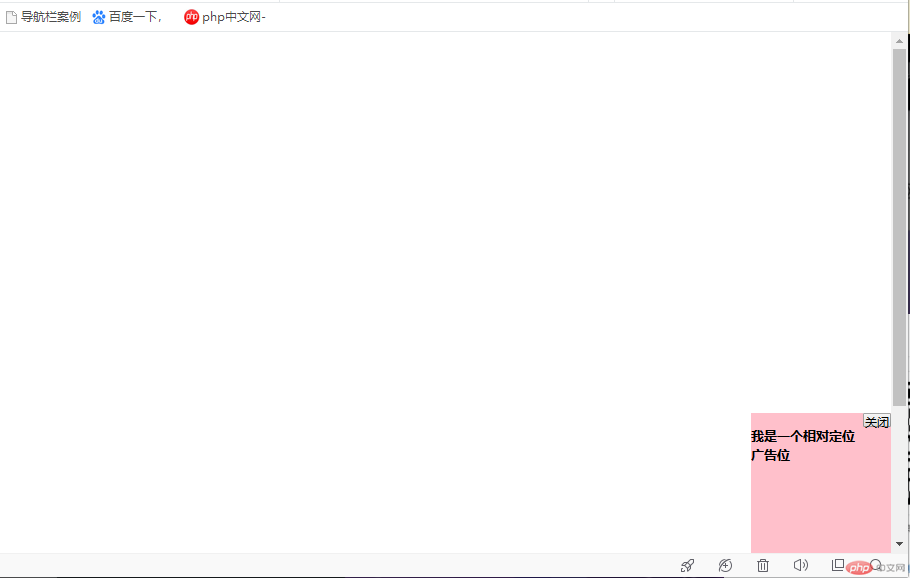
四.固定定位制作广告位
效果图

<!DOCTYPE html>
<html lang="en">
<head>
    <meta charset="UTF-8">
    <link rel="stylesheet" href="css/style03.css">
    <title>相对定位广告位</title>
</head>
<body>
    <div class="ads">
        <!-- 添加关闭按钮 -->
        <button onclick="this.parentNode.style.display = 'none'" >关闭</button>
        <h3>我是一个相对定位广告位</h3>

    </div>
</body>
</html>
*{
    margin:0;
    padding:0;
}

body {
    height: 1000px;
    width: 100px;

}

.ads {
    width:200px;
    height: 200px;
    background-color:pink;
    position:fixed;
    right: 0;
    bottom:0;
}

.ads button {
    float: right;
    height: 20px;
    width:40px;
    color: black;