Correction status:Uncorrected
Teacher's comments:


今天学习的是JavaScript的基础--函数的调用、闭包、HTML DOM、DOM 事件,下面是我根据老师课堂上的内容所做的练习:
练习
<!DOCTYPE html>
<html lang="en">
<head>
	<meta charset="UTF-8">
	<title>JavaScript 第三章</title>
	<link rel="icon" type="image/x-icon" href="static/images/favicon.ico">
</head>
<body>
	<script>
	// 函数的调用
        function myfun(){
        	document.write('欢迎来到PHP中文网!');
        }
        myfun();

        function myfu(a,b){
        	document.write(a*b);
        }
        myfu(23,34);
        document.write('<br>');

        var add=function(x,y){
        	return x+y;
        };
        document.write(add(12,3));

        document.write('<hr>');

        var myobj={
        	firstName:"张无忌",
        	twoName:"爱",
        	lastName:"赵敏",
        	fullName:function(){
        		return this.firstName+this.twoName+this.lastName;
        	}
        }
        document.write(myobj.fullName());

        document.write('<hr>');

     // 闭包
        function one(){
        	var x=50;
        	function two(){
        		var y=100;
        		document.write(x);
        	}
        	return two();
        }
        one();

	</script>
</body>
</html>点击 "运行实例" 按钮查看在线实例

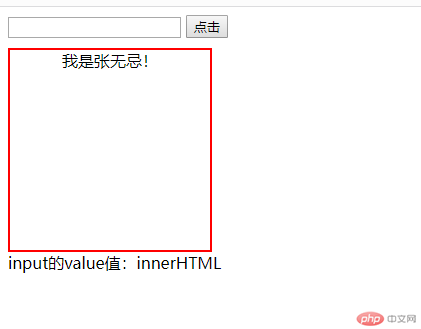
<!DOCTYPE html>
<html lang="en">
<head>
	<meta charset="UTF-8">
	<title>JavaScript 第三章</title>
	<link rel="icon" type="image/x-icon" href="static/images/favicon.ico">
</head>
<body>
	<input type="text" name="" class="box">
	<input type="button" name="" value="innerHTML" class="box">
	<div id="inner" style="border:2px solid red;width:200px;height:200px;text-align:center;margin-top:10px;">php中文网</div>

    <script>
        function getInnerHtml(){
	       var inner=document.getElementById("inner");
	       inner.innerHTML="我是张无忌!";
	    }
	    getInnerHtml();

	    var c=document.getElementsByClassName("box")[1];
	    document.write("input的value值:"+c.getAttribute("value"));
	    c.setAttribute("value","点击");
    </script>

</body>
</html>点击 "运行实例" 按钮查看在线实例

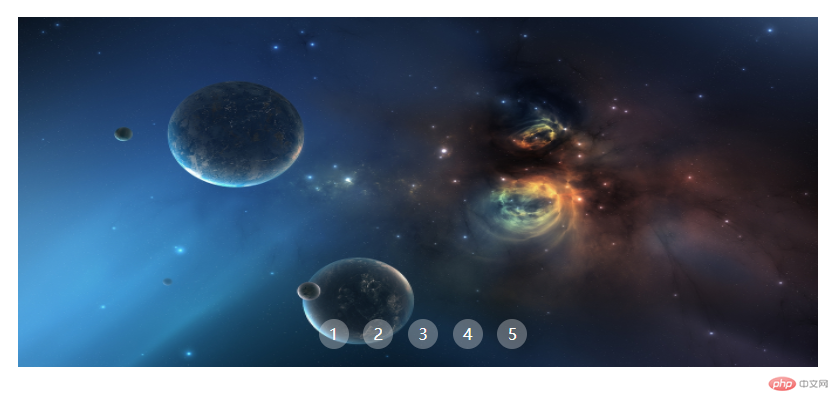
2.简单轮播效果
<!DOCTYPE html>
<html lang="en">
<head>
	<meta charset="UTF-8">
	<title>JavaScript 第三章</title>
	<link rel="icon" type="image/x-icon" href="static/images/favicon.ico">
	<style>
        div{
        	width:800px;
        	height:350px;
        	margin:100px auto;
        	overflow:hidden;
        	position:relative;
        }
        img{
        	width:800px;
        	height:350px;
        }
        p{
        	width:800px;
        	height:35px;
        	color:#fff;
            position:absolute;z-index:100;bottom:0;left:0;
            text-align:center;
            line-height:35px;
        }
        p span{
        	display:inline-block;
        	width:30px;
        	height:30px;
        	text-align:center;
        	background:rgba(254,254,254,0.3);
        	border-radius:50%;
        	line-height:30px;
        	margin-left:10px;
        	cursor:pointer;
        }
	</style>
</head>
<body>
	<div id="photo">
        <a href=""><img src="static/images/1.jpg"></a>
        <a href=""><img src="static/images/2.jpg"></a>
        <a href=""><img src="static/images/3.jpg"></a>
        <a href=""><img src="static/images/4.jpg"></a>
        <a href=""><img src="static/images/5.jpg"></a>

        <p>
           <span onclick="change(0)">1</span>
           <span onclick="change(1)">2</span>
           <span onclick="change(2)">3</span>
           <span onclick="change(3)">4</span>
           <span onclick="change(4)">5</span>
        </p>
	</div>

	<script>
        function change(num){
        	var obj=document.getElementById('photo');
        	var obj_a=obj.getElementsByTagName('a');
        	for(var i=0;i<obj_a.length;i++){
        		obj_a[i].style.display="none";
        	}
        	obj_a[num].style.display="block";
        }
	</script>
</body>
</html>点击 "运行实例" 按钮查看在线实例

总结:今天的内容深入了些,感觉有点难了,课堂上听了感觉还行,但到了自己动手就做不出来了,还是没有掌握得很好,还是要多加练习的。