

学习java的朋友们,想必一定会接触到eclipse,那怎么在eclipse下安装activiti呢,小猿圈今天带你学习一下,希望大家看后可以学会。
一、安装步骤:
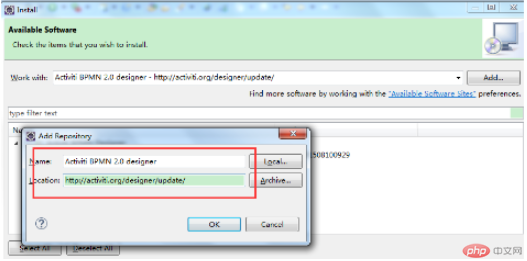
1,打开Eclipse的 Help -> Install New Software,填上插件地址:
Name:Activiti BPMN 2.0 designer
Location:http://activiti.org/designer/update/

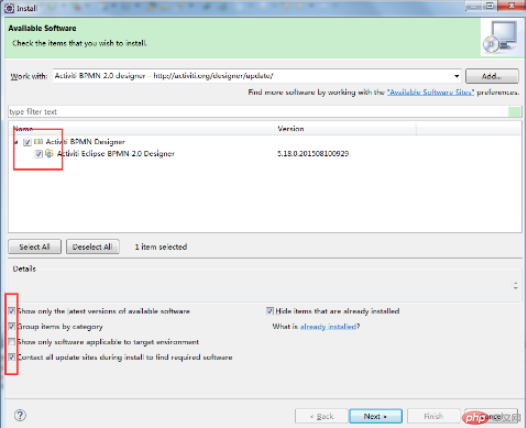
2,对应的选项打勾,执行下一步,按提示操作直到安装成功:
注意:Details选项中,记得选中 "Contact all updates sites during install to find required software" ,
它表示会检查所有当前安装所需要的插件并可以被Eclipse下载.

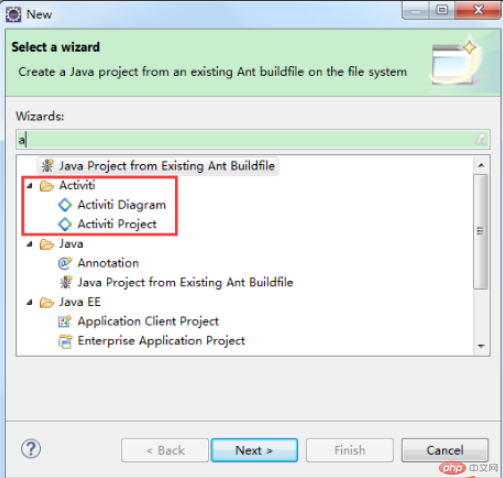
3,校验安装是否成功,新建工程,可以看到Activiti选项,即表示成功;如下图:

二、使用说明
打开Eclipse的Windows->Preferences->Activiti->Save Action流程图片的生成方式:
注意:打上勾后,Activiti画图工具会在保存流程文件时,自动生成一张流程图;
虽然流程引擎在单独部署bpmn文件时会自动生成图片,但在实际开发过程中,自动生成的图片会导致和BPMN中的坐标有出入,
在实际项目中展示流程当前位置图会有问题。
所在完成以上(打勾)配置后,会由我们自己来管理流程图片。
在发布流程时把流程规则文件和流程图片一起上传就行了。
***,跟着流程步骤走,安装是不是很轻松,大家安装成功activiti插件后,一定要多学习这个插件有什么功能,可以到小猿圈看一下视频,了解更多,希望大家能尽早学会这个插件的功能。