Blogger Information
Blog 2
fans 0
comment 0
visits 1501
Popular Tutorials
More>
Latest Downloads
More>
Web Effects
Website Source Code
Website Materials
Front End Template
7月1日课后作业-phpStudyProV8使用
张润春的博客
Original
947 people have browsed it
  • 安装指南

1.从PHP中文网(七期)培训群文件中下载最新版本phpStudyV8.0x64.zip

2.解压到目录名不带中文名称/空格的路径

3.打开解压后路径phpStudyV8.0x64\COM\phpstudy_pro.exe,可将phpstudy_pro.exe发送至桌面快捷方式  方便后续使用

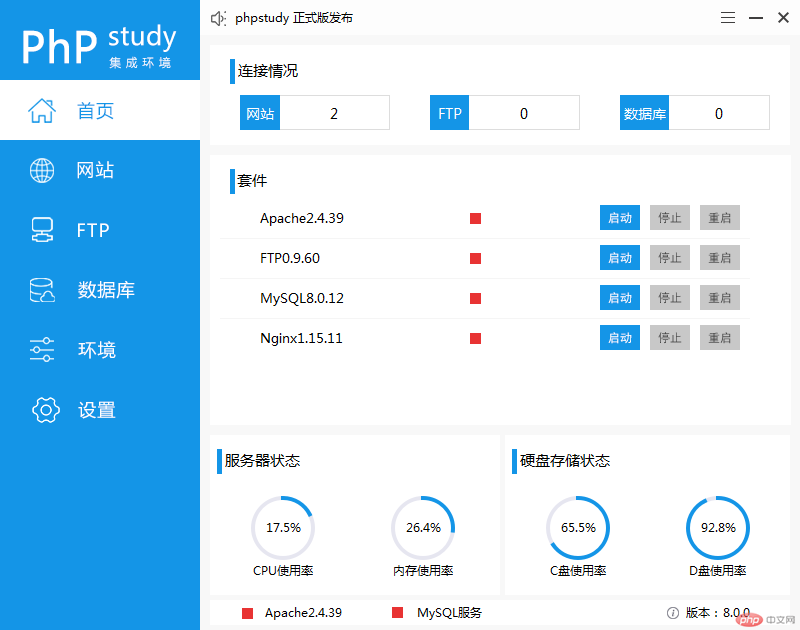
打开后  如下图所示

20190706213410.png


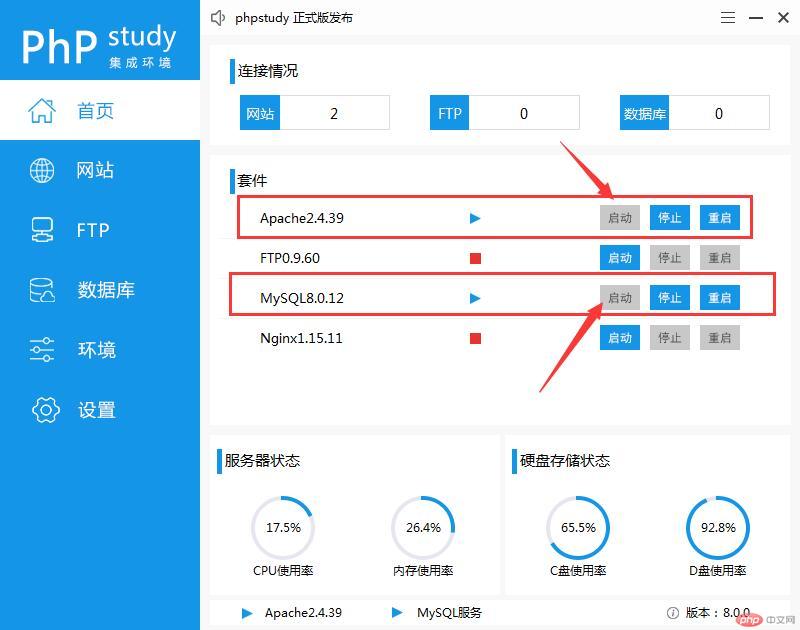
4.启动Apache和Mysql服务  如下图既是启动成功

QQ截图20190706213549.jpg

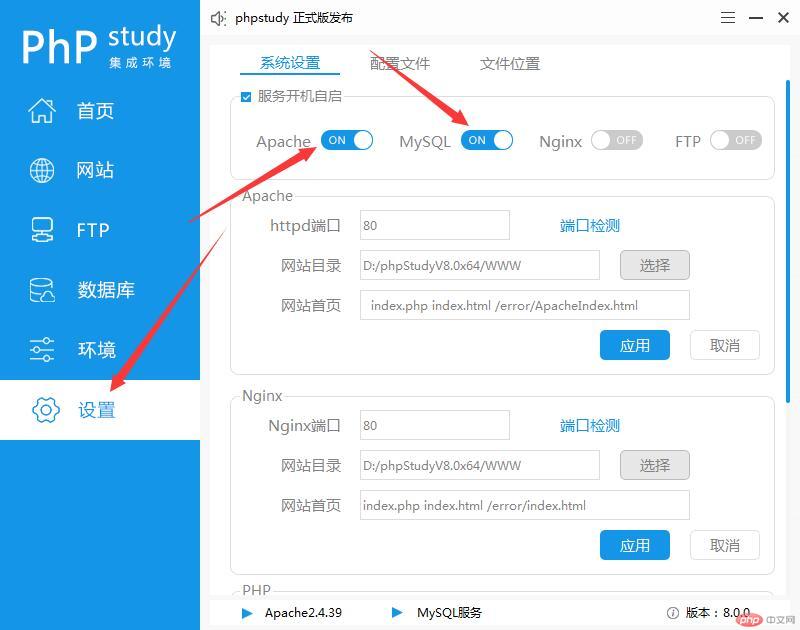
为了方便后续使用  可以将apache和Mysql服务设置为开机启动项  点击设置-开启对应服务选项  如下图

QQ截图20190706213720.jpg


  • 创建一个本地网站

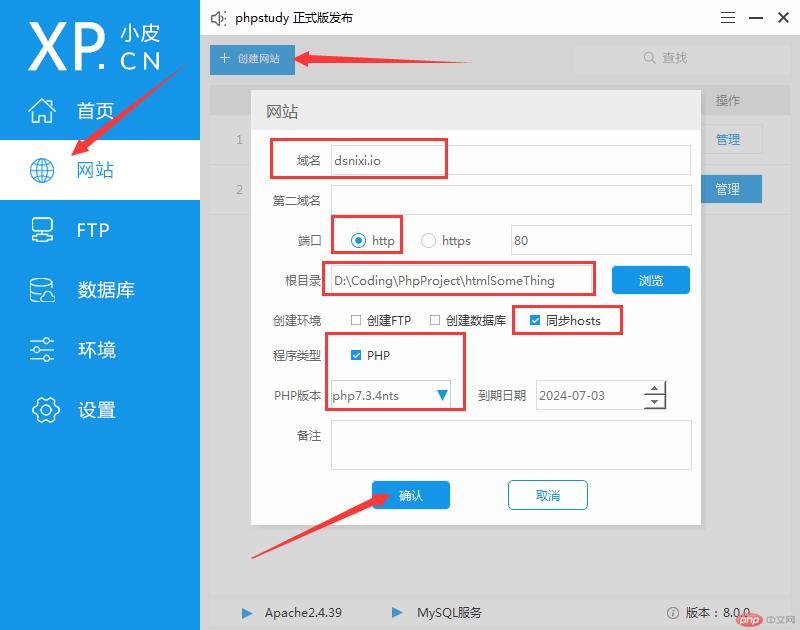
  1. 点击网站-创建网站 写入你自己喜欢的域名  选择任意不带中文/空格的目录 勾选同步hosts 选择对应的php版本  点击确定

QQ截图20190706214538.jpg

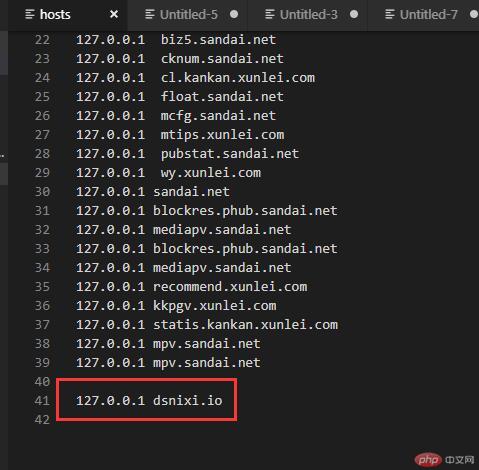
创建完成后  工具会自动在操作系统host文件中创建域名与本地ip的绑定 我们可以打开路径C:\Windows\System32\drivers\etc\hosts  可以看出刚才我们输入的域名已经与本机ip127.0.0.1进行绑定

QQ截图20190706214822.jpg


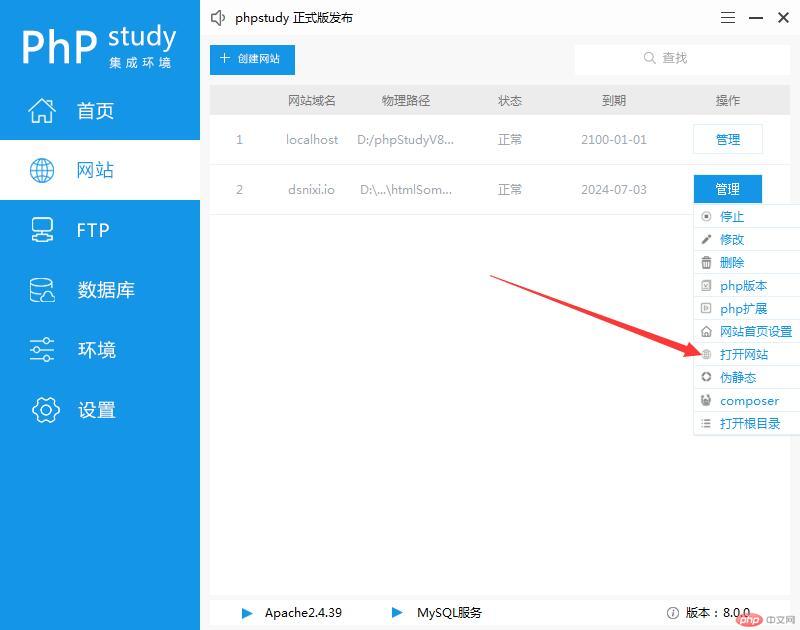
2.我们测试一下 刚才创建的网站是否创建成功 

QQ截图20190706215245.jpg


显示如下图说明创建网站成功   


QQ截图20190706215421.jpg


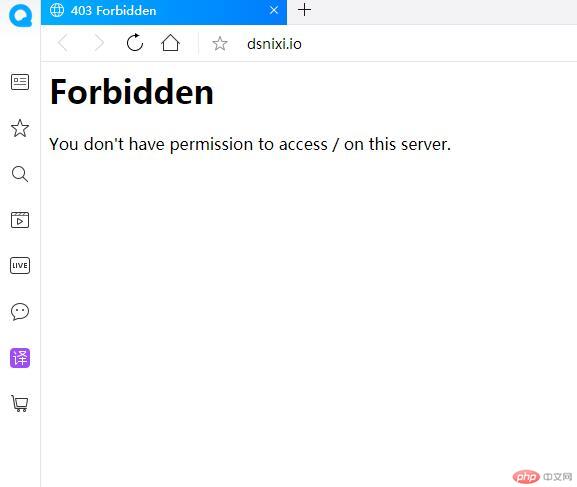
3.下面报错内容是 You don't have permission to access / on this server.

大致意思是没有权限访问web站点的根目录

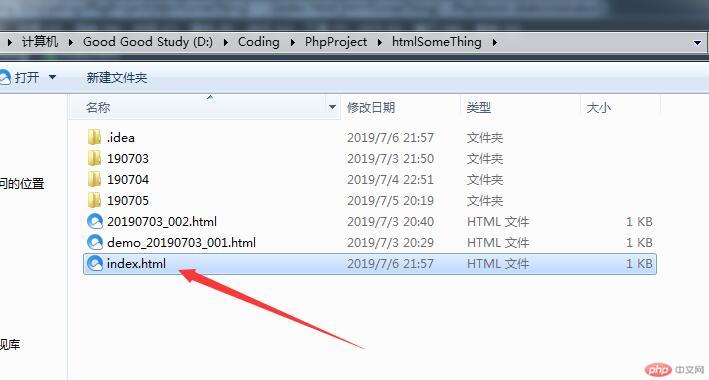
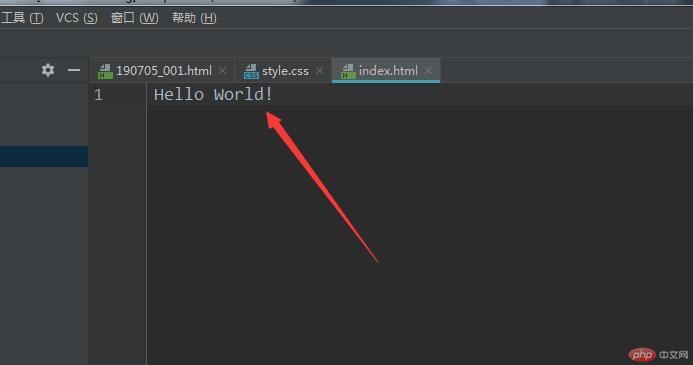
报错原因是我们根目录下没有识别到默认首页  所以我们创建一个index.html/index.php

QQ截图20190706215754.jpg


QQ截图20190706215803.jpg


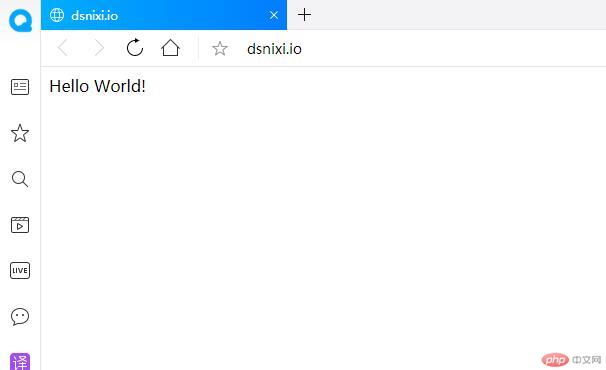
4.输入完Hello World后  我们保存再次打开dsnixi.io  如下图所示

QQ截图20190706220206.jpg


一切ok!


Correction status:qualified

Teacher's comments:配图不错
Statement of this Website
The copyright of this blog article belongs to the blogger. Please specify the address when reprinting! If there is any infringement or violation of the law, please contact admin@php.cn Report processing!
All comments Speak rationally on civilized internet, please comply with News Comment Service Agreement
0 comments
Author's latest blog post