Correction status:qualified
Teacher's comments:下一次可以将一天的多个作业合并在一个博客中发布


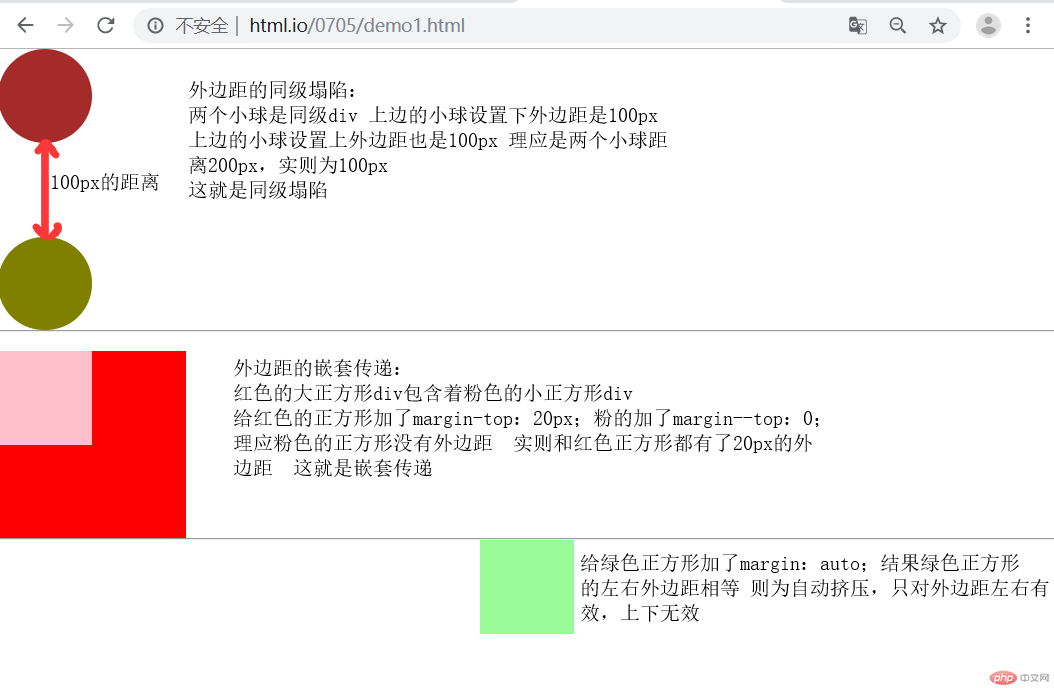
理解并写出外边距的三个特征: 同级塌陷,嵌套传递,自动挤压的案例
*{
    margin: 0;
    padding: 0;
}
.box1{
    height: 100px;
    width: 100px;
    border-radius: 100px;
    background-color: brown;
    margin-bottom:100px ;
}.box2{
    height: 100px;
    width: 100px;
    border-radius: 100px;
    background-color: olive;
    margin-top: 100px;
}
.box3{
    width: 200px;
    height: 200px;
    background-color: red;
    margin-top: 20px;
}
.box4{
    width: 100px;
    height: 100px;
    background-color: pink;
    margin-top: 0px;
}
.box5{
    width: 100px;
    height: 100px;
    background-color: palegreen;
    /*float: left;*/
    margin: auto;
}
/*
.box6{
    width: 100px;
    height: 100px;
    background-color: dodgerblue;
    margin: auto;
}*/点击 "运行实例" 按钮查看在线实例
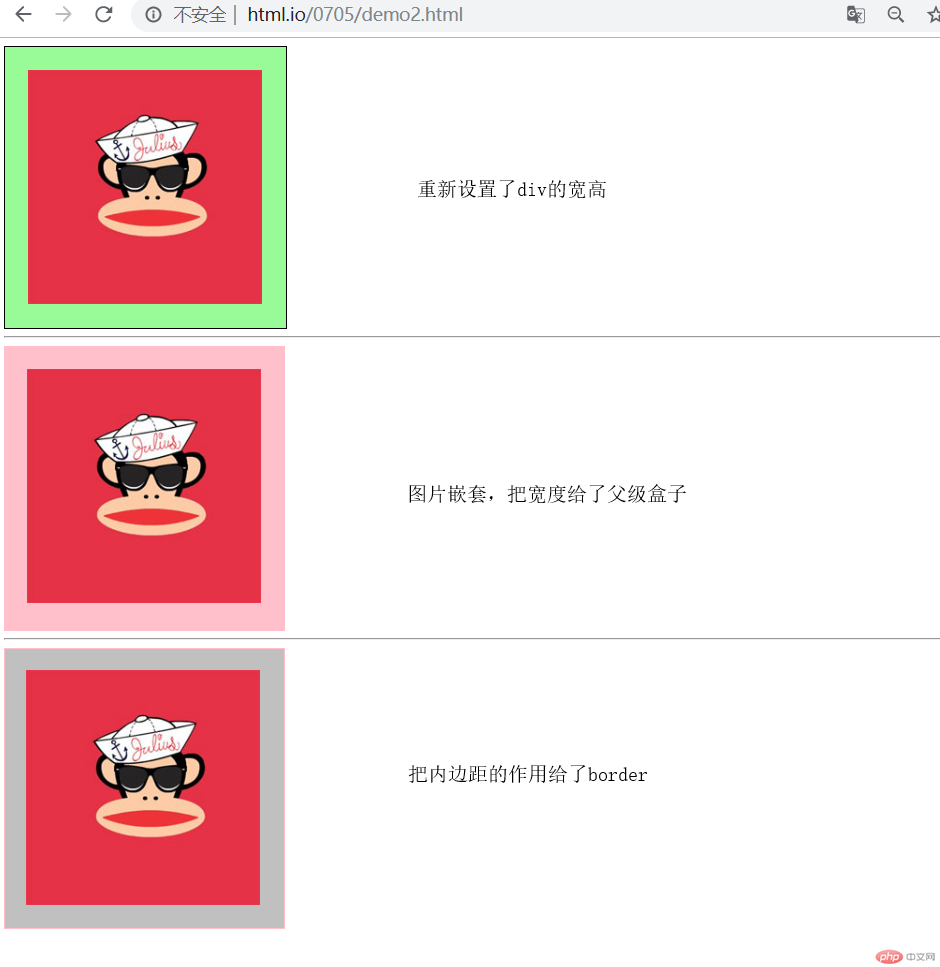
2. 写案例,并分析内边距对盒中内容的影响,以及解决的三种方案是什么?
<!DOCTYPE html>
<html lang="en">
<head>
    <meta charset="UTF-8">
    <title>内边距</title>
    <link rel="stylesheet" href="css/style2.css">
</head>
<body>
    <div class="box1">
            <img src="http://www.ghost64.com/qqtupian/qqTxImg/10/214c73bb82a421ac12538ff9c05bae6d.jpg" alt="大猩猩">
    </div>
    <hr>
    <div class="box3">
        <div class="box4">
            <img src="http://www.ghost64.com/qqtupian/qqTxImg/10/214c73bb82a421ac12538ff9c05bae6d.jpg" alt="大猩猩">
        </div>
    </div>
    <hr>
    <div class="box5">
        <img src="http://www.ghost64.com/qqtupian/qqTxImg/10/214c73bb82a421ac12538ff9c05bae6d.jpg" alt="大猩猩">
    </div>

</body>
</html>
点击 "运行实例" 按钮查看在线实例
.box1{
    width: 300px;
    height: 300px;
    background-color: palegreen;
    border: 1px solid #000000;
    padding: 25px;
}
.box1{
    width: 250px;
    height: 250px;
}
.box3 {
    width: 300px;
    background-color: pink;
}
.box4{
    padding: 25px;
}
.box5{
    width: 300px;
    height: 300px;
    background-color: silver;
    box-sizing: border-box;
    border: 1px solid pink;
    padding: 23px;
}点击 "运行实例" 按钮查看在线实例
3. 浮动的实现原理与清除的技巧
*{
    margin: 0;
    margin: 0;
}
/*左浮动*/
.box1{
    width: 100px;
    height: 100px;
    background-color: palegreen;
    float: left;
}
/*右浮动*/
.box2{
    width: 100px;
    height: 100px;
    background-color: gainsboro;
    float: right;
}
/*左浮动*/
.box3{
    width: 100px;
    height: 150px;
    background-color: darkgreen;
    float: left;
}
/*清除浮动*/
.box4{
    width: 100%;
    height: 30px;
    background-color: aqua;
    clear: both;
}点击 "运行实例" 按钮查看在线实例


图一和图二相比,图一是没有给蓝色的长条取消浮动,它就会受到浮动的影响按从左往右,从左往右的顺序排列,图二是清除浮动后,不受其他元素的影响正常按文档流排序
4.相对定位与绝对定位的区别与联系,并实例演示
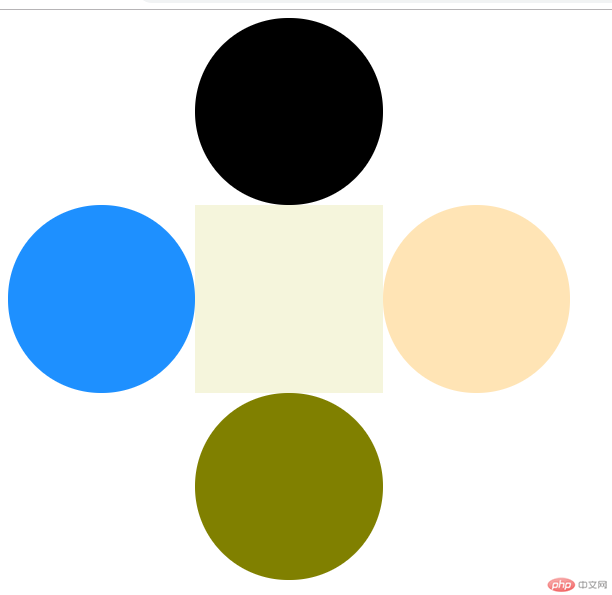
相对定位是相对于元素自身定位
.box1{
    width: 200px;
    height: 200px;
    background-color: black;
    position: relative;
    left: 200px;
    border-radius: 50%;
}
.box2{
    width: 200px;
    height: 200px;
    background-color: dodgerblue;
    position: relative;
    border-radius: 50%;
}
.box3{
    width: 200px;
    height: 200px;
    background-color: moccasin;
    position: relative;
    left: 400px;
    top:-200px;
    border-radius: 50%;
}
.box4{
    width: 200px;
    height: 200px;
    background-color: beige;
    position: relative;
    left: 200px;
    top: -400px;
}
.box5{
    width: 200px;
    height: 200px;
    background-color: olive;
    position: relative;
    left: 200px;
    top: -400px;
    border-radius: 50%;
}点击 "运行实例" 按钮查看在线实例
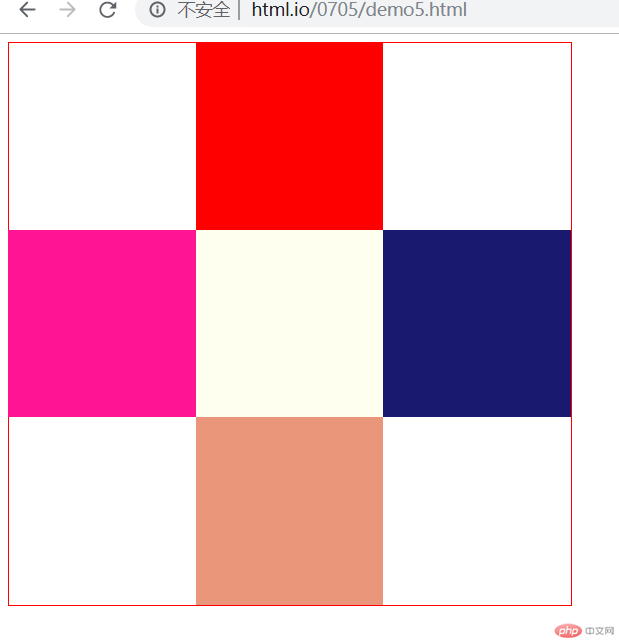
绝对定位是和相对定位配合使用的,首先给父级元素一个相对定位作参考物
.box{
    width: 600px;
    height: 600px;
    border: 1px solid red;
    position: relative;
}
.box6{
    width: 200px;
    height: 200px;
    background-color: red;
    position: absolute;
    left: 200px;
}
.box7 {
    width: 200px;
    height: 200px;
    background-color:deeppink;
    position: absolute;
    top: 200px;
}
.box8{
    width: 200px;
    height: 200px;
    background-color: ivory;
    position: absolute;
    left: 200px;
    top: 200px;
}
.box9{
    width: 200px;
    height: 200px;
    background-color: midnightblue;
    position: absolute;
    left: 400px;
    top: 200px;
}
.box0{
    width: 200px;
    height: 200px;
    background-color: darksalmon;
    position: absolute;
    left: 200px;
    top: 400px;

}点击 "运行实例" 按钮查看在线实例
5.绝对定位与遮罩
<!DOCTYPE html>
<html lang="en">
<head>
    <meta charset="UTF-8">
    <title>绝对定位与遮罩</title>
    <link rel="stylesheet" href="css/style6.css">
</head>
<body>
    <div class="box1">

    </div>
    <div class="box2">
        <img src="images/login.jpg" alt="">
    </div>
</body>
</html>
点击 "运行实例" 按钮查看在线实例
body{
    margin: 0;
    padding: 0;
    background-image: url(../images/php.jpg);
    background-size: cover;
}
.box1{
    position: absolute;
    width: 100%;
    height: 100%;
    background-color: black;
    opacity: 0.6;
}
.box2{
    background-color: white;
    position: absolute;
    top: 50%;
    left: 50%;
    margin-top: -230px;
    margin-left: -190px;
    background-repeat: repeat-x;
}
.box2 img{
    width: 380px;
    height: 460px;

}点击 "运行实例" 按钮查看在线实例

6.固定定位
<!DOCTYPE html>
<html lang="en">
<head>
    <meta charset="UTF-8">
    <title>固定定位广告框</title>
    <style>
        .box1{
            width: 300px;
            height: 300px;
            background-color: aqua;
            position: fixed;
            bottom: 0;
            right: 0;
        }
        .box p{
            float: left;
        }
        .box1 input{
            float: right;
            border: none;
            background: none;
            color: pink;
            margin-top: 10px;
            margin-right: 20px;
            font-size: 2rem;
        }
    </style>
</head>
<body>
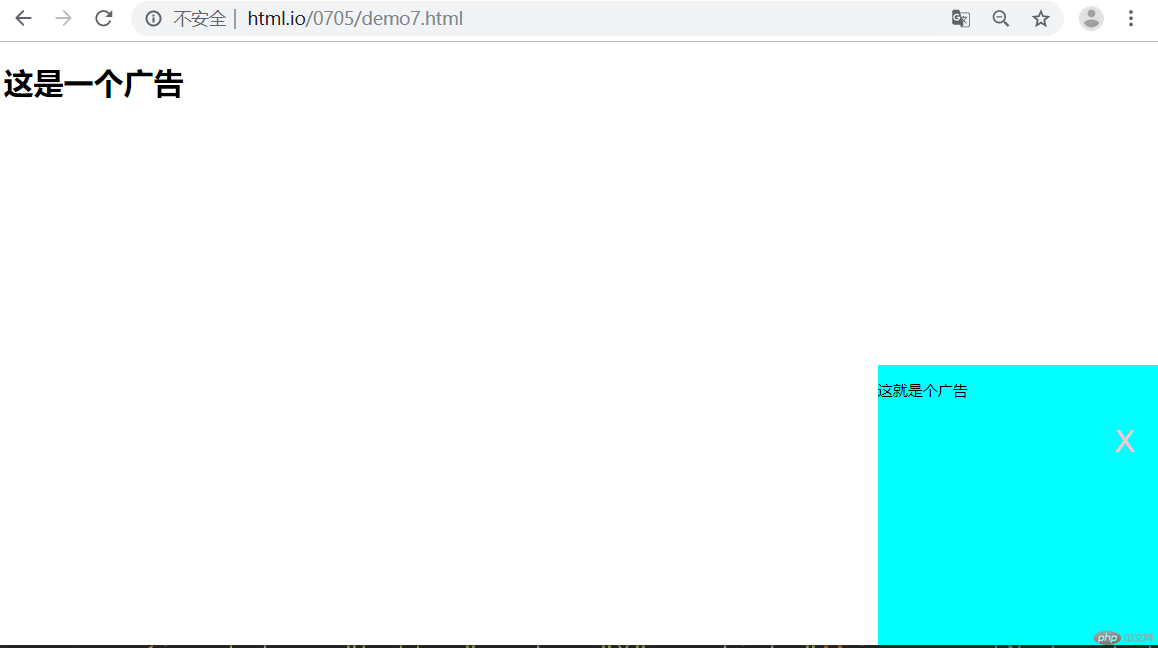
    <h1>这是一个广告</h1>
    <div class="box1">
        <p>这就是个广告</p>
        <input type="button" value="X" onclick="this.parentNode.style.display = 'none'">
    </div>
</body>
</html>点击 "运行实例" 按钮查看在线实例
