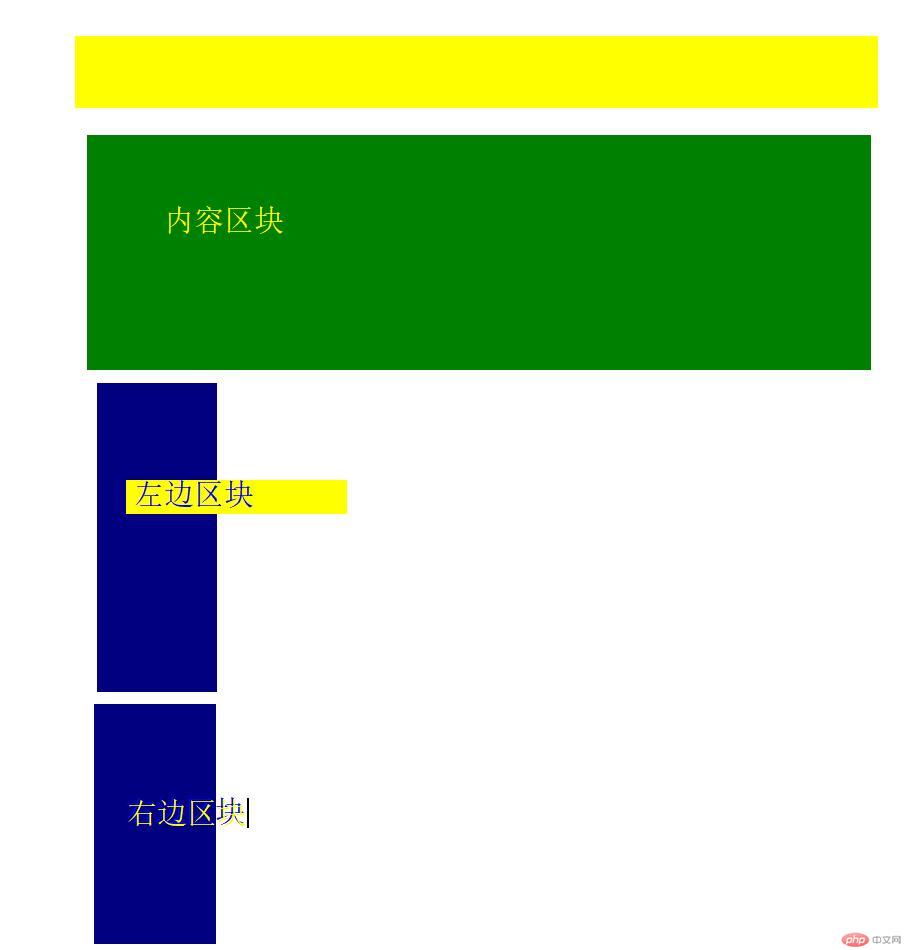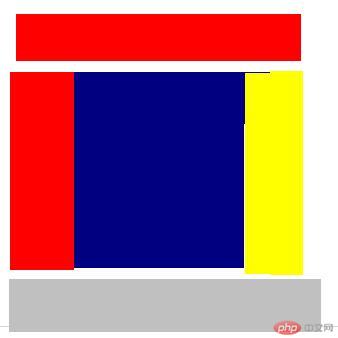


双飞燕布局 是主要针对内容部分的1-3列自由切换的布局方式,基本原理是 把内容整体分为三份, 左边部分 右边部分,和中间部分,先让中间部分 占据宽度的100% 然后把三个块元素全部浮动,.然后把左边块用margin 往回拉-100% 使左边块覆盖到最左边的位子.其次是把右边浮动块往回来浮动块对应的宽度(例如你设置200 就是拉回-200 margin:-200px,注意是像素不是百分比)


上图第一个图是 float 后 区块显示的位置. 第二个图是 把区块拉回后的显示位置.
下面是代码部分:
html部分:
<!DOCTYPE html>
<html lang="en">
<head>
<meta charset="UTF-8">
<link rel="stylesheet" href="static/css/style12.css">
<title>小网站</title>
</head>
<body>
<!--头部-->
<div class="header">
<div class="content">
<ul class="nav">
<li class="item"><a href="">首页</a></li>
<li class="item"><a href="">公司产品</a></li>
<li class="item"><a href="">公司新闻</a></li>
<li class="item"><a href="">关于我们</a></li>
<li class="item"><a href="">联系我们</a></li>
</ul>
</div>
</div>
<!--主体内容区-->
<div class="container">
<!--1.优先渲染主体区块-->
<div class="wrap">
<div class="main">内容区</div>
</div>
<!--2.渲染左侧区块-->
<div class="left">
</div>
<!--3.渲染右侧区块-->
<div class="right">
</div>
</div>
<!--底部-->
<div class="footer">
<div class="content">
<p>
<a href="">©PHP中文网版权所有</a> |
<a href="">0551-65358899</a> |
<a href="">皖牛逼克拉斯:8888888-1</a>
</p>
</div>
</div>
</body>
</html>
以下为 css部分----
.header{
background-color: darkorange;
}
/*头部和底部内容区*/
.header .content{
width: 1000px;
height: 60px;
background-color: black;
margin: 0 auto;
}
.header .content .nav{
margin: 0;
padding: 0;
}
.header .content .nav .item{
list-style: none;
}
.header .content .nav .item a{
float: left;
min-width: 80px;
min-height: 60px;
line-height: 60px;
color: white;
padding: 0 15px;
text-decoration: none;
}
.header .content .nav .item a:hover{
background-color: red;
font-size: 1.1rem;
}
/*一下是主图部分的代码-现在使用双飞翼布局*/
.container{
width: 1000px;
min-height: 1800px;
margin: 5px auto;
background-color: lightgray;
overflow: hidden;
}
.wrap{
width: inherit;
min-height: 800px;
background-color: aquamarine;
}
.left{
width: 200px;
height: 800px;
background-color: darkorange;
}
.right{
width: 200px;
height: 800px;
background-color: darkred;
}
/*全部浮动一起写*/
.wrap,.left,.right{
float: left;
}
.left{
margin-left: -100%;
}
.right{
margin-left: -200px;
}
.main{
margin: 0 200px;
}
/*以下是底部区域代码*/
.footer{
background-color: lightgray;
}
.footer .content{
width: 1000px;
height: 60px;
background-color: #444;
margin: 0 auto;
}
.footer .content p{
/*单行文本的水平居中*/
text-align: center;
line-height: 60px;
}
.footer .content p a{
color: gray;
text-decoration: none;
}
.footer .content p a:hover{
color: #fff;
}