

HTML集合转换成数组对象
1.获取HTML集合 然后 转换成数组 用Array.prototype.slice.call();
ES6 转换数组则用 Array.from()
<!DOCTYPE html>
<html lang="en">
<head>
    <meta charset="UTF-8">
    <title>数组的知识</title>

</head>
<body>

<ul>
    <li>item1</li>
    <li>item2</li>
    <li>item3</li>
    <li>item4</li>
    <li>item5</li>
</ul>
<script>

    //将HTML集合转成真正的数组
    var lis = document.getElementsByTagName('li');
    console.log(lis);
    var arr = Array.prototype.slice.call(lis);
    console.log(arr);
    var arr1 = Array.from(lis);
    console.log(arr1);


</script>
</body>
</html>点击 "运行实例" 按钮查看在线实例
关于slice()与splice()知识点
1.slice()从数组中取出部分数据, 返回取的数据组成的新数组
<!DOCTYPE html>
<html lang="en">
<head>
    <meta charset="UTF-8">
    <title>数组的知识</title>

</head>
<body>

<script>

    var Arr1 = ['华为','三星','苹果','锤子','小米'];
    console.log(Arr1);
    var Arr2 = Arr1.slice(1,2);     //第一个值为起始索引,第二个值为终止索引,返回值不包括终止索引的值;
    console.log(Arr2);

</script>
</body>
</html>
点击 "运行实例" 按钮查看在线实例
2. splice(): 多用于数组的增删改查数据
<!DOCTYPE html>
<html lang="en">
<head>
    <meta charset="UTF-8">
    <title>数组的知识</title>

</head>
<body>

<script>

   var Arr1 = ['华为','三星','苹果','锤子','小米'];
    console.log(Arr1);

    // 2. splice(): 主要用来删除数组中指定的元素, 始终返回被删除的元素
    //删除数组中的指定元素
    var Arr3 = Arr1.splice(0,2);    //第一个值为起始索引,第二值为删除数量
    console.log(Arr3); //展示的删除的数据
    console.log(Arr1);//展示删除后的数据
    //插入数据
    var Arr4 = Arr1.splice(2,0,'魅族','OPPO'); // 第一个值为起始索引,则为要插入当前位置,第二个为0,之后为插入的新数据
    console.log(Arr1);
    //更新数据
    var Arr5 = Arr1.splice(1,1,'vivo'); //第二个值为删除数量,第一个值为起始索引,则为要插入当前位置,之后为插入的新数据
    console.log(Arr1);

</script>
</body>
</html>
点击 "运行实例" 按钮查看在线实例
3.自定义属性
<!DOCTYPE html>
<html lang="en">
<head>
    <meta charset="UTF-8">
    <title>数组的知识</title>

</head>
<body>
<h3 class="red black white" data-brand="华为">演示</h3>
<script>
var h3 = document.getElementsByTagName('h3').item(0);
    console.log(h3);

    // 获取原生属性,将元素看成对象,标签的属性看成该元素对象的属性,直接用点语法访问
    console.log( h3.id );
    // 获取自定义属性
    console.log( h3.getAttribute('data-brand') );
    //getAttribute() 可以获取原生属性
    // 原生属性,自定义属性,支持写操作
    //第一种修改属性方法
//    h3.className = 'hide';
    console.log( h3.className );
    //第二种修改属性方法
    h3.dataset.brand = '3590';
    console.log( h3.dataset.brand );
    //第三种修改属性方法
    h3.setAttribute('data-brand', 'P30 Pro');
    console.log( h3.getAttribute('data-brand') );

</script>
</body>
</html>点击 "运行实例" 按钮查看在线实例
4.classList对象
//classList对象
    //获取class样式
    console.log(h3.className);  //传统方法
    console.log(h3.classList.value); //对象方式

    //添加class样式
    h3.classList.add('woshi1');
    console.log(h3.classList.value);

    //更新class样式
    h3.classList.replace('woshi1','woshi2');
    console.log(h3.classList.value);

    //获取某一个class样式
    console.log(h3.classList.item(0));

    //删除一个或多个样式
    h3.classList.remove('woshi2','red');
    console.log(h3.classList.value);

    //自动切换,有则删除,无则添加
    h3.addEventListener('click',function () {
        h3.classList.toggle('red');
})点击 "运行实例" 按钮查看在线实例
5.定时器与事件模拟器
1.定时执行 一次性定时器 setTimeout() 清除用clearTimeout()
2.间歇式定时器 重复执行 setInterval() 清除用clearInterval()
3.事件模拟器的原理 生成一个点击事件 var click = new Event('click');
点击事件分配给 当前节点.dispatchEvent(click);
<!DOCTYPE html>
<html lang="en">
<head>
    <meta charset="UTF-8">
    <title>定时器与时间模拟器</title>
</head>
<body>
    <h3>setTimeout()一次性定时器案例</h3>
    <button>登陆</button>
    <button>取消</button>
    <p></p>
    <hr>
    <p>点击我3秒后给你弹个框</p> <button>弹个框</button>
    <p>点击我取消执行任务</p> <button>取消</button>
    <hr>
    <h3>setInterval() 间歇式定时器 重复使用案例</h3>
    <p>北京时间</p>
    <input type="text" class="clock" id="clock" style="width: 500px;">
    <button>停止</button>
    <hr>
    <h3>事件模拟器案例</h3>
    <div style="width: 200px;height: 200px;background-color: #3377aa">
        点击我
    </div>
    <p id="price"></p>
    <script>
        //setTimeout() 只执行一次, 清除用clearTimeout
        //setInterval() 每间隔指定的时间, 就执行一次, 清除用clearInterval
        var btn1 = document.getElementsByTagName('button').item(0);
        var btn2 = document.getElementsByTagName('button').item(1);
        var tips = document.getElementsByTagName('p').item(0);
        var timer = null;
        //setTimeout() 延迟多少秒执行,一次性定时器
        btn1.addEventListener('click',login,false);
        function login() {
            tips.innerText = '正在登陆中';
            timer = setTimeout(function () {
                location.assign('http://www.baidu.com');
            },3000);
        }
        //取消跳转,清除定时器
        btn2.addEventListener('click',function (ev) {
            clearTimeout(timer);
            tips.innerText = null ;
//            console.log(timer);
        })

//        弹个框小案例
        var btn3 = document.getElementsByTagName('button').item(2);
        var btn4 = document.getElementsByTagName('button').item(3);
        btn3.addEventListener('click',function () {
            timer = setTimeout(
                function () {
                    alert('我给你弹了个框');
                },3000
            )
        });
        btn4.addEventListener('click',function () {
            clearTimeout(timer);
        })

//        setInterval() 间歇式定时器 重复执行

            var clock = document.getElementsByClassName('clock').item(0);
            var timer = setInterval(function () {
               var time = new Date();
               clock.value = time ;
            },50)
            var btn5 = document.getElementsByTagName('button').item(4);
            btn5.addEventListener('click',function () {
                clearInterval(timer);
            })
//        事件模拟器
            var div = document.getElementsByTagName('div').item(0);
            var pr = document.getElementById('price');
            var num = 0 ;
            var price = 0.5;
            var click = new Event('click');
            setInterval(function () {
                div.dispatchEvent(click);
                num +=1;
                pr.innerHTML = '广告收入' + (num*price) +'元';
            },2000)
    </script>
</body>
</html>点击 "运行实例" 按钮查看在线实例
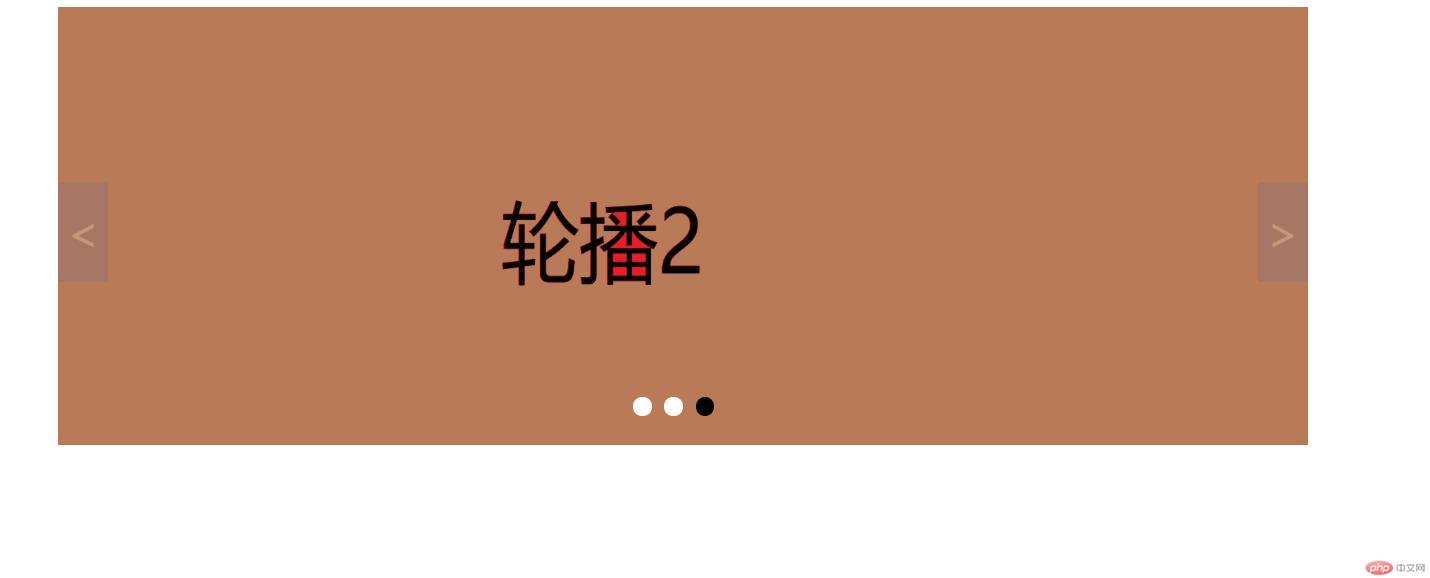
6.轮播图的实行原理
一、先设置小圆点,让小圆点数量与图片数量同步,并 一 一对应,DOM结构中小圆点可以注释掉;
步骤为:
1.先拿取图片 用document.images;
2.将所有图片集合转换为数组 用Array.prototype.slice.call(img,0);
3.获取小圆点的父节点,createElement在内存上添加子节点,用数组forEach按照图片数量添加span小圆点,根据if判断索引,当index为0时,第一个小圆点添加active class属性
4.让span的自定义属性data-index与img的自定义属性data-index同步,可用 span.classList.index = img.classList.index
利用父节点的appendChild()给页面打印上标签;
二、给小圆点设置点击事件,切换图片(setImgActive)
步骤为:
1.小圆点为被点击的对象,利用data-index中对应关系,当图片的data-index与点击的小圆点data-index全等时,删除所有图片的激活样式,再给当前图片激活样式,利用封装设置小圆点的高亮样式 setPointActive(img.dataset.index);
三、翻页跳转按钮
获取翻页跳转按钮然后添加监听事件,然后获取当前的显示图片,用img.classList.contains('active'),再用if判断点击的是显示前一个图片还是后一个图片,ev.target.classList.contains('prev'或者'next'),然后删除当前节点的active,或者上一张图片previousElementSibling/下一张图片nextElementSibling
判断是否不存在前一个或后一个兄弟节点,用if(currentImg !== null && currentImg.nodename === 'IMG')获取最后一个节点图片currentImg = imgArr[imgArr.length-1]; 获取第一个节点图片currentImg = imgArr[0];
然后获取当前显示图片的data-index 设置小圆点高亮setPointActive()
先清除所有的小圆点高亮,在判断dataset.index是否全等于 当前的图片的dataest.index 是的话,添加激活样式
四、自动切换图片用定时器切换,用事件模拟器完成
设置鼠标移出/移入的监听事件,用setInterval
生成一个自定义的点击事件对象 如 var clickEvent = new Event('click');
将点击事件分配给按钮 如skip.item(0).dispatchEvent(clickEvent);移入则清除定时器
<!DOCTYPE html>
<html lang="en">
<head>
    <meta charset="UTF-8">
    <title>轮播图实战</title>
    <style>
        .box{
            position: relative;
            width:1000px;
            height: 350px;
            margin: 0 auto;
        }
        .box .slider {
            width: 1000px;
            height: 350px;

            display: none;
        }
        .box .slider.active{
            display: block;
        }
         .box .point-list{
            position: absolute;
            left: 50%;
             margin-left: -45px;
             top:310px;

        }
        .box .point-list .point{
            display: inline-block;
            width:15px;
            height: 15px;
            margin: 0 5px;
            background-color: white;
            border-radius: 100%;
        }
        .box .point-list .point.active{
            background-color: black;
        }
        .box .point-list .point:hover {
            cursor: pointer;
        }

        .box .skip{
            position: absolute;
            display: inline-block;
            top:140px;
            width:40px;
            height:80px;
            text-align: center;
            line-height: 80px;
            background-color: #666699;
            color: white;
            opacity: 0.2;
            font-size:36px;
        }
        .box .skip.prev{
            left:0;
        }
        .box .skip.next{
            right:0;
        }
        .box .skip:hover {
            cursor: pointer;
            color: black;
            opacity: 0.5;
        }
    </style>
</head>
<body>
    <div class="box">
        <img src="static/images/banner1.jpg" alt="" data-index="1" class="slider active">
        <img src="static/images/banner2.jpg" alt="" data-index="2" class="slider ">
        <img src="static/images/banner3.jpg" alt="" data-index="3" class="slider ">
        <div class="point-list">
            <!--<span class="point active" data-index="1"></span>-->
            <!--<span class="point " data-index="2"></span>-->
            <!--<span class="point " data-index="3"></span>-->
        </div>
        <span class="skip prev"><</span>
        <span class="skip next">></span>
    </div>
    <script>
        var img = document.images;
        console.log(img);
        var imgArr = Array.prototype.slice.call(img, 0);
        console.log(imgArr);
        var pointlist = document.getElementsByClassName('point-list').item(0);

        imgArr.forEach(function (img,index) {
            var span = document.createElement('span');
            if(index === 0 ){
                span.classList.add('point','active')
            }
            span.classList.add('point');
            span.dataset.index = img.dataset.index;
            pointlist.appendChild(span);
        })

        var points = document.getElementsByClassName('point');
        var pointsArr = Array.prototype.slice.call(points,0);
        console.log(pointsArr);

        pointsArr.forEach(function (point) {
            point.addEventListener('click',setImgActive,false);
        });

        function setImgActive(ev) {
            imgArr.forEach(function (img) {
                if (img.dataset.index === ev.target.dataset.index){
                    imgArr.forEach(function (img) {
                        img.classList.remove('active');

                    });
                    img.classList.add('active');
                    setPointActive(img.dataset.index);
                }
            });
        }
        var skip = document.getElementsByClassName('skip');

        skip.item(0).addEventListener('click',skipImg,false);
        skip.item(1).addEventListener('click',skipImg,false);

        function skipImg(ev) {
            var currentImg = null;
            imgArr.forEach(
                function (img) {
                    if (img.classList.contains('active')){
                        currentImg = img ;
                    }
                }
            );

            if (ev.target.classList.contains('prev')){
                currentImg.classList.remove('active');
                currentImg = currentImg.previousElementSibling;
                if (currentImg !== null && currentImg.nodeName === 'IMG'){
                    currentImg.classList.add('active');
                }else{
                    currentImg = imgArr[imgArr.length-1];
                    currentImg.classList.add('active');
                }

            }
            if (ev.target.classList.contains('next')){
                currentImg.classList.remove('active');
                currentImg = currentImg.nextElementSibling;

                if (currentImg !== null && currentImg.nodeName === 'IMG') {
                    // 高亮前一个兄弟节点图片
                    currentImg.classList.add('active');
                } else {
                    // 如果不存在前一个兄弟节点,则显示最后一个,以此来循环显示
                    // 高亮第一个兄弟节点图片, 索引为0
                    currentImg = imgArr[0];
                    currentImg.classList.add('active');
                }
            }
            var imgIndex = currentImg.dataset.index;
            setPointActive(imgIndex);
        }
        function setPointActive(imgIndex) {
            pointsArr.forEach(function (point) {
                point.classList.remove('active')
            });
            pointsArr.forEach(function (point) {
                if(point.dataset.index === imgIndex)
                    point.classList.add('active');
            });
        }

        var box = document.getElementsByClassName('box').item(0);
        var timer = null;
        box.addEventListener('mouseout',startTimer,false);
        box.addEventListener('mouseover',clearTimer,false);

        function startTimer() {
            var clickevent = new Event('click');
            timer = setInterval(function () {
                skip.item(1).dispatchEvent(clickevent);
            },3000);
        }
        function clearTimer() {
            clearInterval(timer);
        }
    </script>
</body>
</html>点击 "运行实例" 按钮查看在线实例
效果图:
