Correction status:qualified
Teacher's comments:一个小小的轮播图, 代码量可能超出了你的预料吧, 其实这还是一些基本的功能, 这个轮播图案例, 是不少公司的必备和经典的面试题


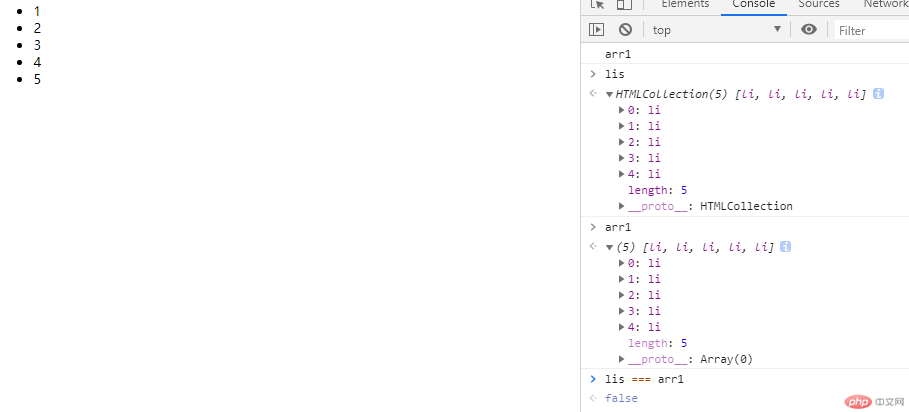
将文档集合转换为数组:利用Array.prototype.slice()将html集合转换为数组。
<!DOCTYPE html>
<html lang="en">
<head>
    <meta charset="UTF-8">
    <title>Title</title>
</head>
<body>
<ul>
    <li>1</li>
    <li>2</li>
    <li>3</li>
    <li>4</li>
    <li>5</li>
</ul>


<script>
    var  lis = document.getElementsByTagName('li');
    var arr1 = Array.prototype.slice.call(lis,0);
    console.log('arr1');

</script>
</body>
</html>点击 "运行实例" 按钮查看在线实例
运行结果如图所示:

2.定时器:一次性的 setTimeout(函数 多久时间后单位毫秒);
间歇式可多次重复的:setInterval()
清除定时器cleantimeout()
<!DOCTYPE html>
<html lang="en">
<head>
    <meta charset="UTF-8">
    <title>定时器与事件模拟器</title>
</head>
<body>
<button>登录</button>
<button>取消登录</button>
<p></p>
<hr>
<button>播放</button>
<button>停止</button>
<hr>
<img src="images/banner1.jpg" alt="" width="500">

<hr>

<div style="width: 200px;height: 150px;background-color: lightgreen">我是广告</div>
<p id="res"></p>

<script>

    var btn1 = document.getElementsByTagName('button').item(0);
    var btn2 = document.getElementsByTagName('button').item(1);
    var tips = document.getElementsByTagName('p').item(0);
    var timer = null;

    btn1.addEventListener('click', login, false);
    function login() {
        tips.innerText = '正在跳转中...';

        timer = setTimeout(function () {
            location.assign('http://www.php.cn');
        }, 3000);
        console.log(timer);
    }

    btn2.addEventListener('click',function (ev) {
        clearTimeout(timer);
        tips.innerText = '';
        console.log(timer);
    });


    var btn3 = document.getElementsByTagName('button').item(2);
    var btn4 = document.getElementsByTagName('button').item(3);
    var img = document.images.item(0);


    btn3.addEventListener('click', play, false);

    function play() {
        timer = setInterval(function () {
            var index = Math.ceil(Math.random()*3);
            img.src = 'images/banner' + index.toString() + '.jpg';
            console.log(img.src);
        }, 1000);
    }

    btn4.addEventListener('click', function (ev) {
        clearInterval(timer);
    },false);
    var div = document.getElementsByTagName('div').item(0);
    var res = document.getElementById('res');
    var num = 0;
    var price = 0.5;

    var click = new Event('click');
    setInterval(function () {
        div.dispatchEvent(click);
        num += 1;
        console.log(num);
        // 输出收入提示信息
        res.innerHTML = '广告收入: '+ '<span style="color:red">'+(num * price).toString()+'</span>' + '元';
    }, 2000);


</script>
</body>
</html>点击 "运行实例" 按钮查看在线实例
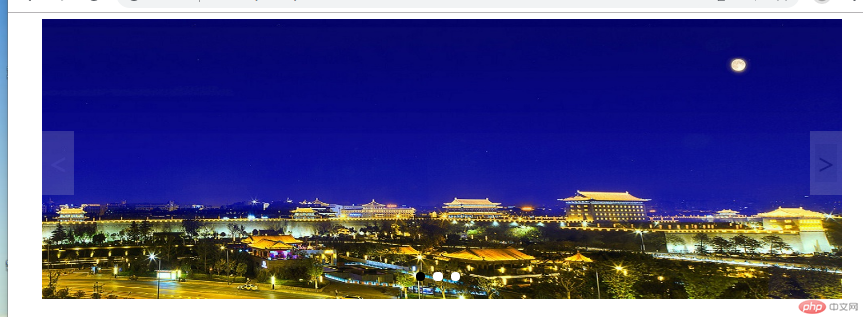
3.轮播图的设计思路:
(1)设计轮播图的主题框架;
(2)用JavaScript添加具体细节。1.设置小圆点的数量与样式,让小圆点与图片一一对应,并且实现每添加一张照片,自动添加一个与之对应的小圆点,利用dataset相等使照片与小圆点对应。2.为小圆点添加点击事件,点击小圆点切换照片,(点击下一个小圆点时,删除当前照片的激活状态设置点击照片为激活状态,并且显示那张照片,与之对应小圆点高亮);3.翻页设置:为翻页按钮添加事件,判断点击的是显示前一张图片,显示前一个兄弟元素节点,高亮前一个兄弟节点图片。如果不存在前一个兄弟节点,则显示最后一个,以此来循环显示,高亮最后一个兄弟节点图片;反之如果点击的是后一张图片,步骤相同。4.设置定时器: 每隔3秒自动切换,可以利用鼠标移入与移出事件来启动/关闭定时器。
<!DOCTYPE html>
<html lang="en">
<head>
    <meta charset="UTF-8">
    <title>轮播图</title>
    <style>
        ul,li {
            margin: 0;
            padding: 0;
            list-style: none;
        }
        .box {
            /*定位父级*/
            position: relative;
            width: 1000px;
            height: 350px;
            margin: 0 auto;
        }

        .box .slider {
            width: 1000px;
            height: 350px;
            display: none;
        }

        .box .slider.active{
            display: block;
        }

        .box .point-list {
            position: absolute;
            /*绝对定位的环境下的水平居中方式*/
            left: 50%;
            margin-left: -38px;
            top: 310px;
        }


        .box .point-list .point {
            display: inline-block;
            width: 12px;
            height: 12px;
            margin: 0 5px;
            background-color: white;
            border-radius: 100%;
        }

        .box .point-list .point.active {
            background-color: black;
        }

        .box .point-list .point:hover {
            cursor: pointer;
        }


        .skip {
            position: absolute;
            top: 140px;
            display: inline-block;
            width: 40px;
            height: 80px;
            text-align: center;
            line-height: 80px;
            background-color: lightgray;
            color: white;
            opacity: 0.2;
            font-size: 36px;
        }
        .box .prev{
            left: 0;
        }

        .box .next{
            right: 0;
        }

        .box .skip:hover {
            cursor: pointer;
            opacity: 0.5;
            color: black;
        }
    </style>
</head>
<body>
<div class="box">
    <img src="images/x1.jpg" alt="" data-index = "1" class="slider active" >
    <img src="images/x2.jpg" alt="" data-index = "2" class="slider " >
    <img src="images/x3.jpg" alt="" data-index = "3" class="slider " >
<div class="point-list">
    <!--<span class="point active" data-index = "1"></span>-->
    <!--<span class="point " data-index = "2"></span>-->
    <!--<span class="point " data-index = "3"></span>-->

</div>
    <span class="skip prev"><</span>
    <span class="skip next">></span>
</div>
<script>
    var imgs = document.images;
    var imgArr =Array.prototype.slice.call(imgs,0);
    var pointList = document.getElementsByClassName('point-list').item(0);
    imgArr.forEach(function (img, index){
        var span = document.createElement('span');

        if (index === 0) {
            span.classList.add('point','active')
        }
        span.classList.add('point');

        span.dataset.index = img.dataset.index;
        pointList.appendChild(span);
    });
    var points =document.getElementsByClassName('points');
    var pointArr = Array.prototype.slice.call(points,0);

    pointArr.forEach(function (point) {
        point.addEventListener('click',setImgActive,false);
    });
    function setImgActive(ev) {
        imgArr.forEach(function (img) {
            if(img.dataset.index === ev.target.dataset.index){
                imgArr.forEach(function (img) {img.classList.remove('active')});
                img.classList.add('active');
                setPointActive(img.dataset.index);
            }
        })
    }
    var skip = document.getElementsByClassName('skip');
    skip.item(0).addEventListener('click',skipImg,false);
    skip.item(1).addEventListener('click',skipImg,false);
    function skipImg(ev) {
        var currentImg = null;
        imgArr.forEach(function (img) {
            if (img.classList.contains('active'))
            currentImg = img;
        }
        )}
        if(ev.target.classList.contains('prev')){
            currentImg.classList.remove('active');
            currentImg = currentImg.previousElementSibling;
            if (currentImg!==null && currentImg.nodeName==='IMG'){
            currentImg.classList.add('active');
            }else{
                currentImg = imgArr[imgArr.length-1];
                currentImg.classList.add('active');
            }
            if (ev.target.classList.contains('next')){
                currentImg.classList.remove('active');
                currentImg =currentImg.nextElementSibling;
                if (currentImg!== null&& currentImg.nodeName==='IMG'){
                    currentImg.classList.add('active');
                } else{
                    currentImg = imgArr[0];
                    currentImg.classList.add('active');
                }
            }
             var imgIndex = currentImg.dataset.index;
             setPointActive(imgIndex);
        }
    function setPointActive(imgIndex) {
        pointArr.forEach(function (point) { point.classList.remove('active') });
        pointArr.forEach(function (point) {
            if (point.dataset.index === imgIndex)
                point.classList.add('active');
        });
    }
    var  box = document.getElementsByClassName('box').item(0);
        var timer = null;
box.addEventListener('mouseout',startTimer,false);
box.addEventListener('mouseover',clearTimer,false);
function startTimer() {
    var clickEvent = new Event('click');
    timer =setInterval(function () {
        skip.ritem(1).dispatchEvent(clickEvent);
    },3000);

}
      function  clearTimer() {
          clearInterval(timer);
      }


</script>
</body>
</html>点击 "运行实例" 按钮查看在线实例
