

yum -y install subversion 通过yum命令安装svnserve
mkdir /var/svnphp 选择在var路径下创建版本库
svnadmin create /var/svnphp(库)/blog(项目名)
cd /var/svnphp/blog/conf authz(负责账号权限的管理,控制账号是否读写权限) passwd(负责账号和密码的用户名单管理) svnserve.conf(svn服务器配置文件)
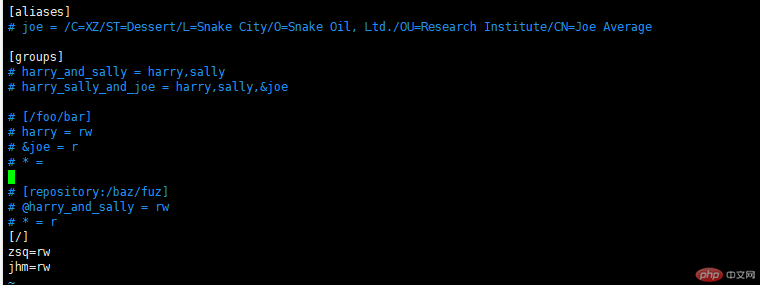
编辑 authz 文件(注意:[/]也是必须的)

编辑 passwd 文件
![1565139691651799.png MVZY631S@}@ZF)]EICVX6]8.png](https://img.php.cn/upload/image/555/342/631/1565139691651799.png)
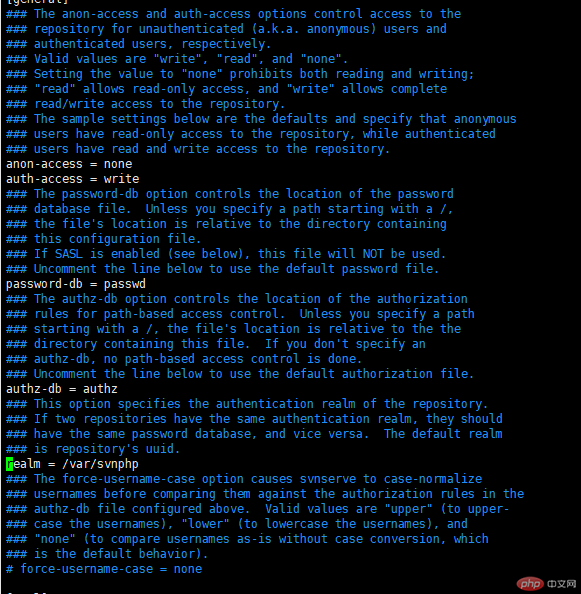
编辑 svnserve.conf 文件

anon-access = none:表示禁止匿名用户访问。
auth-access = write:表示授权用户拥有读写权限。
password-db = passswd:指定用户名口令文件,即 passwd 文件。
authz-db = authz:指定权限配置文件,即 authz 文件。
realm = /var/svnphp:指定认证域,即 /var/svnphp目录。
多数情况下服务器安装完成,配置完成后,无法连接svn服务器,均是防火墙问题【注意:如果是阿里云,腾讯云的服务器,还需在安全组添加端口开启规则】
vim /etc/sysconfig/iptables
-A INPUT -p tcp -m state --state NEW -m tcp --dport 3690 -j ACCEPT 添加配置信息
systemctl restart iptables.service 重启防火墙使配置生效
svnserve -d -r /var/svnrepos 启动svn服务器
ps -ef | grep 'svnserve' 启动成功后,可用ps -aux查看服务启动是否成功
svn co svn://ip地址:3690/xxxx linux服务器输入命令测试: