


1.实例演示相邻选择器与兄弟选择器,并分析异同
#id + * {} 是相邻选择器, 指当前元素后面紧挨着的相邻元素会被选中.
#id ~ * {} 是兄弟选择器,指当前元素后面所有的元素会被选中.
实现效果如下:

实现代码如下:
<style>
        div {
            width: 40px;
            height: 40px;
            background-color: red;
            border: 1px dashed black;
            display: inline-block;
            text-align: center;
            line-height: 40px;
            margin: 20px 4px;
            /* 设置DIV的外边距 */
        }

        ul {
            margin: 0;
            padding-left: 0;
            /* 取消左侧圆点 */
            border: 0px dashed red;
            /* 边框为虚线,红色,1个像素 */
        }

        ul li {
            list-style-type: none;
            width: 50px;
            height: 50px;
            background-color: wheat;
            text-align: center;
            line-height: 50px;
            /* 水平和垂直的居中 */
            border-radius: 50%;
            display: inline-block;
            /* 将一个块级元素转为内联元素 */
            box-shadow: 2px 2px 1px #888;
        }
        /* 相邻选择器 */

        #bg-blue+* {
            background-color: yellow;
        }
        /* 兄弟选择器 */

        #green~* {
            background-color: green;
        }
    </style>
</head>

<body>
    <ul>
        <li>1</li>
        <li id=bg-blue>2</li>
        <li>3</li>
        <li>4</li>
        <li>5</li>
        <li>6</li>
    </ul>
    <div>1</div>
    <div id="green">2</div>
    <div>3</div>
    <div>4</div>
    <div>5</div>
    <div>6</div>

</body>点击 "运行实例" 按钮查看在线实例
2.实例演示:nth-child() 和 :nth-of-type()选择器,并分析异同
伪类: 子元素选择器:nth-child(n) 选择器匹配属于其父元素的第 N 个子元素,不论元素的类型。n 可以是数字、关键词或公式。
实现效果如下:
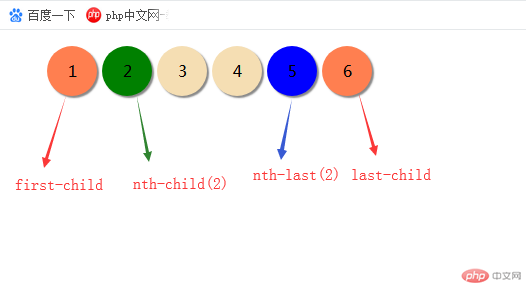
伪类: 类型选择器,:nth-of-type(n) 选择器匹配属于父元素的特定类型的第 N 个子元素的每个元素.n 可以是数字、关键词或公式。
实现效果如下:
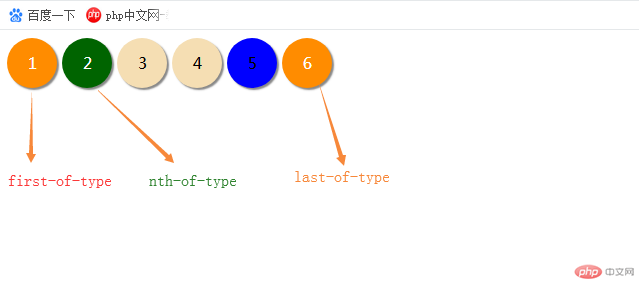
实现代码如下:
<style>
            ul {
            margin: 0;
            padding-left: 0;
            /* 取消左侧圆点 */
            border: 0px dashed red;
            /* 边框为虚线,红色,1个像素 */
        }

        ul li {
            list-style-type: none;
            width: 50px;
            height: 50px;
            background-color: wheat;
            text-align: center;
            line-height: 50px;
            /* 水平和垂直的居中 */
            border-radius: 50%;
            display: inline-block;
            /* 将一个块级元素转为内联元素 */
            box-shadow: 2px 2px 1px #888;
        }
        /* 伪类:子元素选择器  */

        ul :first-child {
            background-color: coral;
        }
        /* 选择第一个元素 */

        ul :last-child {
            background-color: coral;
        }
        /* 选择最后一个元素 */

        ul :nth-child(2) {
            background-color: green;
        }
        /* 选择第二个元素 */

        ul :nth-last-child(2) {
            background-color: blue;
        }
        /* 选择倒数第二个元素 */

        ul li:first-of-type {
            background-color: darkorange;
            color: white;
        }

        ul li:last-of-type {
            background-color: darkorange;
            color: white;
        }

        ul li:nth-of-type(2) {
            background-color: darkgreen;
            color: white;
    </style>
</head>

<body>
    <ul>
        <li>1</li>
        <li id=bg-blue>2</li>
        <li>3</li>
        <li>4</li>
        <li>5</li>
        <li>6</li>
    </ul>
</body>点击 "运行实例" 按钮查看在线实例
3. 实例演示:padding 对盒子大小的影响与解决方案, 使用宽度分离或box-sizing将图片显示在容器中间,演示内边距对盒子大小的影响与解决方案(使用宽度分离或box-sizing)
实现效果如下:
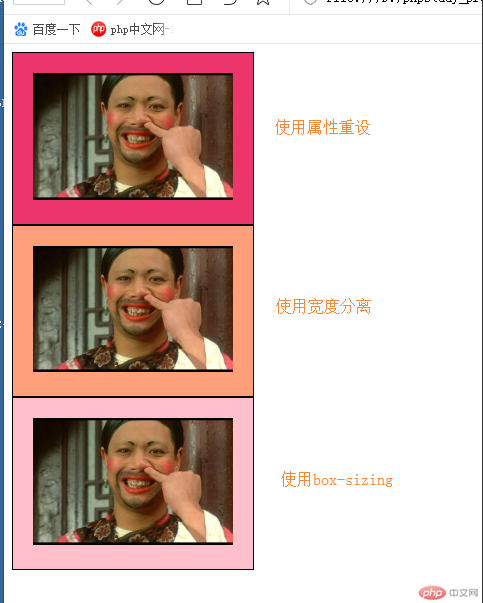
实现代码如下:
<style>
        .box1 {
            width: 240px;
            border: 1px solid black;
            background-color: rgb(235, 53, 108);
        }

        .box1 {
            padding: 20px;
            width: 200px;
        }
        /* 使用宽度分离 */

        .wrap {
            width: 242px;
        }

        .box2 {
            padding: 20px;
            background-color: lightsalmon;
            border: 1px solid black;
        }
        /* box-sizing */

        .box3 {
            width: 242px;
            box-sizing: border-box;
            padding: 20px;
            background-color: pink;
            border: 1px solid black;
        }
    </style>
</head>

<body>
    <!-- 将图片显示在容器中间,演示内边距对盒子大小的影响与解决方案(使用宽度分离或box-sizing) -->
    <div class="box1">
        <img src="https://timgsa.baidu.com/timg?image&quality=80&size=b9999_10000&sec=1567562883900&di=df325af2d0000f36c7d42a6cf9792408&imgtype=0&src=http%3A%2F

%2Fi.shangc.net%2F2017%2F0627%2F20170627125731351.jpg" alt="如花" width="200">
    </div>
    <div class="wrap">
        <div class="box2">
            <img src="https://timgsa.baidu.com/timg?image&quality=80&size=b9999_10000&sec=1567562883900&di=df325af2d0000f36c7d42a6cf9792408&imgtype=0&src=http%3A

%2F%2Fi.shangc.net%2F2017%2F0627%2F20170627125731351.jpg" alt="如花" width="200">
        </div>
    </div>
    <div class="box3">
        <img src="https://timgsa.baidu.com/timg?image&quality=80&size=b9999_10000&sec=1567562883900&di=df325af2d0000f36c7d42a6cf9792408&imgtype=0&src=http%3A%2F

%2Fi.shangc.net%2F2017%2F0627%2F20170627125731351.jpg" alt="如花" width="200">
</div>点击 "运行实例" 按钮查看在线实例
4. 实例演示: margin中的同级塌陷, 嵌套传递与自动挤压, 并提出解决方案或应用场景
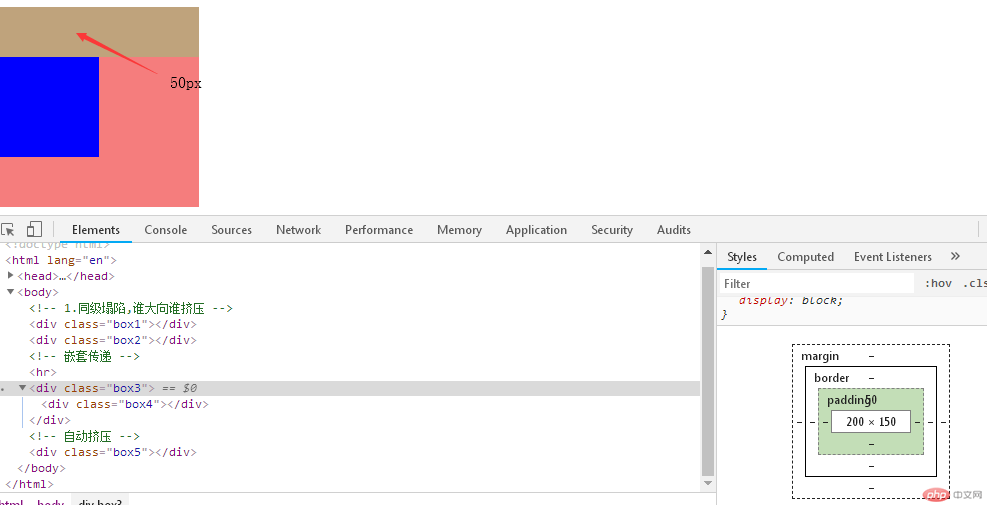
(1)盒子外边框同级塌陷效果 :同级塌陷,谁大向谁挤压
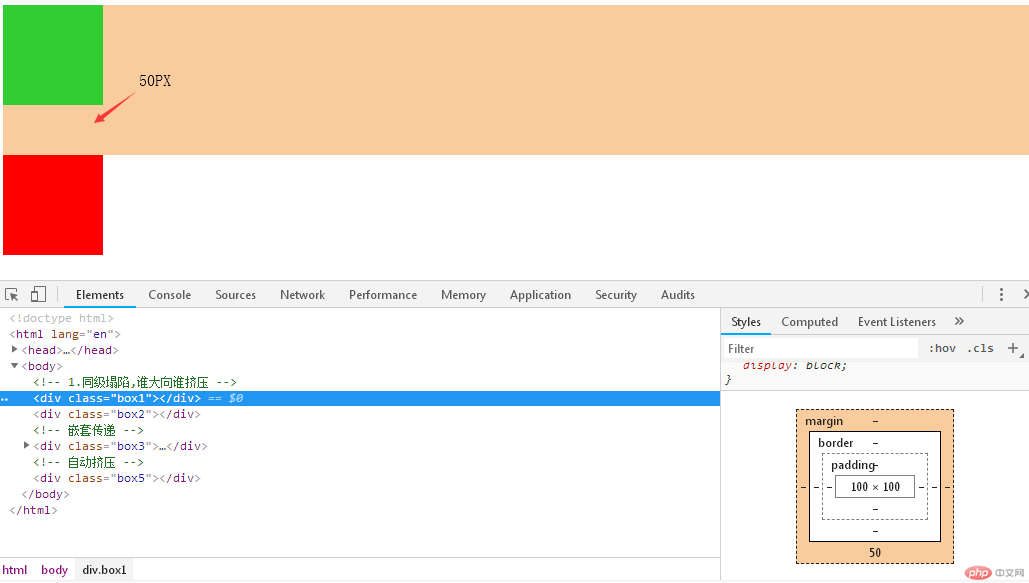
(2) 父级盒子会随内部盒子一起移动,为了解决,让内部盒子内边距增加,宽度再减去内边距,或使用box-sizing: border-box属性
padding和border被包含在定义的width和height之内。对象的实际宽度就等于设置的width值,即使定义有border和padding也不会改变对象的实际宽度,即 ( Element width = width )
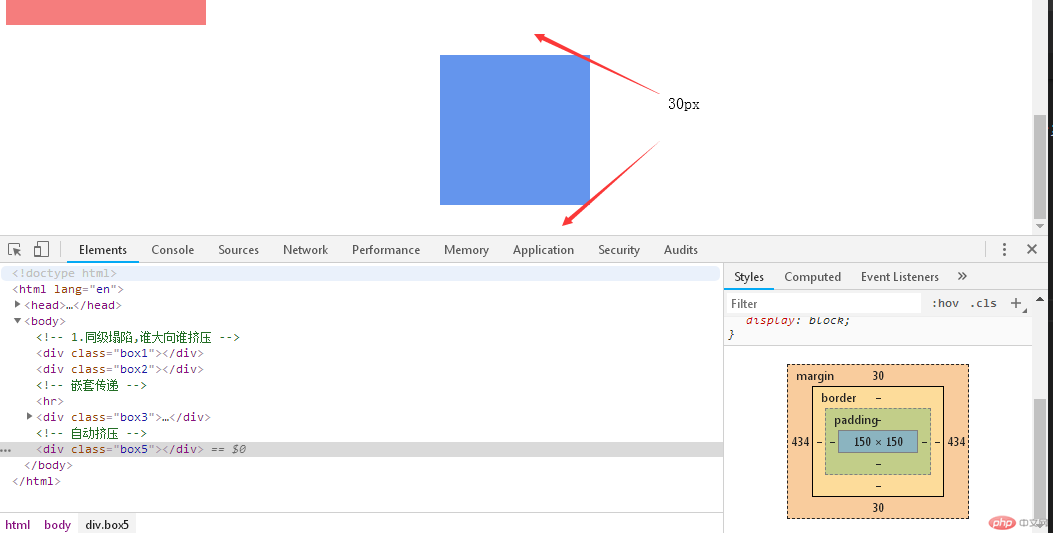
实现效果如下:
(3)自动挤压的效果:
<style>
        .box1 {
            width: 100px;
            height: 100px;
            background-color: limegreen;
            margin-bottom: 50px;
        }

        .box2 {
            width: 100px;
            height: 100px;
            background-color: red;
            margin-top: 30px;
        }

        .box3 {
            box-sizing: border-box;
            width: 200px;
            height: 200px;
            background-color: rgb(245, 125, 125);
        }

        .box4 {
            width: 100px;
            height: 100px;
            background-color: blue;
        }
        /* .box4 {
            margin-top: 50px;
        } */
        /* 父级盒子会随内部盒子一起移动,为了解决,让内部盒子内边距增加,宽度再减去内边距 */

        .box3 {
            padding-top: 50px;
            /* height: 150px; */
        }

        .box5 {
            /* 自动挤压 */
            width: 150px;
            height: 150px;
            background-color: cornflowerblue;
        }

        .box5 {
            margin: 30px auto;
        }
    </style>
</head>

<body>
    <!-- 1.同级塌陷,谁大向谁挤压 -->
    <div class="box1"></div>
    <div class="box2"></div>
    <!-- 嵌套传递 -->
    <hr>
    <div class="box3">
        <div class="box4"></div>
    </div>
    <!-- 自动挤压 -->
    <div class="box5"></div>


</body>点击 "运行实例" 按钮查看在线实例
今日总结: 给老师提个优化建议,这个文章编辑器真的很烂,插入代码后,继续输入的内容就变成代码模式, 一边保存,一遍预览,重新排版花了30分钟.也许是我不会用吧.