Correction status:qualified
Teacher's comments:运行代码有点问题, 在本地是好的吗?


实例演示相邻选择器与兄弟选择器,并分析异同
相邻选择器:+*
选择选中相邻的一个
兄弟选择器:~+
选择选中后面的全部切一定要是同级,多个
<!DOCTYPE html>
<html lang="en">

<head>
    <meta charset="UTF-8">
    <meta name="viewport" content="width=device-width, initial-scale=1.0">
    <meta http-equiv="X-UA-Compatible" content="ie=edge">
    <title>选择器</title>
    <link rel="stylesheet" href="1.css">
</head>

<body>
    <ul>
        <li class="bg-green">1</li>
        <li id="bg-blue">2</li>
        <li class="bg-green">3</li>
        <li class="bg-green">4</li>
        <li>5</li>
        <li>6</li>
        <li>7</li>
        <li>8</li>
        <li>9</li>
        <li>10</li>
    </ul>
    <div>
        <p>宫本武藏</p>
        <li>貂蝉</li>
        <p>沈梦溪</p>
    </div>
    <div>
        <p>妲己</p>
        <li>东皇太一</li>

    </div>

</body>

</html>
ul {
    margin: 0;
    padding-left: 0;
    border: 1px dashed red;
}

ul li {
    list-style: none;
    width: 40px;
    height: 40px;
    background-color: wheat;
    text-align: center;
    border: 0px solid black;
    line-height: 40px;
    border-radius: 50%;
    display: inline-block;
}

#bg-blue {
    background-color: lightblue;
}

.bg-green {
    background-color: lightgreen;
}

#bg-blue,
.bg-green {
    border: 1px solid blue;
}


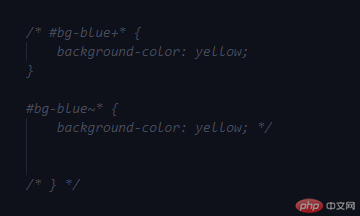
/* #bg-blue+* {
    background-color: yellow;
}

#bg-blue~* {
    background-color: yellow; */


/* } */

ul :first-child {
    background-color: coral;
}

ul :last-child {
    background-color: coral;
}

ul :nth-child(6) {
    background-color: coral;
}

ul :nth-last-child(3) {
    background-color: coral;
}

ul li:first-of-type {
    background-color: darkgreen;
    color: white;
}

ul li:last-of-type {
    background-color: darkgreen;
    color: white;
}

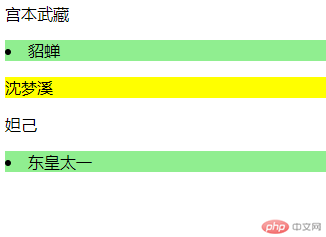
div :nth-child(2) {
    background-color: lightgreen;
}

div:first-of-type :nth-child(3) {
    /* background-color: yellow; */
}

p:nth-of-type(2) {
    background-color: yellow;
}点击 "运行实例" 按钮查看在线实例

2. 实例演示:nth-child() 和 :nth-of-type()选择器,并分析异同
nth-child:关注点不同,关注的是位置
nth-child:既关注位置,又关注类型
<!DOCTYPE html>
<html lang="en">

<head>
    <meta charset="UTF-8">
    <meta name="viewport" content="width=device-width, initial-scale=1.0">
    <meta http-equiv="X-UA-Compatible" content="ie=edge">
    <title>选择器</title>
    <link rel="stylesheet" href="1.css">
</head>

<body>
    <ul>
        <li class="bg-green">1</li>
        <li id="bg-blue">2</li>
        <li class="bg-green">3</li>
        <li class="bg-green">4</li>
        <li>5</li>
        <li>6</li>
        <li>7</li>
        <li>8</li>
        <li>9</li>
        <li>10</li>
    </ul>
    <div>
        <p>宫本武藏</p>
        <li>貂蝉</li>
        <p>沈梦溪</p>
    </div>
    <div>
        <p>妲己</p>
        <li>东皇太一</li>

    </div>

</body>

</html>
ul {
    margin: 0;
    padding-left: 0;
    border: 1px dashed red;
}

ul li {
    list-style: none;
    width: 40px;
    height: 40px;
    background-color: wheat;
    text-align: center;
    border: 0px solid black;
    line-height: 40px;
    border-radius: 50%;
    display: inline-block;
}

#bg-blue {
    background-color: lightblue;
}

.bg-green {
    background-color: lightgreen;
}

#bg-blue,
.bg-green {
    border: 1px solid blue;
}


/* #bg-blue+* {
    background-color: yellow;
}

#bg-blue~* {
    background-color: yellow; */


/* } */

ul :first-child {
    background-color: coral;
}

ul :last-child {
    background-color: coral;
}

ul :nth-child(6) {
    background-color: coral;
}

ul :nth-last-child(3) {
    background-color: coral;
}

ul li:first-of-type {
    background-color: darkgreen;
    color: white;
}

ul li:last-of-type {
    background-color: darkgreen;
    color: white;
}

div :nth-child(2) {
    background-color: lightgreen;
}

div:first-of-type :nth-child(3) {
    /* background-color: yellow; */
}

p:nth-of-type(2) {
    background-color: yellow;
}点击 "运行实例" 按钮查看在线实例

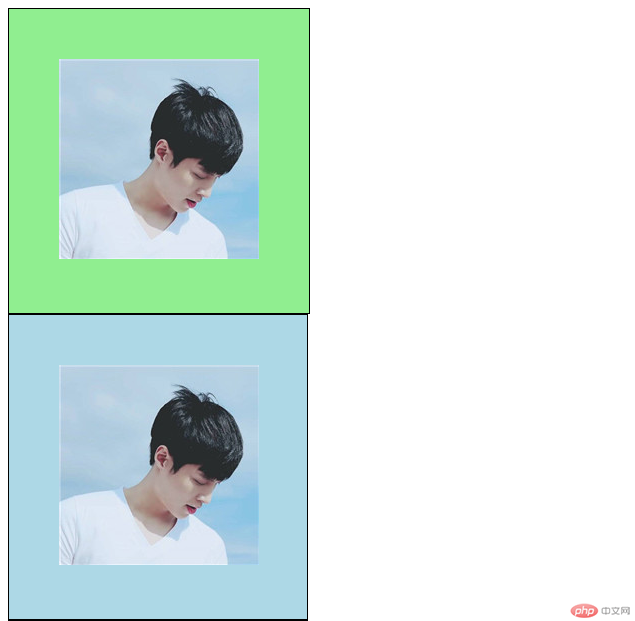
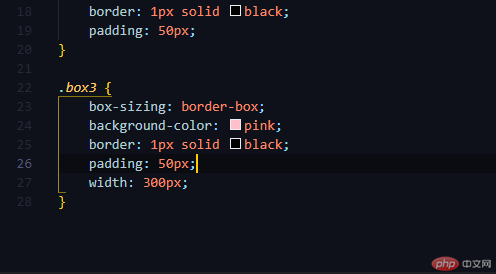
3. 实例演示:padding 对盒子大小的影响与解决方案, 使用宽度分离或box-sizing
<!DOCTYPE html>
<html lang="en">

<head>
    <meta charset="UTF-8">
    <meta name="viewport" content="width=device-width, initial-scale=1.0">
    <meta http-equiv="X-UA-Compatible" content="ie=edge">
    <link rel="stylesheet" href="3.css">
    <title>内边距</title>
</head>

<body>
    <div class="box">
        <img src="3.jpg" alt="张艺兴" width="200">

    </div>


    <div class="wrap">
        <div class="box2">
            <img src="3.jpg" alt="张艺兴" width="200">
        </div>
    </div>

    <div class="box3">
        <img src="3.jpg" alt="张艺兴" width="200">

    </div>


</body>

</html>
.box {
    width: 300px;
    border: 1px solid black;
    background-color: lightgreen;
}

.box {
    padding: 50px;
    width: 200px;
}

.wrap {
    width: 300px;
}

.box2 {
    background-color: lightblue;
    border: 1px solid black;
    padding: 50px;
}

.box3 {
    box-sizing: border-box;
    background-color: pink;
    border: 1px solid black;
    padding: 50px;
    width: 300px;
}点击 "运行实例" 按钮查看在线实例


4. 实例演示: margin中的同级塌陷, 嵌套传递与自动挤压, 并提出解决方案或应用场景
同级塌陷
<!DOCTYPE html>
<html lang="en">

<head>
    <meta charset="UTF-8">
    <meta name="viewport" content="width=device-width, initial-scale=1.0">
    <meta http-equiv="X-UA-Compatible" content="ie=edge">
    <link rel="stylesheet" href="4.css">
    <title>外边距</title>
</head>

<body>
    <div class="box1"></div>
    <div class="box2"></div>

</body>

</html>
 .box1 {
     width: 100px;
     height: 100px;
     background-color: lightblue;
 }

 .box2 {
     width: 100px;
     height: 100px;
     background-color: lightcoral;
 }

 .box1 {
     margin-bottom: 50px;
 }

 .box2 {
     padding-top: 30px;
}点击 "运行实例" 按钮查看在线实例
设置宽高,计算好的高度设置一下就行了
嵌套传递
<!DOCTYPE html>
<html lang="en">

<head>
    <meta charset="UTF-8">
    <meta name="viewport" content="width=device-width, initial-scale=1.0">
    <meta http-equiv="X-UA-Compatible" content="ie=edge">
    <link rel="stylesheet" href="4.css">
    <title>外边距</title>
</head>

<body>
    <div class="box1">
        <div class="box2"></div>
    </div>


</body>

</html>
 .box1 {
     width: 200px;
     height: 200px;
     background-color: lightblue;
 }

 .box2 {
     width: 100px;
     height: 100px;
     background-color: lightcoral;
 }
 /* .box1 {
     margin-bottom: 50px;
 } */

 .box2 {
     margin-top: 50px;
}点击 "运行实例" 按钮查看在线实例
子元素的改变可以变成主元素的改变,适当调试就行了
自动挤压
<!DOCTYPE html>
<html lang="en">

<head>
    <meta charset="UTF-8">
    <meta name="viewport" content="width=device-width, initial-scale=1.0">
    <meta http-equiv="X-UA-Compatible" content="ie=edge">
    <link rel="stylesheet" href="4.css">
    <title>外边距</title>
</head>

<body>
    <!-- <div class="box1">
        <div class="box2"></div>
    </div> -->
    <div class="box1"></div>


</body>

</html>
 .box1 {
     width: 200px;
     height: 200px;
     background-color: lightblue;
     margin-left: auto;
 }
 /* .box2 {
     width: 100px;
     height: 100px;
     background-color: lightcoral;
 } */
 /* .box1 {
     margin-bottom: 50px;
 } */
 /* .box2 {
     margin-top: 50px;
} */点击 "运行实例" 按钮查看在线实例
利用margin添加一些值,就可以弄成自己想要的样子了