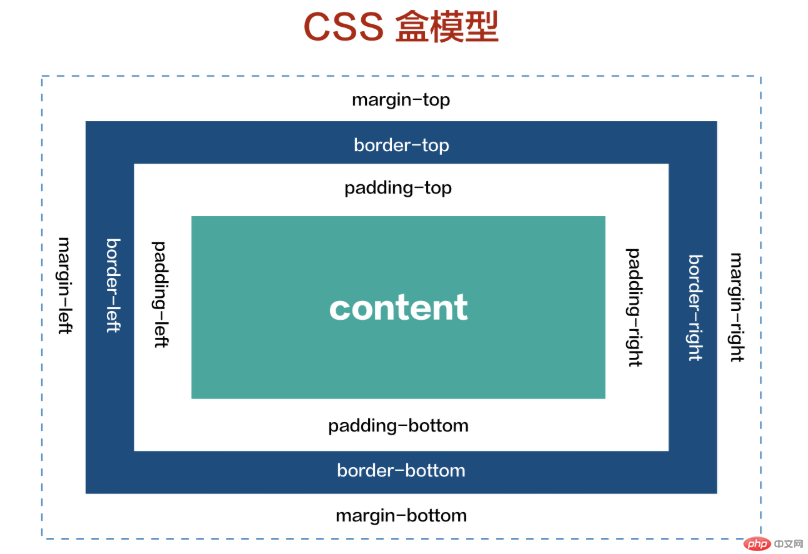


在网页中,一个元素占有空间的大小由几个部分构成,其中包括元素的内容(content),元素的内边距(padding),元素的边框(border),元素的外边距(margin)四个部分。这四个部分占有的空间中,有的部分可以显示相应的内容,而有的部分只用来分隔相邻的区域或区域。4个部分一起构成了css中元素的盒模型。

width 定义盒子宽度
height 定义盒子高度
background 定义盒子的背景
padding 定义盒子内边距
margin 定义盒子外边距
border 盒子边框
重点:
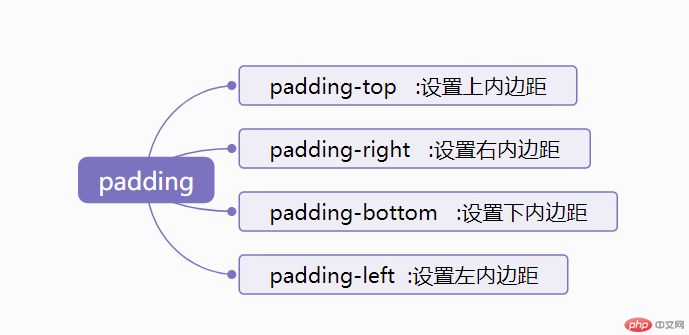
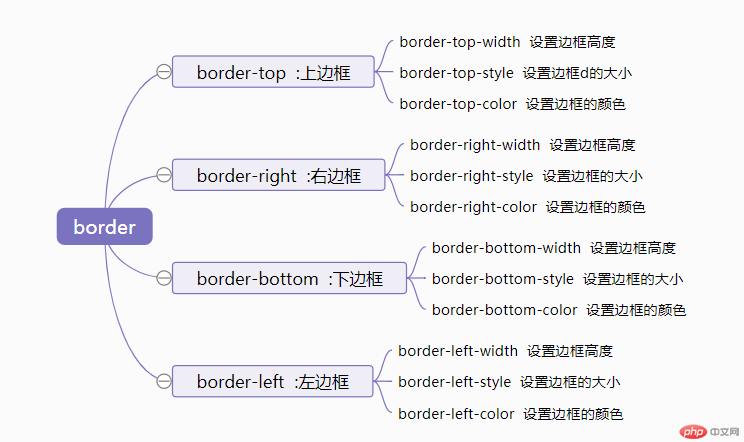
`padding`,`border`,`margin`具有方向性方向遵循: **上, 右, 下, 左**的顺序,即顺时针旋转每个方向上有对应的盒模型属性,
以`padding`举例:
`padding-top`: 上内边距
`padding-right`: 右内边距
`padding-bottom`: 下内边距
`padding-left`: 左内边距
方向遵循: 上, 右, 下, 左的顺序,即顺时针旋转


计算公式:width + padding + border +margin = 盒子最终的宽高
固定宽高的盒子模型,在添加padding属性,border属性,margin属性时,盒子的宽高会变大,
<!DOCTYPE html>
<html lang="en">
	<head>
		<meta charset="UTF-8">
		<meta name="viewport" content="width=device-width, user-scalable=no, initial-scale=1.0, maximum-scale=1.0, minimum-scale=1.0">
		<meta http-equiv="X-UA-Compatible" content="ie=edge">
		<title>盒模型</title>

		<style>
			.box {
				width: 400px;
				height: 400px;
				background:orange;
				padding: 15px;
				border: 10px solid #0000FF;
			}
		</style>

	</head>
	<body>
		<div class="box">
			盒子设置的默认宽高分别是400px ,添加了padding和border后 宽度变成
			width(400px) + padding(15px*2) + border(10px*2) = 实际宽高 450px * 450px
		</div>

	</body>
</html>点击 "运行实例" 按钮查看在线实例
盒子添加box-sizing 样式属性之后会消除padding 、border,margin对于盒子大小的影响!
<!DOCTYPE html>
<html lang="en">
	<head>
		<meta charset="UTF-8">
		<meta name="viewport" content="width=device-width, user-scalable=no, initial-scale=1.0, maximum-scale=1.0, minimum-scale=1.0">
		<meta http-equiv="X-UA-Compatible" content="ie=edge">
		<title>盒模型</title>

		<style>
			.box {
				width: 400px;
				height: 400px;
				background:orange;
				padding: 15px;
				border: 10px solid #0000FF;
				box-sizing: border-box;
			}

			.box2 {
				width: 350px;
				height: 350px;
				background:orange;
				padding: 15px;
				border: 10px solid #0000FF;
				margin-top: 30px;
			}

		</style>

	</head>
	<body>
		<div class="box">
			添加了
			<code>
				box-sizing: border-box;
			</code>
			之后,盒子在增加了padding, margin,border样式之后,不会影响盒子大小


		</div>

		<div class="box2">
			<p style="color: #FFF;">
				如果不使用<code>box-sizing: border-box;</code>
				想让盒子宽高分别为400px,就要把默认的盒子宽高减去padding,border宽度
			</p>
		</div>


	</body>
</html>点击 "运行实例" 按钮查看在线实例
盒元素的背景主要有颜色与图片二种形式
背景色
背景色的控制,主要有裁切和渐变二类
* `background-color`: 设置背景色,支持单词,16进制,`rgb()/rgba()`
* `background-clip`: 设置背景色应用范围(裁切),支持内容,内边距和边框三级
* `background: linear-gradient()`: 线性渐变
* `background: radial-gradient()`: 径向渐变
<!DOCTYPE html>
<html lang="en">
	<head>
		<meta charset="UTF-8">
		<meta name="viewport" content="width=device-width, user-scalable=no, initial-scale=1.0, maximum-scale=1.0, minimum-scale=1.0">
		<meta http-equiv="X-UA-Compatible" content="ie=edge">
		<title>盒模型背景色</title>

		<style>
			.box {
				width: 400px;
				height: 400px;
				background:orange;

			}

			.box2 {
				width: 400px;
				height: 400px;
				background-image: url(https://img.php.cn/upload/course/000/000/001/5d242759adb88970.jpg);
				background-repeat: no-repeat;/*背景图片不重复显示*/
				background-size: initial;
			}

			.box3 {
				width: 400px;
				height: 400px;
				-webkit-background: linear-gradient(orangered, yellow, blue);
				-moz-background: linear-gradient(orangered, yellow, blue);
				background: linear-gradient(orangered, yellow, blue);

			}

			.box4 {
				width: 400px;
				height: 400px;
				-webkit-background:radial-gradient(orangered, yellow, blue);
				-moz-background: radial-gradient(orangered, yellow, blue);
				background:radial-gradient(orangered, yellow, blue);

			}

		</style>

	</head>
	<body>
		<h1>盒模型背景色</h1>
		<div class="box">
			<code>
				background:orange;
			</code>

		</div>

		<h1>盒模型背景图片</h1>
		<div class="box2">

		</div>

		<h1>盒模型背景线性渐变</h1>
		<div class="box3">

		</div>

		<h1>盒模型背景径向渐变</h1>
		<div class="box4">

		</div>

	</body>
</html>点击 "运行实例" 按钮查看在线实例
<!DOCTYPE html>
<html lang="en">
	<head>
		<meta charset="UTF-8">
		<meta name="viewport" content="width=device-width, user-scalable=no, initial-scale=1.0, maximum-scale=1.0, minimum-scale=1.0">
		<meta http-equiv="X-UA-Compatible" content="ie=edge">
		<title>盒模型背图片</title>

		<style>
			*{
				padding: 0;
				margin: 0;
			}
			body{
				padding: 0;
				width: 100%;
				height: 2000px;
				background-image: url(https://www.php.cn/static/images/course_banner.png);
				background-repeat: no-repeat;
				background-position:15% 15%;
				background-attachment: fixed;
				background-size: contain;
			}

		</style>

	</head>
	<body>

		<div style="height: 100px;background: #000000;color: #FFF;line-height: 100px;text-align: center;margin-top: 1800px;">
			使用<code>background-attachment: fixed;</code>背景图片不会随着页面滚动了
		</div>
	</body>
</html>点击 "运行实例" 按钮查看在线实例