Correction status:qualified
Teacher's comments:选择器很强大, 语法并不复杂, 多写就好


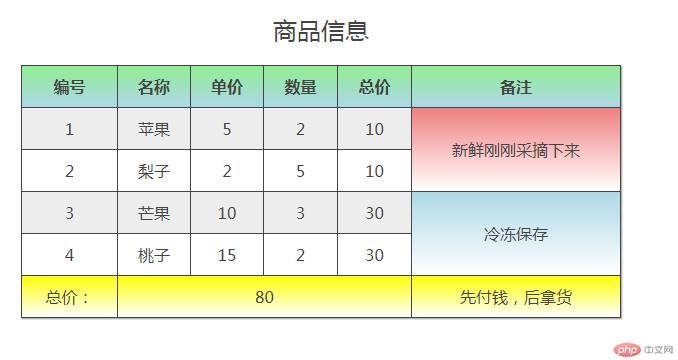
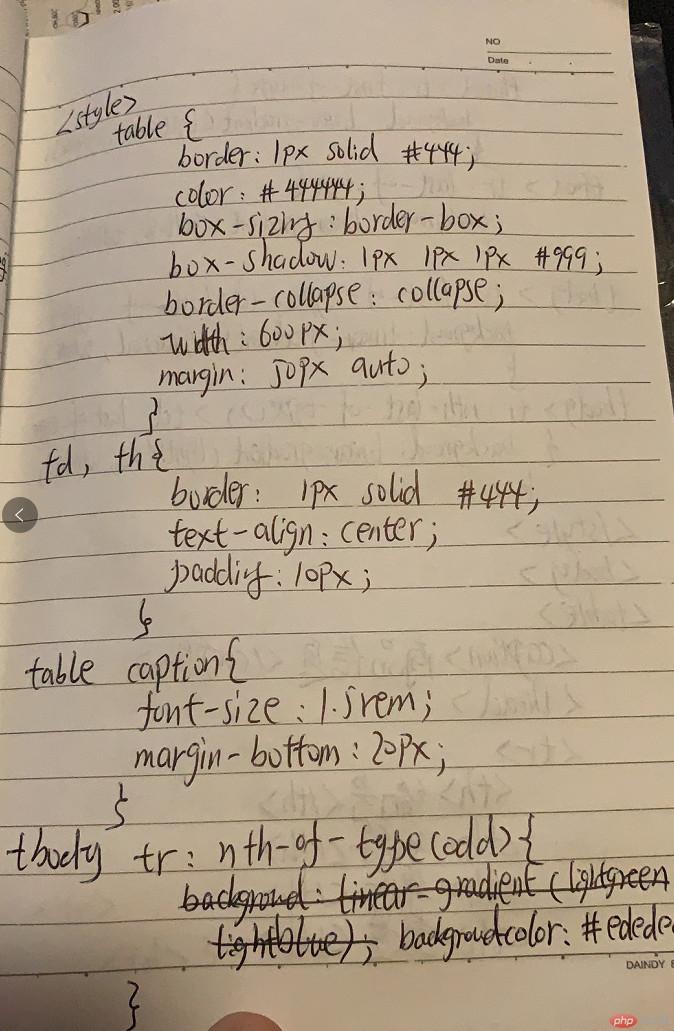
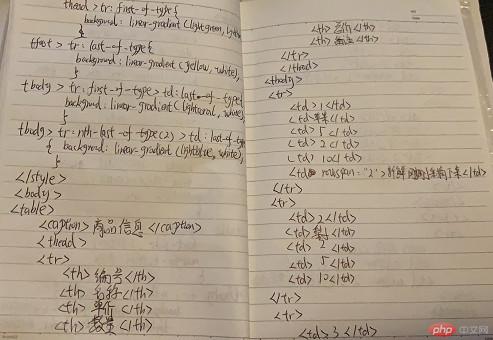
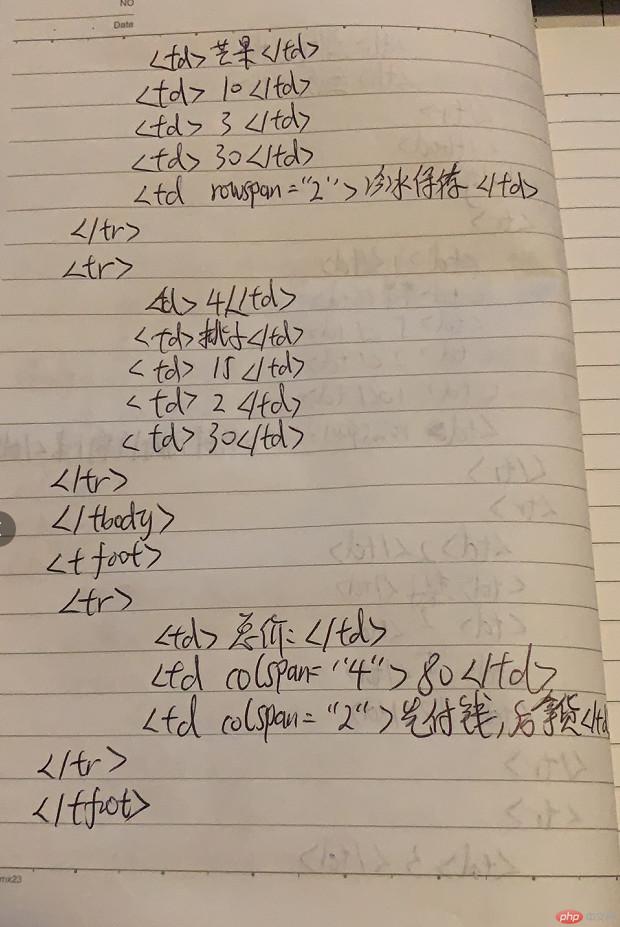
一、制作一张商品信息表,内容自定,要求用到行与列的合并
<!DOCTYPE html>
<html lang="en">
<head>
    <meta charset="UTF-8">
    <title>商品信息</title>
    <style>
        table {
            border: 1px solid #444;
            color: #444444;
            box-sizing: border-box;
            box-shadow: 1px 1px 1px #999;
            border-collapse: collapse;
            width: 600px;
            margin: 50px auto;
        }
        td,th {
            border: 1px solid #444;
            text-align: center;
            padding: 10px;
        }
        table caption {
            font-size: 1.5rem;
            margin-bottom: 20px;
        }
        tbody tr:nth-of-type(odd) {
            background-color: #ededed;
        }
        thead >tr:first-of-type {
            background: linear-gradient(lightgreen,lightblue);
        }
        tfoot >tr:last-of-type {
            background: linear-gradient(yellow,white);
        }
        tbody > tr:first-of-type >td:last-of-type {
            background: linear-gradient(lightcoral,white);
        }
        tbody > tr:nth-last-of-type(2) >td:last-of-type {
            background: linear-gradient(lightblue, white);
        }
    </style>
</head>
<body>
<table>
    <caption>商品信息</caption>
    <thead>
    <tr>
        <th>编号</th>
        <th>名称</th>
        <th>单价</th>
        <th>数量</th>
        <th>总价</th>
        <th>备注</th>
    </tr>
    </thead>
    <tbody>
    <tr>
        <td>1</td>
        <td>苹果</td>
        <td>5</td>
        <td>2</td>
        <td>10</td>
        <td rowspan="2">新鲜刚刚采摘下来</td>
    </tr>
    <tr>
        <td>2</td>
        <td>梨子</td>
        <td>2</td>
        <td>5</td>
        <td>10</td>
    </tr>
    <tr>
        <td>3</td>
        <td>芒果</td>
        <td>10</td>
        <td>3</td>
        <td>30</td>
        <td rowspan="2">冷冻保存</td>
    </tr>
    <tr>
        <td>4</td>
        <td>桃子</td>
        <td>15</td>
        <td>2</td>
        <td>30</td>
    </tr>
    </tbody>
    <tfoot>
    <tr>
        <td>总价:</td>
        <td colspan="4">80</td>
        <td colspan="2">先付钱,后***</td>
    </tr>
    </tfoot>
</table>
</body>
</html>点击 "运行实例" 按钮查看在线实例
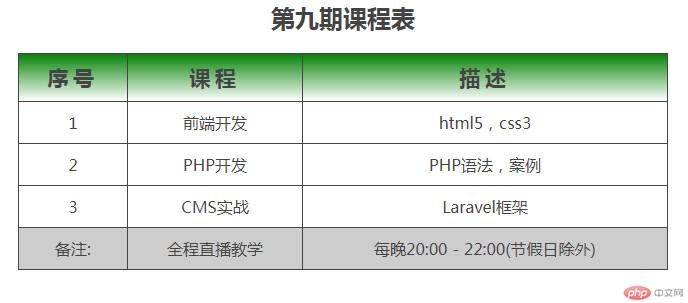
二、使用<div><span><p><ul>...等标签来制作一张课程表
<!DOCTYPE html>
<html lang="en">
<head>
    <meta charset="UTF-8">
    <title>课程表</title>
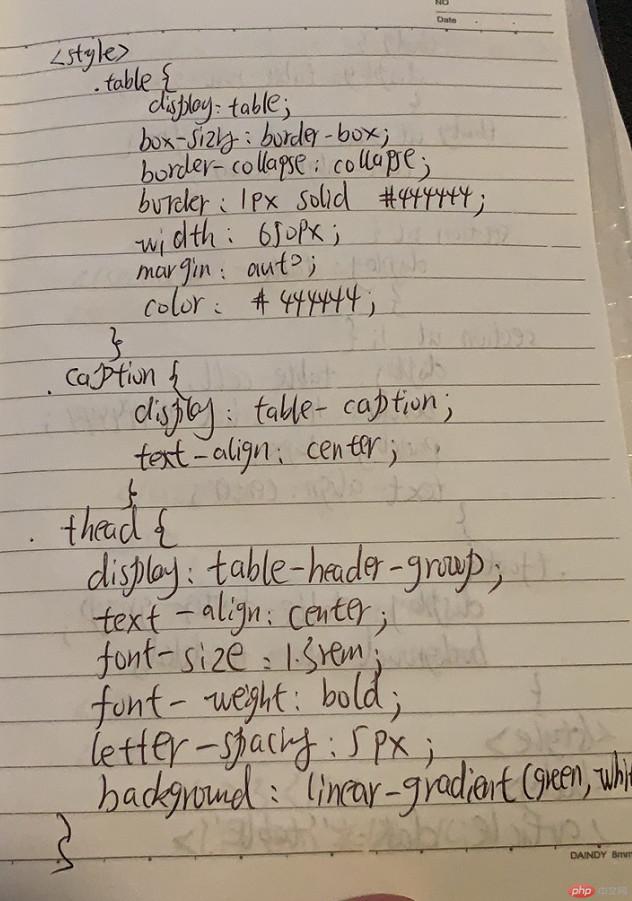
    <style>
        .table {
            display: table;
            box-sizing: border-box;
            border-collapse: collapse;
            border: 1px solid #444444;
            width: 650px;
            margin: auto;
            color: #444444;
        }
        .caption {
            display: table-caption;
            text-align: center;
        }
        .thead {
            display: table-header-group;
            text-align: center;
            font-size: 1.3rem;
            font-weight: bold;
            letter-spacing: 5px;
            background:linear-gradient(green,white);
        }
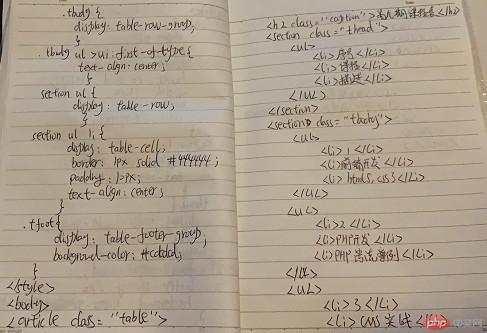
        .tbody {
            display: table-row-group;
        }
        .tbody ul > li:first-of-type {
            text-align: center;
        }
        section ul {
            display: table-row;
        }
        section ul li {
            display: table-cell;
            border: 1px solid #444444;
            padding: 10px;
            text-align: center;
        }
        .tfoot {
            display: table-footer-group;
            background-color: #cdcdcd;
        }
    </style>
</head>
<body>
<article class="table">
    <h2 class="caption">第九期课程表</h2>
    <section class="thead">
        <ul>
            <li>序号</li>
            <li>课程</li>
            <li>描述</li>
        </ul>
    </section>
    <section class="tbody">
        <ul>
            <li>1</li>
            <li>前端开发</li>
            <li>html5,css3</li>
        </ul>
        <ul>
            <li>2</li>
            <li>PHP开发</li>
            <li>PHP语法,案例</li>
        </ul>
        <ul>
            <li>3</li>
            <li>CMS实战</li>
            <li>Laravel框架</li>
        </ul>
    </section>
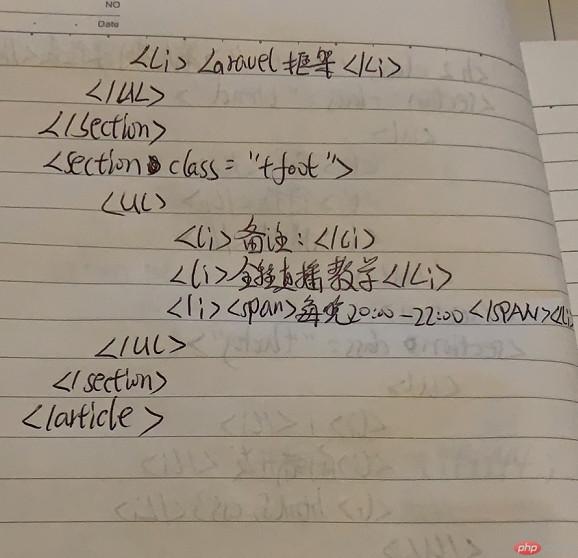
    <section class="tfoot">
        <ul>
            <li>备注:</li>
            <li>全程直播教学</li>
            <li><span>每晚20:00 - 22:00(节假日除外)</span></li>
        </ul>
    </section>
</article>
</body>
</html>点击 "运行实例" 按钮查看在线实例
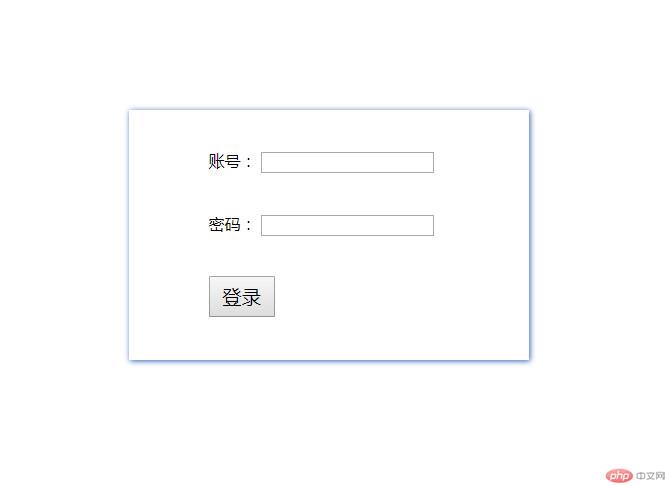
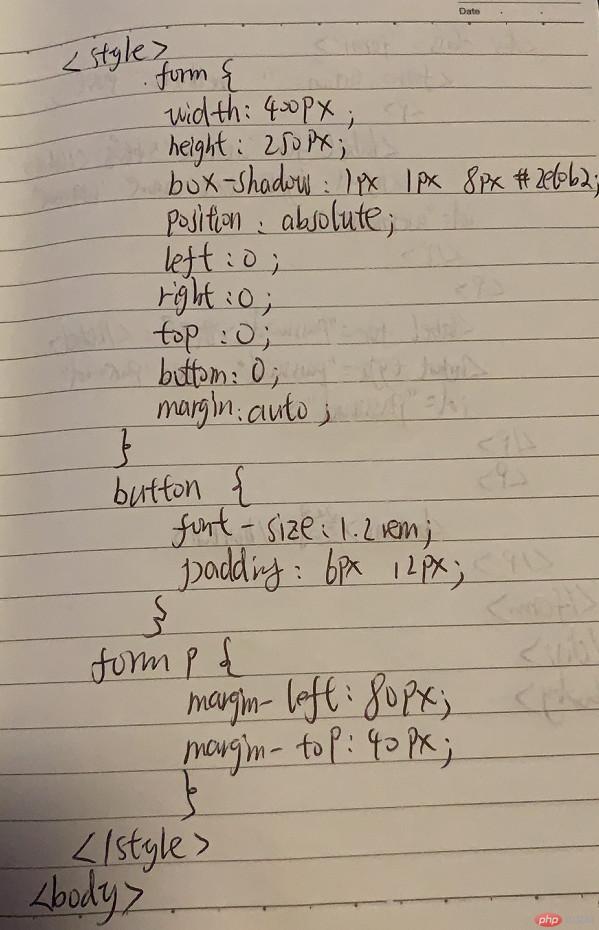
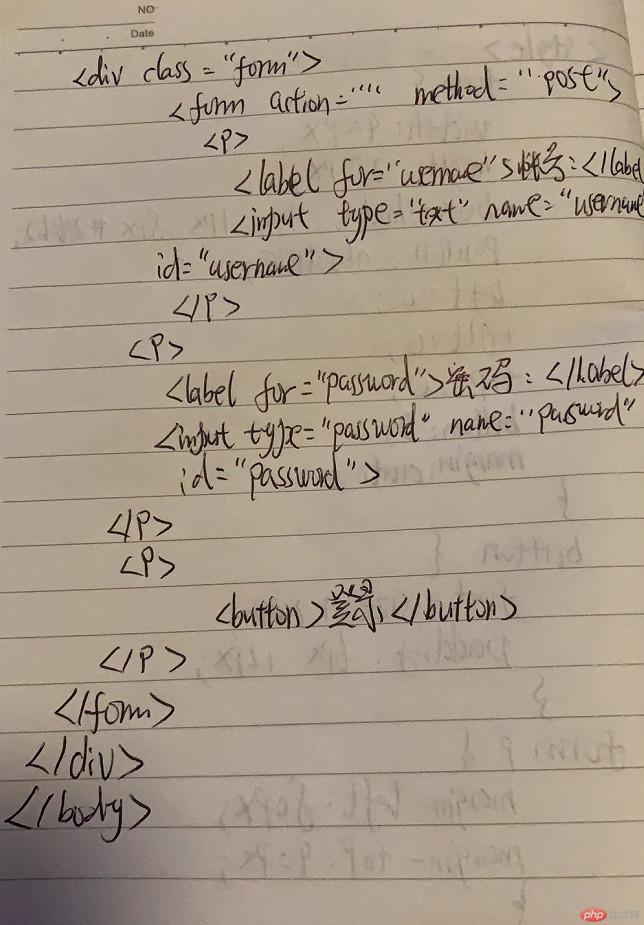
三、使用绝对定位,实现用户登录框在页面中始终居中显示
<!DOCTYPE html>
<html lang="en">
<head>
    <meta charset="UTF-8">
    <title>用户登录</title>
    <style>
        .form {
            width: 400px;
            height: 250px;
            box-shadow: 1px 1px 8px #2e60b2;
            position: absolute;
            left: 0;
            right: 0;
            top: 0;
            bottom: 0;
            margin: auto;
        }

        button {
            font-size: 1.2rem;
            padding: 6px 12px;
        }
        form p {
            margin-left: 80px;
            margin-top: 40px;
        }
    </style>
</head>
<body>
<div class="form">
    <form action="" method="post">
        <p>
            <label for="username">账号:</label>
            <input type="text" name="username" id="username">
        </p>
        <p>
            <label for="password">密码:</label>
            <input type="password" name="password" id="password">
        </p>
        <p>
            <button>登录</button>
        </p>
    </form>
</div>
</body>
</html>点击 "运行实例" 按钮查看在线实例
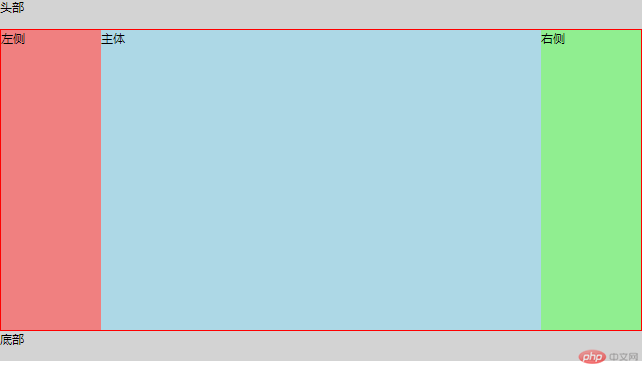
四、 模仿课堂案例, 实现圣杯布局,并写出完整流程与布局思路
1、在body里面创建好header,main,article,aside,footer主体模块
2、设置css参数,比如padding,宽高,box-sizing,背景色等
3、通过float,定位调整各个模块,再通过margin把左右aside调整到相应位置
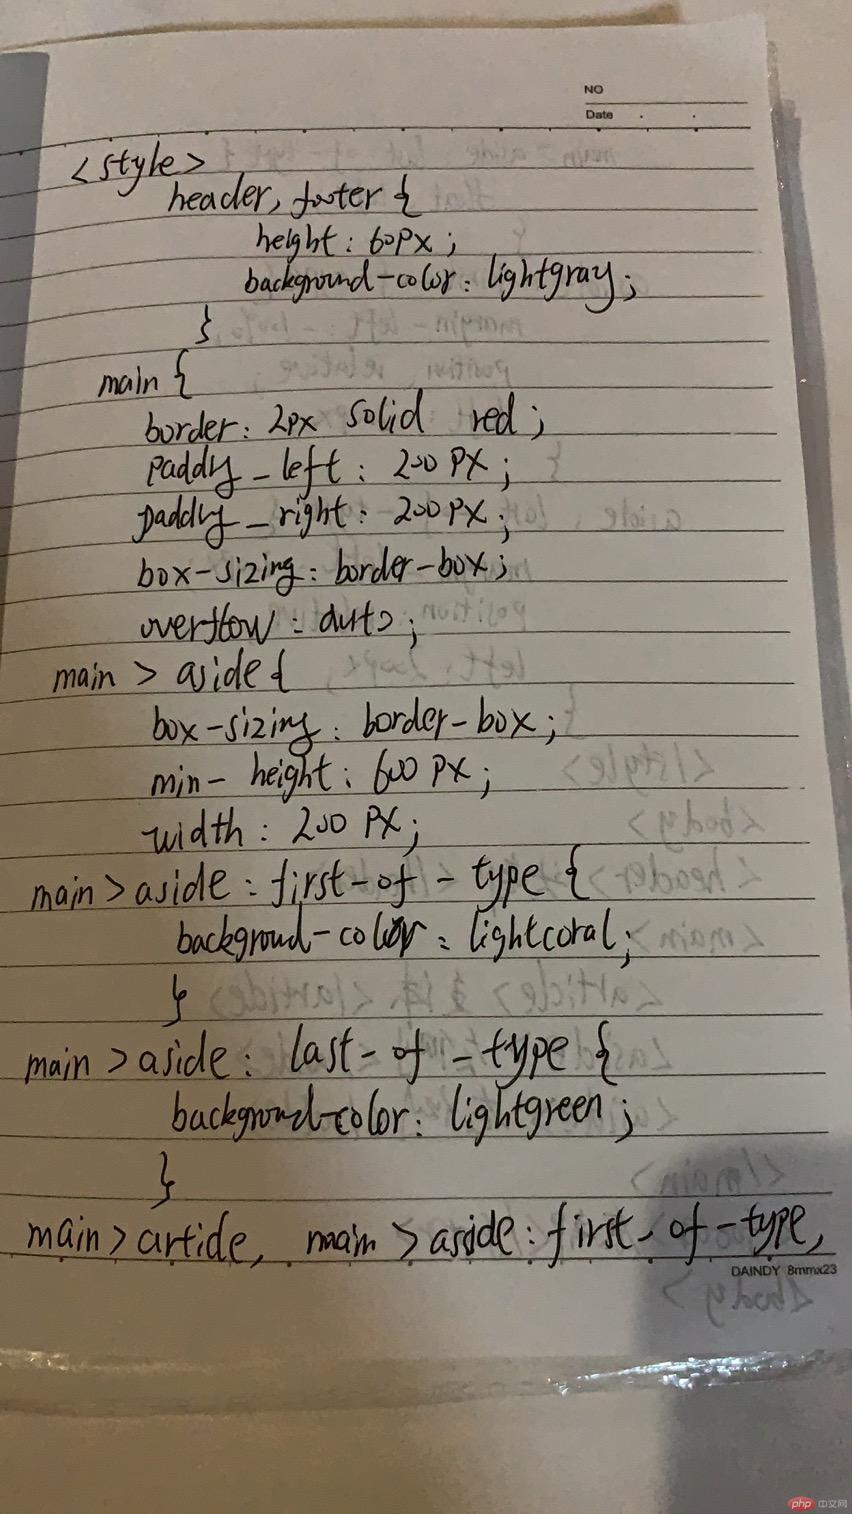
<!doctype html>
<html lang="en">
<head>
    <meta charset="UTF-8">
    <meta name="viewport"
          content="width=device-width, user-scalable=no, initial-scale=1.0, maximum-scale=1.0, minimum-scale=1.0">
    <meta http-equiv="X-UA-Compatible" content="ie=edge">
    <title>Document</title>
    <style>
        header,footer {
            height: 60px;
            background-color: lightgray;
        }
        main {
            border: 2px solid red;
            padding-left: 200px;
            padding-right: 200px;
            box-sizing: border-box;
            overflow: auto;
        }
        main > article {
            box-sizing: border-box;
            background-color: lightblue;
            width: 100%;
            min-height:600px;
        }
        main > aside {
            box-sizing: border-box;
            min-height: 600px;
            width: 200px;
        }
        main > aside:first-of-type {
            background-color: lightcoral;
        }
        main > aside:last-of-type {
            background-color: lightgreen;
        }
        main > article,
        main > aside:first-of-type,
        main > aside:last-of-type {
            float: left;
        }
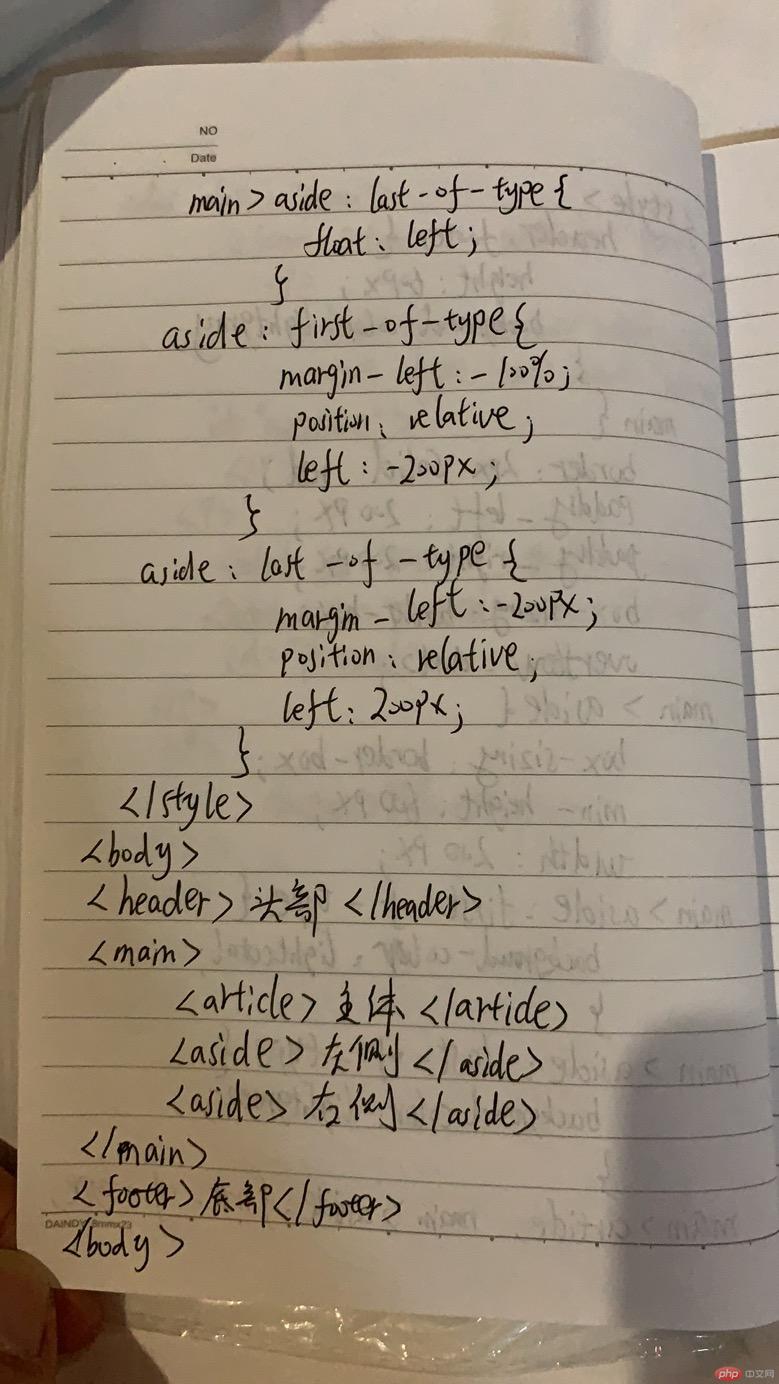
        aside:first-of-type {
            margin-left: -100%;
            position: relative;
            left: -200px;
        }
        aside:last-of-type {
            margin-left: -200px;
            position: relative;
            left: 200px;
        }
    </style>
</head>
<body>
<header>头部</header>
<main>
    <article>主体</article>
    <aside>左侧</aside>
    <aside>右侧</aside>
</main>
<footer>底部</footer>
</body>
</html>点击 "运行实例" 按钮查看在线实例
五、总结
这节课再次复习了选择器,colspan,rowspan,学习了display属性,浮动,相对定位,绝对定位。