Correction status:qualified
Teacher's comments:还在写很久之前的作业呀, 尽快跟上


1、分别创建控制器、视图、路由文件
2、在控制器中模拟数据,并把数据渲染到视图中
3、使用@include将页面的header部分放到public/header.php中
控制器部分代码:
<?php

namespace App\Http\Controllers;

use Illuminate\Http\Request;

class Main extends Controller
{
    public function index(){
        $cn = [0=>['name'=>'少年的你'],1=>['name'=>'叶问'],2=>['name'=>'少林足球']];
        $om = [0=>['name'=>'肖申克的救赎'],1=>['name'=>'越狱'],2=>['name'=>'神探夏洛克']];
        $rh = [0=>['name'=>'灌篮高手'],1=>['name'=>'火影忍者'],2=>['name'=>'海贼王']];
        $data['data'] = ['video'=>[$cn,$om,$rh],
        'cite'=>[['alias'=>'国产影视','id'=>0],['alias'=>'欧美电影','id'=>1],['alias'=>'日韩动漫','id'=>2]]];
        return view('main',$data);
    }
}
视图部分代码:
<!DOCTYPE html>
<html lang="en">
<head>
    <meta charset="UTF-8">
    <meta name="viewport" content="width=device-width, initial-scale=1.0">
    <meta http-equiv="X-UA-Compatible" content="ie=edge">
    <link rel="stylesheet" href="/css/videoStatic/style.css">
    <title>Document</title>
    <style>

</style>
</head>
<body>
    <!-- 头部 -->
    @include('video/public/header')

    <!-- 主体内容 -->
    <div class="container">
    @for ($i = 0; $i<=2; $i++)
        <h3>{{$data['cite'][$i]['alias']}}</h3>
        @foreach($data['video'][$i] as $v)
            <div class="video">{{$v['name']}}</div>
        @endforeach
    @endfor
    </div>

    <!-- 底部 -->
    @include('video/public/footer')
</body>
</html>
路由:
Route::get('/main','main@index');公共头部和底部文件:
 <! -- 头部 -->
<div class="header">
        <div class="header_left">
            <ul>
            <li><a href="">首页</a></li>
            <li><a href="">国产影视</a></li>
            <li><a href="">欧美电影</a></li>
            <li><a href="">日韩动漫</a></li>
            </ul>
        </div>
        <div class="header_right"><span><a href="">登录</a> | <a href="">注册</a></span></div>
</div>

<!-- 底部 -->
<div class="footer">Reid@版权所有</div>
css样式:
* {
    margin: 0;
    padding: 0;
}

ul,
li,
a {
    list-style: none;
    text-decoration: none;
    color: #000;
}

.header,
.footer {
    background-color: lightblue;
    color: #000;
    font-size: 18px;
    height: 50px;
    line-height: 50px;
}

.footer {
    text-align: center;
}

.header_left {
    width: 70%;
    float: left;
}

.header_left ul {
    margin-left: 120px;
}

.header_left ul li {
    width: 80px;
    float: left;
    margin-right: 30px;
}

.header_right {
    float: left;
}

.header_right span {
    position: absolute;
    right: 120px;
    top: 0;
}

.container {
    width: 90%;
    padding: 30px;
    box-sizing: border-box;
}

.video {
    margin-left: 20px;
    margin-top: 3px;
}
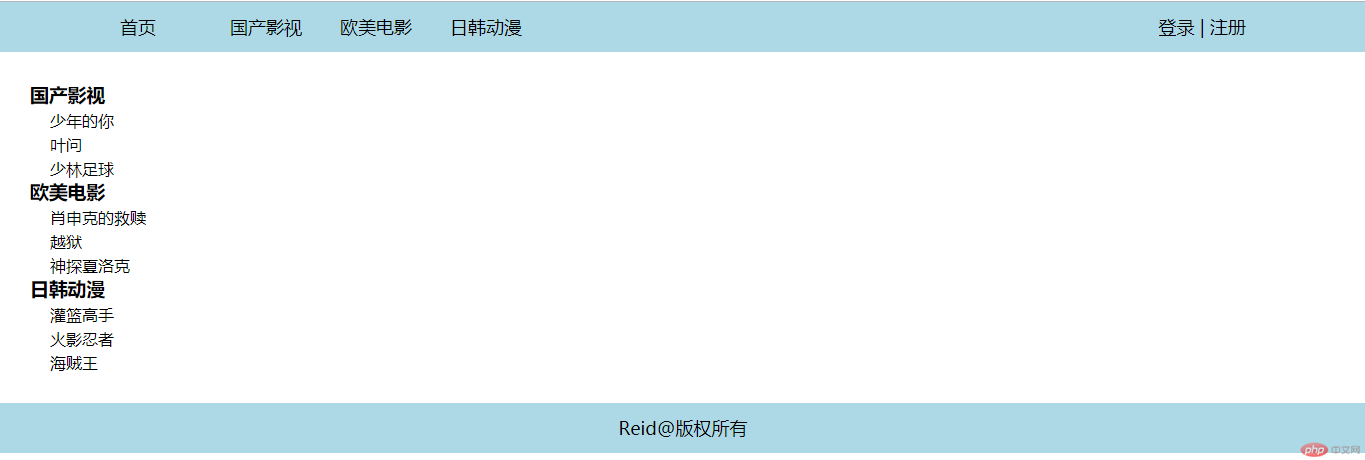
运行结果:

小结:
使用控制器来加载视图的时候,最好将视图名称和控制器名称和方法名称统一,便于后期维护。
疑问:
视图文件在加载数据的时候只能传送一组数据$data,当同一个视图的不同位置分别需要用不同数据表中的数据的时候,需要将它们在模型中将数据拼接成一个数组传给视图?