

1、下载地址 http://sphinxsearch.com/downloads/release/
2、将其解压到D:\sphinx,并在D:\sphinx下新建目录data(用来存放索引文件)与log(用来存放日志文件);
3、将D:\sphinx\sphinx.conf.in复制到D:\sphinx\bin\sphinx.conf.in,并重命名为sphinx.conf;
4、修改sphinx.conf的内容
首先把sphinx.conf各个保存路径改为咱们 斯芬克司 放置的路径
 4.1、搜索source src1修改{...}中的内容//这是索引源
        # 使用的数据库类型
        type = mysql
        # 服务器
        sql_host = localhost
        # 数据库登录名
        sql_user = root
        # 数据库登录密码
        sql_pass = root
        # 操作的数据库名称
        sql_db = test
        # 数据库服务器端口
        sql_port = 3306
        # 设置mysql检索编码,特别要注意这点,很多人中文检索不到数据库的编码是GBK或其他非UTF8
        sql_query_pre = SET NAMES utf-8
        (以上7条前如有#将其删除)
      #获取数据的sql
      sql_query  = \
SELECT id, group_id, UNIX_TIMESTAMP(date_added) AS date_added, title, content \
FROM documents
 #用于命令界面端的测试(cli)
 sql_query_info  = SELECT * FROM documents WHERE id=$id


      4.2、搜索index test1修改{...}中的内容//索引
 #声明索引源
 source   = src1
        # 放索引的目录及索引的文件名
       path = D:/sphinx/data/test1
 ##### 文档信息存储方式
 docinfo = extern
        # 编码
        charset_type = utf-8
        # 指定utf-8编码表,字符表,注意:如使用这种方式,则sphinx会对中文进行单字切分
        charset_table = 0..9, A..Z->a..z, _, a..z, U+410..U+42F->U+430..U+44F, U+430..U+44F
        # 简单分词,只有0和1,需要搜索中文必须置1
        ngram_len = 1
        # 需要分词的字符,搜索中文时必须
        ngram_chars = U+3000..U+2FA1F
        (以上7条前如有#将其删除)
5、导入测试数据将D:\sphinx\example.sql中语句执行到test数据库中,注意:test数据库创建时需要指定为utf-8格式;
6、打开cmd窗口,进入目录D:\sphinx\bin;
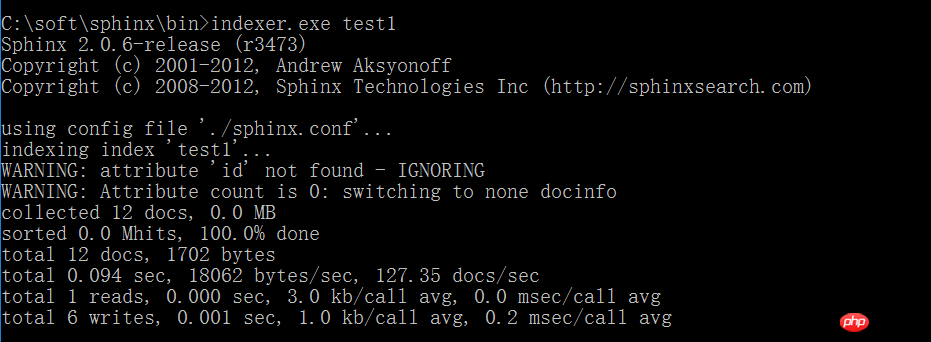
7、建立索引,执行indexer.exe test1,test1即为sphinx.conf中index test1,成功。失败去配置文件中找原因

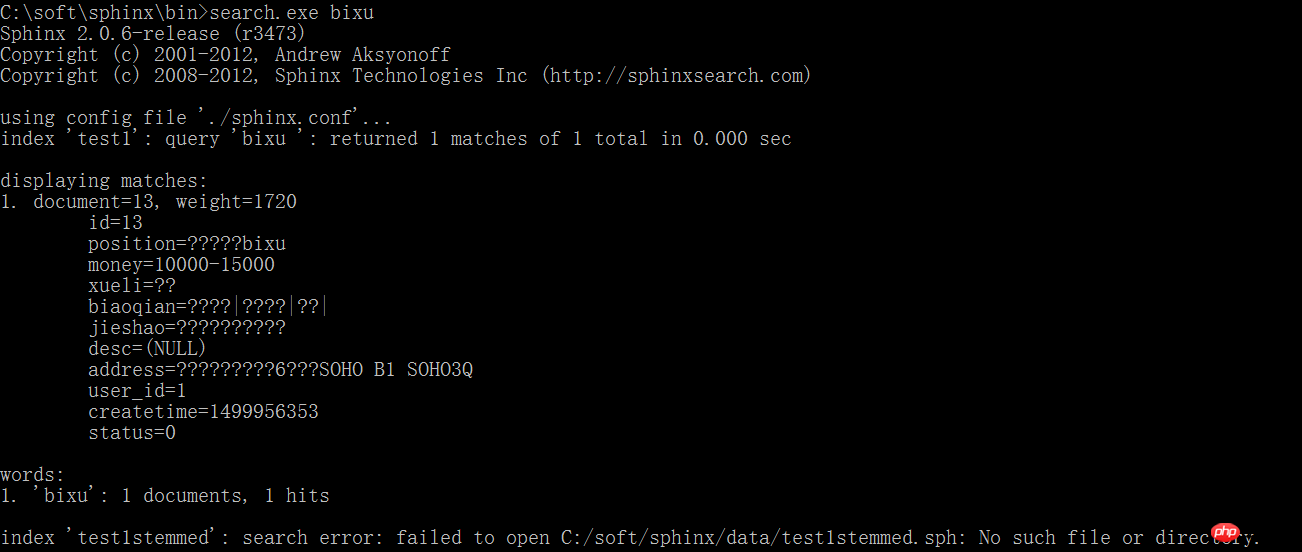
8、搜索'test',执行search.exe test 最后一句error可以忽略

9、搜索中文需要在数据库中含有中文,先修改数据库。然后重新执行第七步。然后在进行搜索“中文”。没有搜索到,因为windows命令行中的中文是GBK编码格式,所以没有匹配内容。我们可以使用PHP程序来试试。
10、进入D:\sphinx\api\目录,可以发现sphinx支持php、java、ruby调用,并提供对应的test例子,这里我们使用php来操作,首先将api复制到我们的网站根目录下,重新命名为sphinxapi目录,新建search.php,内容为:
<?php
    require 'sphinxapi.php';
    $s = new SphinxClient();
    $s->SetServer('localhost', 9312);
    $result = $s->Query('中国');
    print_r($result);
    echo '<br /><br />';
    $result = $s->Query('中文');
    print_r($result);
    ?>
然后回到cmd命令行中,开启sphinx服务,执行searchd.exe(这个必须要执行的),成功后在浏览器中访问search.php,进行打印出来的数据对比
11、至此sphinx在windows下的简单安装与使用就完成了。
下面是在yii框架中的使用
控制器:
//下拉选项字段 搜索值
    public function actionSearch_val()
    {
        $set = Yii::$app->request->get('set','');//接收搜索类型
        $key = Yii::$app->request->get('key','');//接收值
        if(yii::$app->request->isAjax){
            $key1 = '';
            require ( "sphinxapi.php" );//引入类
            //echo $key.$set;die;
            $cl = new \SphinxClient();
            $cl->SetServer ( '127.0.0.1', 9312);
            $cl->SetArrayResult ( true );
                if(empty($key)){
                    $cl->SetMatchMode ( SPH_MATCH_FULLSCAN );
                }else{
                    $cl->SetMatchMode ( SPH_MATCH_EXTENDED2 );
                    if($set == 1){
                        $key1 = $key;
                    }else{
                        $key1 = '@'.$set.' ('.$key.')';
                    }
                }
                $res = $cl->Query ( $key1, "test2" );
                if($res['total_found'] > 0){
                    $ids = [];
                    foreach ( $res['matches'] as $k => $row ) {
                        $ids[] = $row['id'];
                    }
                    $query = new Query();
                    $list = $query->from('position')->where(['in', 'id', $ids])->all();
                    foreach($list as $k=>$v){
                $list[$k]=str_replace($key,"<font color='red'>{$key}</font>",$v);
               }
                } else {
                    $list = [];
                }
                Yii::$app->response->format = \yii\web\Response::FORMAT_JSON;
                return ['list' => $list ];
            }
        return $this->render('search2');
}
视图:
<?php

use yii\helpers\Html;
use yii\helpers\Url;

?>
<form action="" method="get">
    <input type="hidden" name="_csrf" value="">

    <div>
        <select id="set">
            <option value="1">全部</option>
            <option value="position">职位</option>
            <option value="biaoqian">标签</option>
            <option value="xueli">学历</option>
        </select>
    </div>
    <div>
        <input type="text" placeholder="keyword" id="key">
    </div>
    <button type="button" class="btn btn-default">Search</button>
</form>

<p>

<div id="content"></div>

<?php $this->beginBlock('index') ?>

$(function(){
    $('.btn-default').click(function(){
        var set = $('#set').val();
        var key = $('#key').val();
        var url = '<?php echo Url::toRoute(['hello/search_val'])?>';

        $.getJSON(url, {'key':key, 'set':set}, function(data){
            //alert(data);
            console.log(data);
            var lists= data.list;
            //console.log(data.length)

            var html = '<table>';//这里用的是拼接
            for(var i = 0; i < lists.length; i++ ) {
                html += '<tr>';
                html += '<td>'+lists[i].id+'</td>';
                html += '<td>'+lists[i].position+'</td>';
                html += '<td>'+lists[i].biaoqian+'</td>';
                html += '<td>'+lists[i].xueli+'</td>';
                html += '</tr>';
            }
            html += '</table>';
            $('#content').html(html);

        });
    });
});
<?php $this->endBlock('index') ?>
<?php $this->registerJs($this->blocks['index'], \yii\web\View::POS_END);?>