Correction status:qualified
Teacher's comments:不知是否记住了


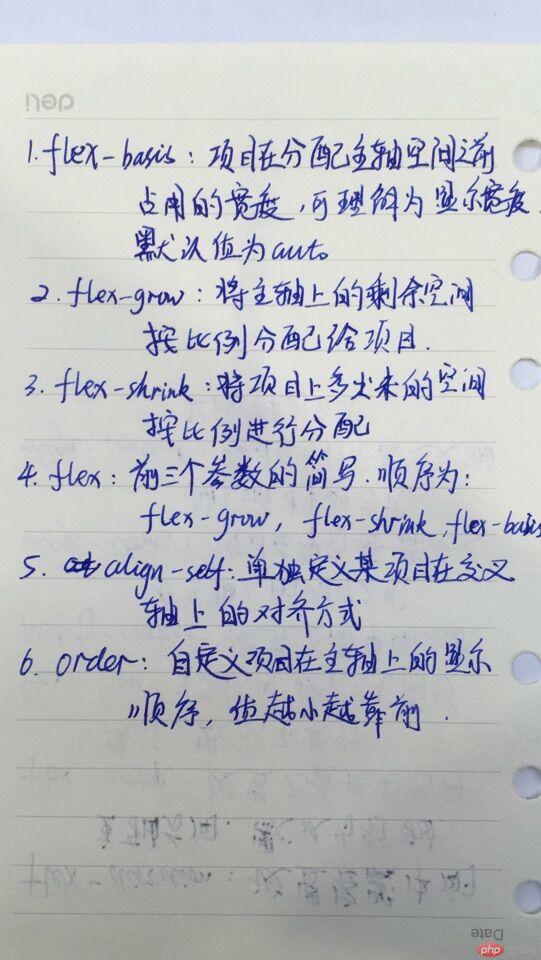
flex-basis:项目在分配主轴剩余空间之前所占的主轴空间的宽度。默认值为auto:取项目的原始宽度。可设置像素值、比例等,改变项目的显示宽度flex-grow:将主轴上的剩余空间按照比例分配给项目。默认值为0:不分配;在0~1之间取值,设置每个项目分配的剩余空间的比例;为1时为平均分配flex-shrink:将项目上多出来的空间按比例在项目之间进行分配。默认值为1:空间不足时按照比例进行收缩;设置为0时不收缩,会将容器撑开;在0~1之间取值,设置项目的收缩比例flex:前三个属性的简写,默认值为0 1 auto,也可写为initial。可以设置三个参数,按顺序分别为:flex-grow、flex-shrink、flex-basis。flex:auto等价于flex:1 1 auto;flex:1等价于flex:1 1 auto;flex:2等价于flex:1 1 0;align-self:单独定义某个项目在交叉轴上的对齐方式。默认值为flex-start,可选值:flex-end、centerorder:自定义项目在主轴上排列顺序,默认为0:书写顺序。值越小越靠前专用组件:
|-public| |-public_header| | |-public_header.html| | |-public_header.css| || |-public_reset.css||-static| |-font| | |-iconfont.css......
<!DOCTYPE html><!--public_header.html--><html lang="en"><head><meta charset="UTF-8"><link rel="stylesheet" href="./public_header.css"><link rel="stylesheet" href="../../static/font/iconfont.css"><title>全部头部导航</title></head><body><div class="public-header"><a href="">网站首页</a><a href="">专题</a><a href="">网站导航</a><a href="">二手商品</a><a href="">讨论区</a><span><a href=""><i class="iconfont icon-huiyuan2"></i>登录</a><a href="">免费注册</a></span></div></body></html>
/*public_header.css*/@import "../public_reset.css";/*全站头部导航*/.public-header{height: 44px;background-color: #000000;padding: 0 20px;display: flex;flex-flow: row nowrap;}.public-header a{line-height: 44px;color:#ccc;padding: 0 10px;}.public-header > a:hover{background-color: #fff;color:black;}.public-header > span {margin-left: auto;}/*字体图标*/.public-header > span i {font-size: 16px;color:#cccccc;margin-right:10px;}
/*public_reset.css*/*{margin:0;padding: 0;}body{font-size:13px;font-family: "Microsoft YaHei UI";color:#555555;background: #efefef;}a{color: #404040;text-decoration: none;}li{list-style: none;}
