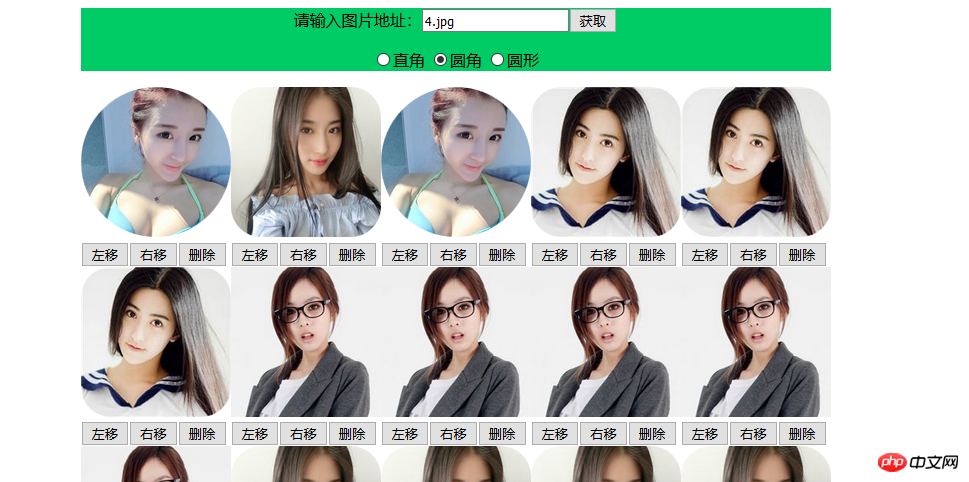
<!DOCTYPE html>
<html lang="en">
<head>
    <meta charset="UTF-8">
    <script src="jquery-3.2.1.js"></script>
    <title>Title</title>
    <style>
        body {
            margin: 0;
            padding: 0;
        }
        .album {
            margin: 20px auto;
            width: 750px;
            background-color: #00CC66;
        }
        p {
            text-align: center;
        }

        #display li {
            display: table-cell;
        }
    </style>
</head>
<body>
 <div class="album">
     <div id="albumUrl">
         <p>请输入图片地址:<input type="text" name="url"><button id="add">获取</button></p>
         <p>
             <input type="radio" name="border" id="zj" value="0" checked><label for="zj">直角</label>
             <input type="radio" name="border" id="yj" value="30" ><label for="yj">圆角</label>
             <input type="radio" name="border" id="yx" value="100" ><label for="yx">圆形</label>
         </p>
     </div>
     <div id="display"></div>
 </div>
 <script>
 $('#add').on('click',function () {
     //1.1获取图片地址
 var imgUrl = $('#albumUrl input[name= "url"]').val();
//     console.log(imgUrl);
     //1.2获取图片边框
 var imgBorder = $('#albumUrl input[name="border"]:checked').val();
     //2.1创建个新的img,并将用户输入的url添加进去
 var img = $('<img>').attr('src',imgUrl).width(150);
     //2.2设置相框的形状
 img.css('border-radius',imgBorder+'px');
     //2.3创建一个放图片的容器
 var imgBox= $('<div id="imgBox"></div>');
     imgBox.css('float','left');
     //2.4将img放入imgBox
 imgBox.append(img);
     //2.5将图片容器放到display中
 $('#display').append(imgBox);

     //接下来拓展一些功能
     //3.1创建左移和右移功能
//     $('img').after('<br/>')//本意是想在图片后加换行,但是不能放在该函数下,得放在外面
     //所以我采取用li包裹button的方式,还需设置css样式,但其实直接采用上面的方式更方便,也更省代码
 var moveLeft  = $('<li><button>左移</button></li>');
     var moveRight  = $('<li><button>右移</button></li>');

     //左移事件
 moveLeft.on('click',function () {
         //在它的前一个兄弟节点之前插入
 imgBox.prev().before(imgBox)
     });
     //右移事件
 moveRight.on('click',function () {
         //在它的后一个兄弟节点之后插入
 imgBox.next().after(imgBox)
     });

     //3.2创建删除功能
 var del = $('<li><button>删除</button></li>');

     //删除事件
 del.on('click',function () {
         imgBox.remove()

     });


     //2.4将img放入imgBox
 imgBox.append(img,moveLeft,moveRight,del);
     //2.5将图片容器放到display中
 $('#display').append(imgBox);
 })
// //图片后加换行
// $('img').after('<br/>')


 </script>
</body>
</html>
Statement of this Website
The copyright of this blog article belongs to the blogger. Please specify the address when reprinting! If there is any infringement or violation of the law, please contact admin@php.cn Report processing!


